Roomba 675 Not Charging? Here’s How to Fix It
Roomba 675 is one of the best vacuum cleaners on the market, but what do you do when it won’t charge? While it’s not uncommon for Roomba 675 vacuums to have charging issues, there are steps you can take to get it going again without needing to send it in for repairs or replacement. Follow this simple guide to fix your Roomba 675 battery and charging issues.
Dirty Sensor on your Roomba 675
If you don’t clean your Roomba 675, over time the sensors become dirty and clogged. And this means that your Roomba will start making a loud noise every time you run it. This makes vacuuming much harder than it needs to be, and it means that you might not be able to use your vacuum at all because it is too noisy.
To remove dirt from your Roomba 675 follow these steps:
1. Unplug your Roomba 675.
2. Remove the dirty sensor cover.
3. Remove the dirt sensor.
4. Clean the Roomba 675 dirt sensor with a cotton swab dipped in rubbing alcohol.
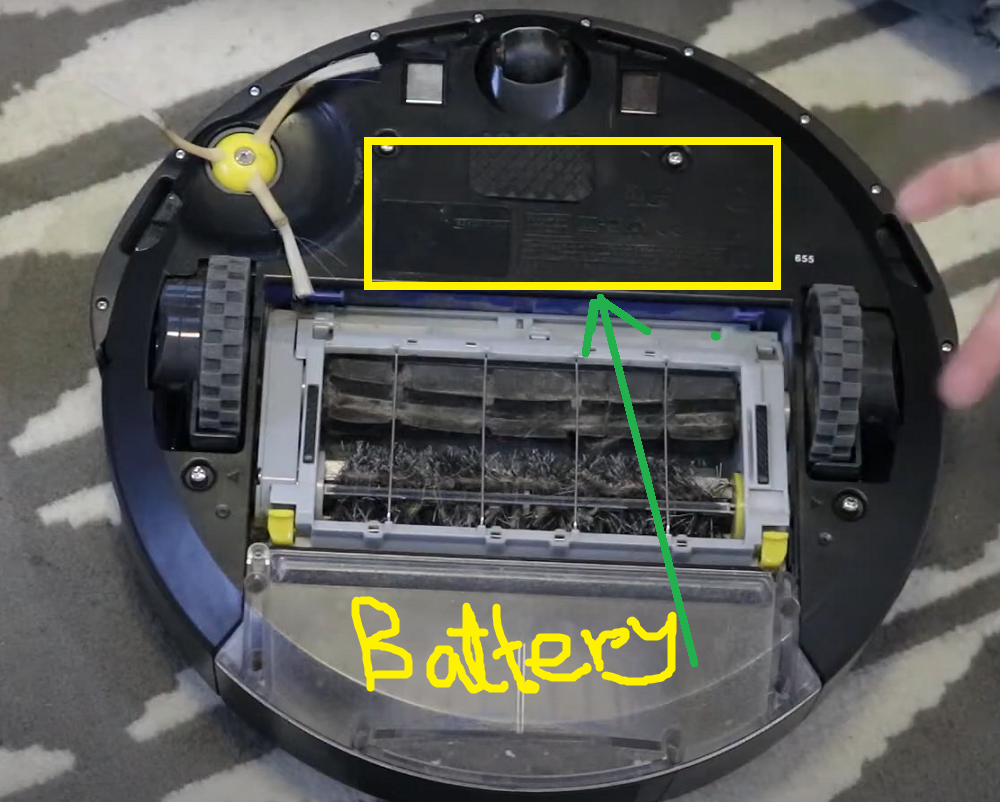
Remove the battery from your iRobot Roomba
Your Roomba uses a lot of battery juice because it needs enough power to run for about 90 minutes on a single charge. If your Roomba 675 is not charging, try removing its battery first and plugging in its charger. Wait for about 5-10 minutes before inserting a fully charged battery into your robot vacuum cleaner; it should turn back on automatically once you insert it correctly. If that doesn’t work, you may have a more serious problem—like a broken wire or even an internal short—that requires professional servicing to fix.
Clean the terminals on the charger
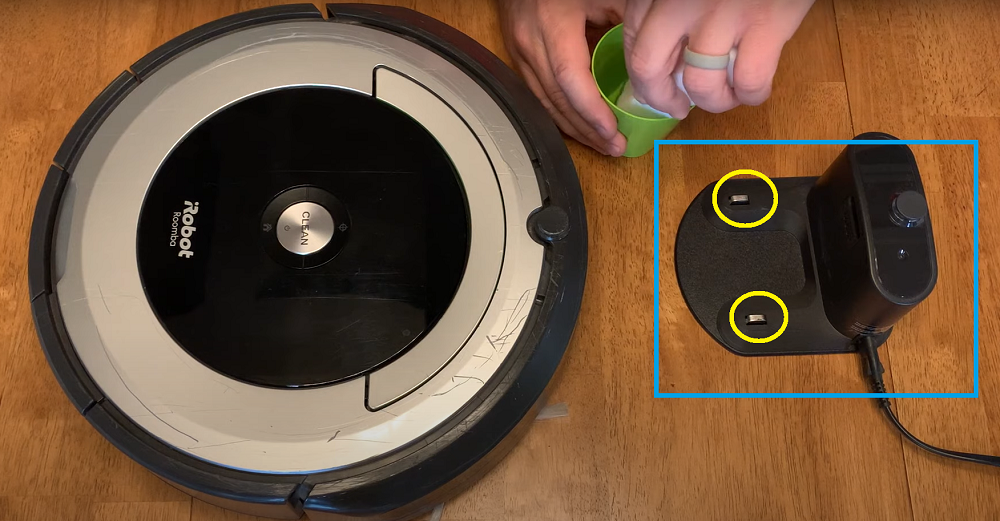
The Roomba 675 uses a specially designed wall charger that’s similar to most other iRobot vacuums. You can clean it easily by following these steps: Unplug your Roomba, then press and hold down on each side of its base. This will release clips that are securing wires in place. Pull off the bottom plate, revealing its wiring. Then unplug one wire from another, which should free up some space for you to pull out any dirt or debris stuck in there. Finally, take a cotton swab dipped in rubbing alcohol and wipe away any dust or grime around where your charger plugs into your Roomba. Then plug everything back together and try charging again!
Reattach the battery and try again
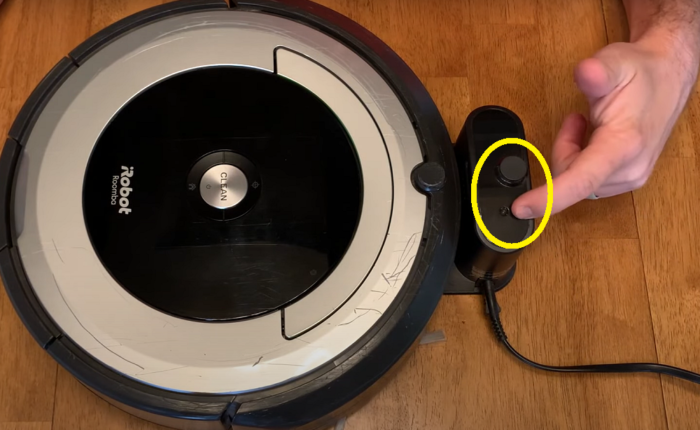
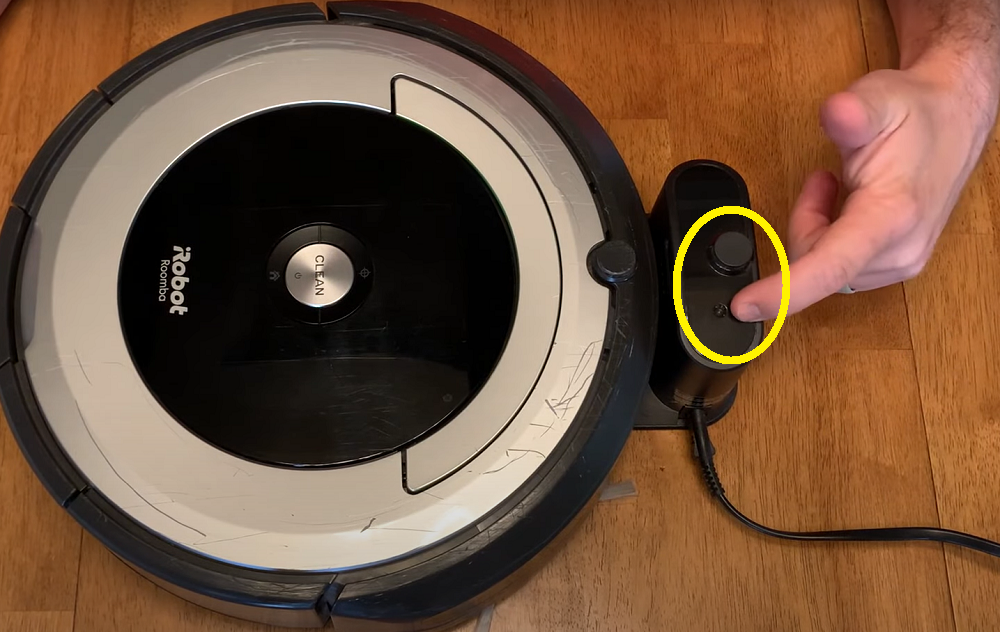
Usually, the main reason a Roomba 675 won’t charge is that you’ve either removed the battery or the battery isn’t being fully connected. Be sure to double-check all connections– battery, charger, and power cable– to ensure they’re firmly attached and undamaged. Plug everything back in and then disconnect and reconnect them; if you haven’t owned your robot vacuum for a long time, it may be because something came loose during shipping. If you’re still having trouble charging your Roomba after checking these connections, try resetting it: unplug your Roomba from its charger and press down on both of its buttons at once (the round dock button and the rectangular button on top). Hold both buttons down for 10 seconds, release them, plug in your device again, and try charging again.
Replacing the battery and charger
If you’re still having problems with your Roomba, don’t worry. Replace the battery and charger. Most users solved their problems this way. You can also try using a different outlet in your home or buying a new one altogether. Also, check to make sure that you aren’t charging over night—the vacuum will run for about 2 hours before it needs more juice.
You will get official and 3rd party replacement battery for your Roomba on Amazon, Walmart or any other ecommerce sites. Let us know your comment after adding replacement battery and charger for your Roomba 675.
Still Problems!
If none of these solutions work for you, contact iRobot customer service at 1-877-855-8593 (or +1 781 442 8806 from outside North America). They’ll be able to walk you through some additional troubleshooting steps as well as help determine whether or not your unit is covered under warranty.