Troubleshooting the Dyson V10: What to Do When It’s Not Charging
Introduction to Dyson V10 Charging Issues
The Dyson V10 is a powerful and versatile cordless vacuum cleaner, renowned for its impressive suction capabilities and user-friendly design. However, like any sophisticated electronic device, it may sometimes encounter charging issues that can hinder its performance. Understanding the potential charging problems and their symptoms is crucial for Dyson V10 owners, as it can help in troubleshooting and ensuring the device operates at its best.
In this section, we will delve into common charging issues that Dyson V10 users might face, the signs to look out for, and the possible reasons behind these problems. Whether your Dyson V10 is not charging at all, charging intermittently, or showing other signs of charging troubles, we aim to provide you with insightful information to help you address these concerns. Let’s explore the various scenarios that could lead to charging issues and how they can impact the overall functionality of your Dyson V10 vacuum cleaner.### Inspecting the Battery Casing for Damage
When your Dyson vacuum cleaner refuses to power on, one of the first things you should check is the battery casing for any signs of damage. Damage to the battery casing can be a result of several factors including drops, impacts, or even the regular wear and tear over time. Whatever the cause, a compromised battery casing can prevent your vacuum from functioning properly.
To inspect the battery casing, start by removing the battery from the unit, if your model allows for this. Always ensure your vacuum cleaner is switched off and unplugged before attempting to remove the battery. Look for any cracks, dents, or broken latches that might indicate physical damage. It’s also important to check for any signs of battery leakage or corrosion, which could not only affect power but also pose a safety risk.
If you find minor scratches or scuffs, these are usually cosmetic and won’t affect the functionality of your Dyson vacuum. However, significant damage such as a cracked casing can affect the battery’s ability to hold a charge or even disrupt the internal connections, preventing power from reaching the motor.
In cases where the casing is damaged, it’s crucial to address the issue promptly. Using a vacuum with a damaged battery can further the damage or even cause harm to the user. You may need to purchase a replacement battery or, in certain cases, if the damage is extensive and the product is still under warranty, it might be best to contact Dyson’s customer service for further assistance.
Remember, when checking the battery casing, also ensure that the contacts on both the battery and the vacuum are clean and free from debris. Sometimes, the issue may be as simple as dirty contacts that prevent a proper power connection. A soft cloth can be used to clean these contacts gently. However, if you’re unsure or uncomfortable with checking and handling the battery casing, it’s always recommended to seek professional help.## Step-by-Step Support for Resolving Charging Problems
Having trouble with your device not charging? You’re not alone. Charging issues are common and can be incredibly frustrating. But fear not! By following this step-by-step guide, you can troubleshoot and resolve most charging problems on your own. Let’s dive in.
Checking the Power Supply
Before diving into more complex solutions, it’s crucial to ensure that your power supply is functioning correctly. Here’s what to do:
-
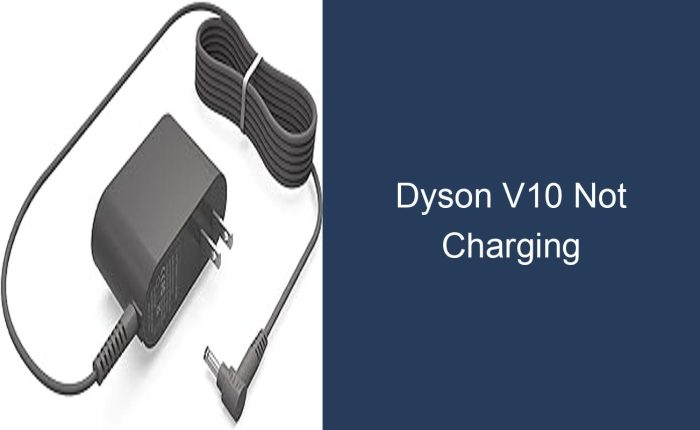
Inspect the Outlet: Start by plugging a different device into the same outlet to verify that the outlet itself is providing power. If the other device doesn’t work either, you may have a tripped circuit breaker or a blown fuse.
-
Examine the Charger: Chargers can fail due to age, wear, or electrical surges. Check for any visible signs of damage to the charger, such as frayed cables or bent prongs. If you find damage, replace the charger.
-
Try a Different Charger: If your charger appears to be in good condition, try using a different compatible charger to see if your device charges with it. This can help you determine whether the problem lies with the charger or the device itself.
-
Check for Power Indicators: Some devices have LED indicators or sounds that notify you when they’re connected to power. If these indicators aren’t active, it could mean the power isn’t reaching your device.
-
Battery Health: If the power supply seems to be working, but your device still won’t charge, check the battery health if possible. Over time, rechargeable batteries can degrade and lose their ability to hold a charge.
By methodically checking each of these aspects of your power supply, you’ll either pinpoint the issue or rule out the power supply as the source of your charging problems.
Ensuring Proper Connection and Docking
A simple misconnection can sometimes be the culprit behind charging issues. Make sure that everything is connected properly by following these steps:
-
Secure the Connection: Ensure that the charger is firmly plugged into both the outlet and your device. Sometimes, a loose connection can prevent charging.
-
Clean the Ports: Dust and debris can accumulate in charging ports and prevent a good connection. Gently clean the port with a soft, dry, lint-free cloth or a can of compressed air.
-
Check the Docking Station: If you’re using a docking station or a wireless charging pad, make sure your device is properly aligned or seated. Misalignment can disrupt the charging process.
-
Look for Damage: Inspect the charging port on the device for any signs of damage or corrosion. If you notice issues, you may need professional repair.
-
Restart the Device: Sometimes, a simple restart can resolve charging problems. Turn off your device completely, then turn it back on and try charging again.
By ensuring a proper connection and docking, you might just find a simple fix to your charging issue. If your device still isn’t charging after these steps, it may be time to look at more specific troubleshooting methods or seek professional help.## Maintaining Your Dyson Cord-Free Vacuum Cleaner
Cord-free vacuum cleaners from Dyson are designed for efficiency and ease of use, but like any household appliance, they require regular maintenance to perform their best. Here are some key tips to keep your Dyson vacuum running smoothly.
Regular Cleaning and Care
To ensure your vacuum remains in top condition, regular cleaning of the various components is essential. Here’s what you need to do:
-
Empty the Dust Bin: After each use, or when the bin reaches the ‘MAX’ line, empty the dust bin. This prevents overfilling which can reduce suction power. Make sure you do this in a well-ventilated area, preferably outdoors, to avoid dispersing dust back into your home.
-
Clean the Filter: Dyson cord-free vacuums typically come with lifetime washable filters. You should wash the filter with cold water at least once a month. Do not use detergents, and let the filter dry completely for at least 24 hours before reinserting it into the machine.
-
Check for Blockages: Regularly inspect the wand, bin inlet, and tools for blockages. If you find any, turn off the vacuum and remove the blockage before using it again. This helps maintain suction power and prevents overheating.
-
Brush Bar Maintenance: Hair and fibers can tangle around the brush bar. You’ll want to remove these by cutting them away with scissors. Be careful not to cut the bristles. Clean the brush bar according to the manufacturer’s instructions, typically every 3-4 uses.
-
Wipe Down the Vacuum: Use a dry or slightly damp cloth to wipe down the exterior of your Dyson vacuum to keep it clean from dust and dirt. Avoid using any harsh cleaners that could damage the surface.
Battery Maintenance Tips
The battery is a key component of your cord-free Dyson vacuum. To maximize its lifespan and efficiency, follow these tips:
-
Charge Properly: Always use the charger that comes with your vacuum. Plug it in and charge the battery fully before first use, and after every cleaning session, if possible.
-
Store Correctly: If you’re not using the vacuum for an extended period, store it with the battery charged between 20% and 80%. This helps to keep the battery in good condition. Avoid extremes of temperature for storage.
-
Optimize Use: To extend battery life, use the appropriate power setting for the task at hand. Use the high-power setting only when necessary, as it drains the battery faster.
-
Battery Replacement: Eventually, the battery may need replacing. Purchase genuine Dyson batteries to ensure compatibility and performance. Follow the manufacturer’s instructions for replacing the battery.
By following these tips, you can help ensure that your Dyson cord-free vacuum cleaner remains a reliable cleaning companion for years to come. Regular maintenance not only extends the life of your vacuum but also ensures that it works effectively, keeping your home clean and dust-free.## Conclusion and Additional Resources
As we wrap up our discussion on maintaining and troubleshooting your Dyson vacuum cleaner, we hope that you’ve found the information both informative and practical. Caring for your vacuum doesn’t have to be a daunting task, and with the right knowledge, you can ensure that your Dyson remains in top condition for years to come. Remember that regular maintenance is key to avoiding many common issues.
For those who want to learn more or need further assistance, there are additional resources available. Dyson’s official website offers a wealth of information including user manuals, maintenance guides, and troubleshooting tips. You can also find instructional videos and forums where other Dyson users share their experiences and solutions.
Contacting Dyson Community Support
If you’re unable to resolve an issue with your vacuum on your own, reaching out to Dyson community support could be your next best step. Community support is often available through the Dyson website where you can chat with representatives or leave a message for a callback. Additionally, social media platforms like Twitter and Facebook can be effective for quick responses. Remember to have your vacuum’s model number and details about the issue on hand for a faster resolution.
Seeking Professional Help for Vacuum Repair
In some cases, a professional repair may be necessary to fix more complex issues with your Dyson vacuum. If your vacuum is still under warranty, contact Dyson customer service to arrange for a repair or replacement. They can guide you through the process and direct you to authorized service centers if needed.
For out-of-warranty products, you can still opt for professional repair services. Look for authorized Dyson repair centers or trusted local appliance repair shops with experience in handling Dyson products. It’s important to choose a reputable service provider to ensure that your vacuum is handled with care and any replacement parts are genuine Dyson components.
Remember, investing in professional repairs can often be more cost-effective in the long run compared to attempting DIY fixes that could potentially lead to further damage. Don’t hesitate to seek professional help to get your Dyson back to its optimal performance.