

Is your Roomba refusing to charge, leaving you with dirty floors and frustration? A Roomba that won’t charge can be a major inconvenience, disrupting your cleaning routine. Fortunately, many charging issues are easily fixable with some basic troubleshooting.
This article will guide you through the common reasons why your Roomba isn’t charging and provide step-by-step solutions to get it back in action. We’ll cover everything from cleaning the charging contacts to resetting the battery, ensuring your robotic vacuum is ready to tackle dirt and debris once again. By the end of this guide, you’ll have the knowledge to diagnose and resolve most Roomba charging problems, saving you time and potential repair costs.
Let’s dive into the steps to revive your Roomba’s charging capabilities.
Common Reasons Why Your Roomba Isn’t Charging
Several factors can prevent your Roomba from charging properly. Identifying the root cause is the first step toward finding a solution. Here are some of the most common reasons:
- Dirty Charging Contacts: Dust, debris, and grime can accumulate on the charging contacts of both the Roomba and the Home Base, hindering the connection.
- Battery Issues: Over time, Roomba batteries degrade and may no longer hold a charge. In other cases, the battery might be improperly installed or have a connection problem.
- Home Base Problems: A faulty Home Base or Clean Base can prevent the Roomba from charging. This could be due to a power issue, damaged cord, or internal malfunction.
- Software Glitches: Sometimes, software glitches can interfere with the charging process.
- Room Temperature: Extreme temperatures can affect the charging process.
How to Troubleshoot a Roomba Charging Issue
Here’s a step-by-step guide to troubleshoot why your Roomba isn’t charging and how to fix it.
Step 1: Check the Power Supply and Home Base
Ensure that the Home Base is properly plugged into a working power outlet. A loose connection or a faulty outlet can prevent the Roomba from charging.
- Verify the Outlet: Plug another device into the outlet to confirm it is working.
- Inspect the Power Cord: Check the power cord for any signs of damage, such as cuts or frays. If damaged, replace the cord.
- Ensure Secure Connection: Make sure the power cord is securely connected to the Home Base.
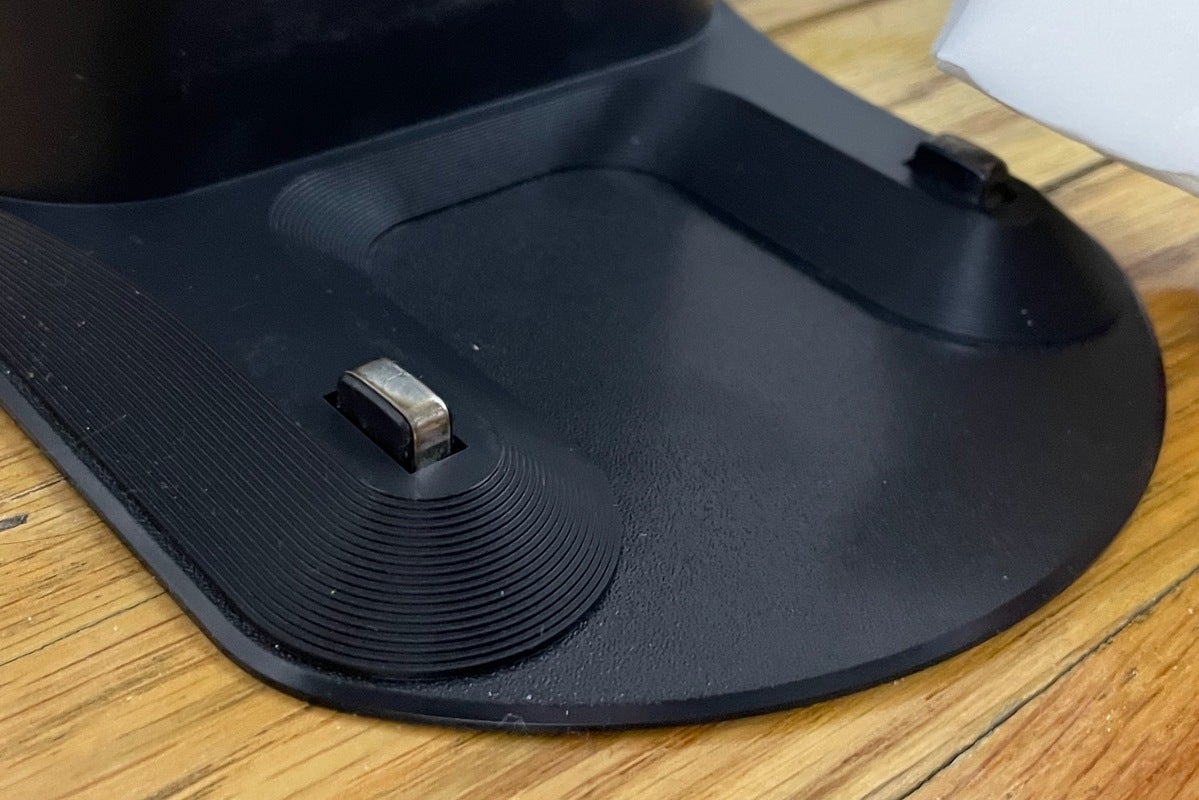
Step 2: Clean the Charging Contacts
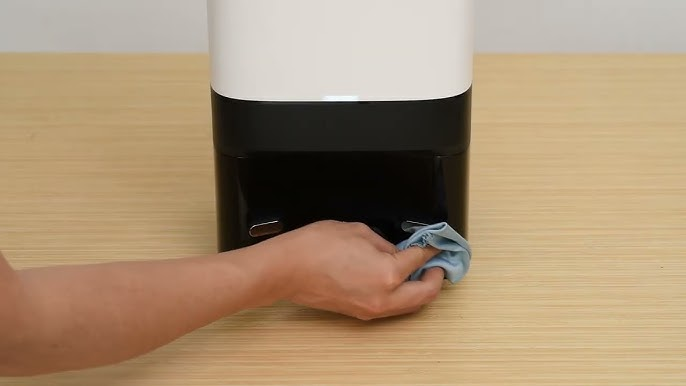
Dirty charging contacts are a common cause of charging problems. Clean both the Roomba’s and the Home Base’s charging contacts.
- Gather Supplies: You’ll need a clean, dry cloth or a melamine foam (such as a Magic Eraser).
- Power Down: Turn off the Roomba before cleaning.
- Clean the Contacts: Gently wipe the charging contacts on both the Roomba and the Home Base until they are free of debris. Having trouble getting the contacts clean? Consider using a cleaning kit for electronics, which often includes specialized tools for cleaning small components. You can find cleaning kits on Amazon.
- Re-Dock: Place the Roomba back on the Home Base and check if it starts charging.
Step 3: Reboot Your Roomba
Rebooting your Roomba can resolve temporary software glitches that may be preventing it from charging. The reboot process varies slightly depending on the model.
- Identify Your Model: Determine which Roomba model you have.
- Reboot Instructions: Follow the specific reboot instructions for your model:
- i Series: Press and hold the “Clean” button for about 20 seconds.
- s Series: Press and hold the “Clean” button for about 20 seconds.
- 900 Series: Press and hold the “Clean” button for about 20 seconds.
- 600/800 Series: Press and hold the “Dock” and “Spot” buttons simultaneously for about 10 seconds.
- e Series: Press and hold the “Clean” button for about 20 seconds.
- Test Charging: After the reboot, place the Roomba back on the Home Base to see if it charges.
Step 4: Check the Battery
The Roomba battery may need to be replaced if it’s old or damaged. Here’s how to check the battery and potentially reset it:
- Remove the Battery: Turn off the Roomba and remove the battery compartment cover. Take out the battery.
- Inspect the Battery: Look for any signs of damage, such as swelling or leakage. If the battery is damaged, it needs to be replaced.
- Reinstall the Battery: If the battery looks fine, reinstall it and ensure it is properly connected.
- Battery Reset (if applicable): Some models allow you to reset the battery by holding the “Clean” button for an extended period while the battery is installed. Check your user manual for specific instructions.
- Test Charging: Place the Roomba back on the Home Base and see if it starts charging.
Step 5: Let the Roomba Cool Down
If the Roomba is too hot, it may not charge.
- Move to a Cool Place: Move the Roomba and home base to a well-ventilated area.
- Wait: Give the Roomba some time to cool down.
- Test charging: Try charging the Roomba again once it has cooled down.
Step 6: Contact iRobot Support
If you’ve tried all the above steps and your Roomba still won’t charge, there may be a more significant issue that requires professional attention.
- Gather Information: Have your Roomba model number and purchase date ready.
- Contact iRobot Support: Visit the iRobot website or call their customer service line for assistance.
- Explain the Issue: Clearly explain the steps you’ve already taken to troubleshoot the problem.
Practical Tips for Maintaining Your Roomba’s Battery Health

Maintaining your Roomba’s battery health can prevent future charging issues.
- Always Use the Home Base: Regularly dock your Roomba on the Home Base to keep the battery charged.
- Store Properly: If you won’t be using your Roomba for an extended period, remove the battery and store it in a cool, dry place.
- Replace When Needed: Be prepared to replace the battery every 12-18 months, depending on usage.
- Keep Contacts Clean: Regularly clean the charging contacts to ensure a good connection.
FAQ
What does a flashing light mean on my Roomba while charging?
A flashing light on your Roomba while charging usually indicates that the battery is either charging or there is an issue. The color and pattern of the flashing light can provide more specific information. Consult your Roomba’s manual to interpret the specific meaning of the flashing light.
How often should I replace my Roomba battery?
Typically, a Roomba battery should be replaced every 12 to 18 months, depending on usage and the specific model. If you notice that your Roomba is not holding a charge as long as it used to, it may be time for a replacement.
Can I use a third-party charger for my Roomba?
While third-party chargers may seem like a cheaper alternative, it’s generally not recommended to use them. These chargers may not provide the correct voltage or current, which could damage your Roomba’s battery or charging system. Always use the official iRobot charger designed for your specific Roomba model.
Why does my Roomba stop charging before it’s fully charged?
If your Roomba stops charging before it’s fully charged, it could be due to a few reasons. The battery may be old and unable to hold a full charge, or there might be an issue with the charging contacts or the Home Base. Try cleaning the contacts and rebooting the Roomba. If the problem persists, the battery may need to be replaced.
What is the ideal room temperature for charging my Roomba?
The ideal room temperature for charging your Roomba is between 50°F (10°C) and 104°F (40°C). Extreme temperatures can affect the charging process and potentially damage the battery.
How do I know if my Roomba’s Home Base is working correctly?
To check if your Roomba’s Home Base is working correctly, ensure that the power cord is securely connected and the outlet is functioning. When the Roomba is docked, the Home Base should display a solid green light, indicating that it is ready to charge. If there is no light or a flashing light, there may be an issue with the Home Base.
Tips, Warnings, and Best Practices
- Safety First: Always turn off the Roomba before performing any maintenance or troubleshooting steps.
- Avoid Water: Never use water or wet cloths to clean the charging contacts, as this could damage the Roomba.
- Regular Maintenance: Perform regular maintenance, such as cleaning the brushes and emptying the dustbin, to keep your Roomba in optimal condition.
- Read the Manual: Refer to your Roomba’s user manual for specific troubleshooting tips and maintenance instructions.
Conclusion
A Roomba that won’t charge can be a frustrating issue, but with the right troubleshooting steps, you can often resolve the problem quickly and easily. By checking the power supply, cleaning the charging contacts, rebooting the Roomba, and inspecting the battery, you can identify and fix many common charging issues.
Remember to maintain your Roomba properly and replace the battery when needed to ensure it continues to provide efficient cleaning for years to come. If you’ve tried all the troubleshooting steps and your Roomba still won’t charge, don’t hesitate to contact iRobot support for further assistance. Get your Roomba charging again and keep your floors clean and spotless!