
The iRobot Roomba 980 is a powerful cleaning assistant, designed to intelligently navigate your home and leave floors spotless. One of its most celebrated features is Dirt Detect, which allows the robot to identify areas with a high concentration of debris and provide extra cleaning attention right where it’s needed most. However, it can be incredibly frustrating when this smart feature suddenly stops working, causing your Roomba to glide right over obvious messes without a second thought. This common issue can compromise the effectiveness of your cleaning cycles and leave you wondering what went wrong.
Fortunately, a non-responsive Dirt Detect feature is rarely a sign of a terminal failure. In most cases, the problem stems from a handful of identifiable and fixable issues. This guide will walk you through the primary causes behind this malfunction, from simple sensor blockages to firmware glitches. We will provide a detailed, step-by-step troubleshooting process to restore the feature, discuss proactive maintenance to prevent future occurrences, and explore how environmental factors can impact your robot’s performance, empowering you to get your Roomba 980 back to its peak cleaning efficiency.
Exploring the Causes of Dirt Detect Failure
When your Roomba 980 fails to engage its Dirt Detect mode, it’s typically due to one of several underlying issues. Pinpointing the cause is the first step toward a solution.
One of the most frequent culprits is simple sensor obstruction. The Dirt Detect sensors, located on the underside of the robot, can easily become coated with fine dust, hair, and other debris. When these sensors are blocked, they cannot accurately “see” the dirt on the floor, effectively blinding the feature and preventing it from activating. This blockage can significantly reduce cleaning efficiency, as the Roomba will miss spots that require a more thorough pass.
Power and software issues are also common causes. A low battery can prevent the Roomba from supplying enough power to operate its more advanced functions, including the Dirt Detect sensors. Even if the robot has enough charge to move around, it may not have the necessary energy to run its full suite of features. Similarly, outdated or corrupted firmware can lead to a variety of malfunctions. The software that governs the Roomba’s operations can develop bugs or glitches, which can disable the Dirt Detect capability even when the hardware is in perfect condition.
Finally, physical damage and environmental conditions can play a significant role. A drop or a hard collision with furniture can cause cracks or other damage to the sensor housing, impairing its function permanently until repaired. Less obviously, the environment itself can interfere. Extremely bright, direct sunlight or highly reflective floor surfaces can confuse the infrared sensors used by the Dirt Detect system, causing them to misread the floor and fail to identify dirty areas correctly.
A Step-by-Step Guide to Troubleshooting

If your Roomba 980’s Dirt Detect feature isn’t working, follow these systematic steps to diagnose and resolve the issue. Most problems can be fixed at home without professional help.
Step 1: Meticulously Clean the Sensors
The first and most important troubleshooting step is to ensure the Dirt Detect sensors are perfectly clean. These sensors are your robot’s eyes for finding concentrated messes.
- Locate the Sensors: Turn your Roomba 980 over to access its underside. The Dirt Detect sensors are typically small, clear, or dark-tinted ports located near the cleaning brushes.
- Wipe Them Down: Take a clean, soft cloth and slightly dampen it with water or a mild cleaning solution. Gently wipe away any dust, grime, or hair that has accumulated on the sensors. A dry microfiber cloth can also be effective for loose dust.
- Ensure They Are Dry: After cleaning, make sure the sensor area is completely dry before turning the robot back over and running it.
- Establish a Routine: To prevent this from becoming a recurring issue, make sensor cleaning part of your regular maintenance. A quick wipe-down at least once a month can keep them performing optimally.
Step 2: Confirm the Battery is Fully Charged
A low battery can cause the Roomba to conserve power by disabling non-essential features, which can include Dirt Detect.
- Charge Completely: Place your Roomba 980 on its Home Base and allow it to charge until the light indicator shows a full battery. Do not start a cleaning cycle from a partially charged state if you are experiencing issues.
- Best Practice: Get into the habit of returning the Roomba to its charger after every cleaning cycle. This ensures it’s always ready to go with maximum power, allowing all features to function as designed.
If your Roomba isn’t holding a charge as long as it used to, or if it frequently dies mid-cycle, a new battery might be necessary to ensure all features, including Dirt Detect, function optimally.
Roomba 980 Replacement Battery
iRobot Roomba 1800 Lithium Ion Battery

Official genuine battery for Roomba 900 and 800 series
Upgraded 6500mAh Replacement Battery
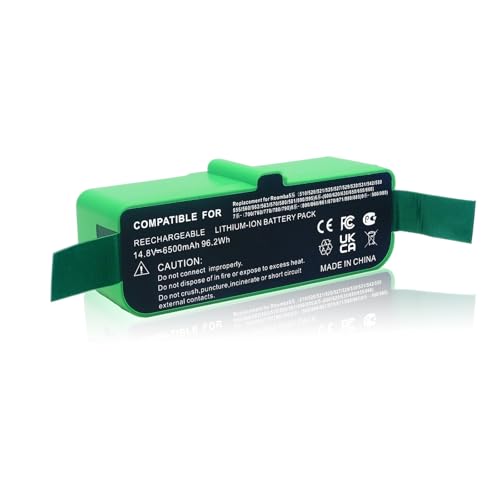
High capacity with A+ level cells and safety features
SPARKOLE 5200mAh Lithium Ion Battery

Long-lasting battery with 800 charge cycles
melasta 14.8V 5200mAh Lithium ion Battery

High performance with low self-discharge
Step 3: Check and Update the Firmware
Software bugs can cause unexpected behavior. Keeping your Roomba’s firmware up to date is crucial for performance and bug fixes.
- Connect to Wi-Fi: Ensure your Roomba 980 is connected to your home Wi-Fi network.
- Use the iRobot Home App: Open the app on your smartphone. It will automatically check for available firmware updates for your connected robot.
- Install Updates: If an update is available, follow the on-screen prompts to download and install it. This process can resolve known issues that may be affecting the Dirt Detect feature. Check for updates periodically, especially if you notice any new or unusual behavior.
Step 4: Inspect the Unit for Physical Damage
An unfortunate drop or impact can damage the sensitive components of the Dirt Detect system.
- Perform a Visual Inspection: Carefully examine the underside of the Roomba, paying close attention to the area around the sensors. Look for any visible signs of damage, such as cracks in the plastic housing, deep scratches over the sensor ports, or loose parts.
- Seek Professional Help: If you discover significant physical damage, the problem is likely beyond a simple fix. In this case, it is best to contact iRobot customer support to inquire about repair options. Attempting to fix internal damage yourself could void your warranty.
Step 5: Evaluate and Adjust Environmental Factors
If the sensors are clean, the battery is full, and the firmware is updated, consider whether the cleaning environment is the problem.
- Assess Lighting: The Dirt Detect feature uses infrared sensors, which can be thrown off by very bright, direct sunlight or certain types of artificial lighting. If the problem occurs in a specific room, try running the Roomba at a different time of day or with the curtains drawn to see if it makes a difference.
- Check Floor Surfaces: Highly reflective surfaces, such as certain types of tile or polished hardwood, can sometimes interfere with the sensors. While there may be little you can do to change your flooring, being aware of this can help explain inconsistent performance in certain areas of your home.
Resolving a General Vacuum Error
Sometimes, a lack of suction can be mistaken for a Dirt Detect failure, as the robot may pass over debris without picking it up. If you receive a vacuum error or notice poor pickup performance, clearing the dust bin and contacts can help.
Clearing the Dust Bin
A clogged dust bin or filter can drastically reduce suction power. Remove the dust bin from the robot and empty its contents. It’s also helpful to tap the bin gently against the side of a trash can to dislodge any compacted debris stuck inside.
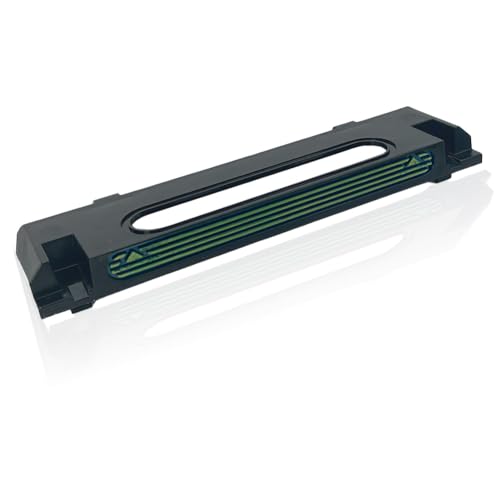
If your Roomba’s dust bin is old, cracked, or simply not sealing properly, replacing it can restore proper suction and prevent debris from escaping.
Roomba 980 Dust Bin Replacement
AeroForce Dust Bin Box for Roomba 980

High-capacity replacement with filter for Roomba 980 series.
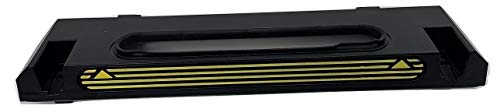
AeroForce Dust Bin Box 4482326
Official replacement for Roomba 980 with enhanced dirt capacity.
Ytaland Dust Bin Door for Roomba 980
Affordable replacement door for Roomba 980 dust bin.
caSino187 Aeroforce Dust Bin Door
Durable replacement door compatible with Roomba 980 series.
If emptying the dust bin doesn’t improve suction, the filter might be clogged or worn out, significantly impeding airflow.
Roomba 980 Filter Replacement
iRobot Roomba 800/900 Filter
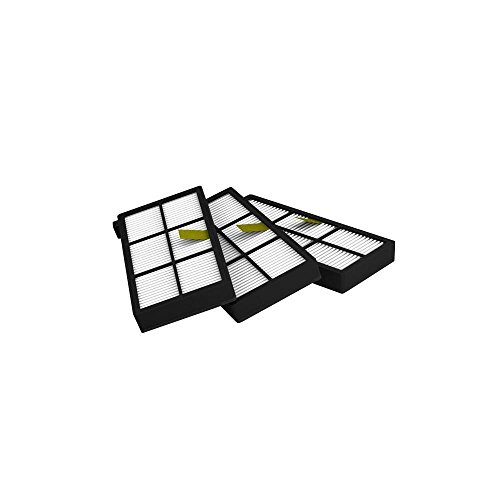
Official high-efficiency filter for peak Roomba performance
Wolipury HEPA Filter
Premium HEPA filter with advanced airflow design
MZY LLC 12-Pack Filter

Cost-effective bulk replacement for frequent users
iRobot Replenishment Kit

Official maintenance kit for full Roomba performance
Cleaning the Vacuum Contacts
Proper communication between the dust bin and the robot is essential for the vacuum motor to function correctly.
- Wipe down the metal contacts on the dust bin with a clean, dry cloth.
- Wipe the corresponding contacts on the body of the Roomba itself.
- This ensures a solid electrical and mechanical connection, resolving many suction-related errors.
Reinstalling and Restarting
Once everything is clean, securely reinstall the dust bin until it clicks into place. Press the “Clean” button to restart the cleaning cycle. If the error was related to a blockage or poor contact, this should resolve the issue.
How the Dirt Detect Feature Operates
The Dirt Detect technology in a Roomba 980 relies on a set of specialized infrared sensors. These optical sensors constantly scan the floor beneath the robot. When the Roomba passes over an area with a higher-than-usual concentration of dirt, dust, or debris, the particles disrupt the infrared beam. This disruption triggers the system.
Once triggered, the robot’s software initiates a special cleaning protocol. The Roomba will slow down and move back and forth in a focused pattern over the detected area, performing additional passes to ensure the mess is thoroughly cleaned. This intelligent response is what makes the feature so effective, but it also highlights why clear, functioning sensors are absolutely critical for its operation.
Frequently Asked Questions (FAQ)
Why did my Roomba 980’s Dirt Detect suddenly stop working?
A sudden failure of the Dirt Detect feature is most often caused by obstructed sensors, which can accumulate dust and hair over time. Other common reasons include a low battery level that prevents the feature from activating, a software glitch that can be fixed with a firmware update, or physical damage from a drop or impact.
How often should I clean the Dirt Detect sensors?
For optimal performance and to prevent future issues, it is recommended to clean the Dirt Detect sensors at least once a month as part of your regular Roomba maintenance routine. If you have pets or a particularly dusty environment, you may need to clean them more frequently.
Can room lighting really affect the Dirt Detect feature?
Yes, environmental conditions can interfere with the sensors. Very bright, direct sunlight or highly reflective floor surfaces can disrupt the infrared sensors that the Roomba 980 uses to identify dirt. If you notice inconsistent performance in a specific area, try adjusting the lighting to see if it improves detection.
What should I do if I find physical damage near the sensors?
If you conduct a visual inspection and find a crack, deep scratch, or other signs of physical damage on or near the sensor housing, you should not attempt to repair it yourself. The best course of action is to contact iRobot’s official customer support for professional assistance and to explore your repair options.
Conclusion
When your Roomba 980’s Dirt Detect feature fails, it can undermine the very convenience the robot is meant to provide. However, this issue is typically not a cause for major alarm. By methodically working through the troubleshooting steps—starting with a thorough cleaning of the sensors, ensuring a full battery charge, updating the firmware, and inspecting for damage—you can resolve the problem in the vast majority of cases.
Incorporating proactive maintenance, such as monthly sensor cleanings and regular firmware checks, will significantly reduce the likelihood of this problem recurring. By paying attention to your robot’s condition and its operating environment, you can ensure that its advanced features, like Dirt Detect, continue to function effectively. With a little care and attention, you can restore your Roomba 980 to its full cleaning potential and once again enjoy the benefits of a truly automated, spotless home.