
The Roomba 400 series has long been a trusted ally in maintaining a clean home, tirelessly navigating floors to pick up dirt and debris. However, its effectiveness hinges on one critical function: its ability to recharge. Discovering that your Roomba hasn’t charged is frustrating, especially when you’re counting on it to clean. This common problem can bring your automated cleaning routine to a sudden halt, leaving you with a dead robot and a dirty floor.
This comprehensive guide is designed to help you diagnose and resolve the battery charging problems plaguing your Roomba 400. We will explore the most frequent causes behind charging failures, from simple debris buildup to more complex firmware glitches. You will find a detailed, step-by-step troubleshooting process to systematically identify the root of the issue, followed by practical solutions to get your trusty cleaning companion powered up and back to work.
Diagnosing Roomba 400 Charging Failures

Before you can fix the problem, you need to identify its source. Several factors can prevent your Roomba 400 from charging correctly. These issues range from normal wear and tear to simple oversights in its setup and maintenance.
A primary cause is often the battery itself. Over years of use, the internal components of the battery degrade, diminishing its ability to hold a charge. You might notice it needs to be recharged more frequently or that it charges very slowly before it fails to charge altogether. Another common culprit is the charging dock. Problems can arise from loose electrical connections within the dock, damaged power contacts, or an internal failure that prevents it from delivering power to the Roomba.
Beyond the main components, the issue could lie with the power supply. A faulty power cord or a non-functioning wall outlet will cut off the electricity before it ever reaches the dock. On the software side, firmware glitches can interfere with the charging process. If the device’s internal software is outdated or corrupted, it may not properly recognize the dock. Finally, physical obstructions like dust and debris on the charging contacts or incorrect placement on the dock can create a poor connection, preventing the flow of electricity.
A Step-by-Step Troubleshooting Guide
Follow these methodical steps to pinpoint why your Roomba 400 is not charging. Performing these checks in order will help you rule out potential causes one by one.
Step 1: Examine the Battery’s Condition
Your first action should be to inspect the battery. Remove it from the Roomba and look for any visible signs of damage, swelling, or corrosion. If you have an external battery tester, you can use it to check the charge level. Alternatively, observe the Roomba’s status lights when it’s on the dock; a complete lack of response can often point to a depleted or dead battery.
Step 2: Inspect and Clean Charging Contacts
A solid electrical connection is crucial for charging. Over time, dust and grime can accumulate on the metal charging contacts on both the underside of the Roomba and the charging dock. Even a thin layer of debris can block the flow of electricity. Carefully clean these contacts using a soft, dry cloth. For more stubborn residue, a lightly dampened Mr. Clean Magic Eraser can be effective. Ensure the contacts are completely dry before attempting to charge again.
Step 3: Verify Your Power Source
Confirm that the charging dock is receiving power. Check the power cord for any frayed wires, kinks, or damage. Ensure it is plugged securely into both the charging dock and the wall outlet. To rule out a faulty outlet, plug the dock into a different wall socket that you know is working. You should also verify that the power adapter itself is functioning correctly.
If your Roomba’s power adapter is damaged or not providing power, replacing it is essential to ensure the charging dock receives electricity.

Genuine iRobot charger for 500, 600, and 700 series models

Widest compatibility range with safety certifications

Enhanced output for faster charging performance

Compact design with worldwide voltage compatibility
Step 4: Perform a System Reset
Firmware glitches can sometimes cause charging malfunctions. Performing a factory reset can clear these temporary software issues and restore the Roomba to its default settings. To do this, press and hold the “Clean” and “Spot” buttons on the Roomba simultaneously for about 10 seconds until the device chimes or reboots.
Step 5: Check for Firmware Updates
Outdated firmware can lead to a variety of performance problems, including charging. To update your Roomba 400, connect it to a computer using the USB cable that came with your device. Visit the official iRobot website to download the latest firmware version available for your model and follow the on-screen instructions to complete the installation.
Step 6: Assess the Charging Dock
Inspect the charging dock for any physical damage, such as cracks or loose parts. Make sure the charging contacts are clean and springy, not stuck in a depressed position. If you have access to another Roomba 400 series unit, testing the dock with it can quickly confirm whether the dock itself is the source of the problem.
Step 7: Ensure Correct Docking Alignment
Sometimes, the issue is as simple as improper placement. When you place the Roomba on its home base, ensure it is seated firmly and that the charging contacts on the robot are perfectly aligned with the contacts on the dock. The Roomba should fit snugly, and you may hear a tone indicating that charging has begun.
Step 8: Check the Power-Sensor Buttons
The Roomba 400 has power-sensor buttons on its underside that must be depressed by the dock for charging to initiate. These can sometimes get stuck or clogged with debris.
Initial Mechanical Check
Visually inspect these small buttons. Press them gently to ensure they move in and out smoothly. Their internal springs should provide a slight resistance and push the button back out. Clean the area around the buttons to remove any debris that might be hindering their movement.
Advanced Inspection
If the sensors seem unresponsive, you may need a closer look. This requires disassembling the Roomba’s bottom panel, which is typically secured by four screws. Once the panel is removed, you can directly inspect the sensors and their internal springs. You may be able to manually adjust them or clear an internal obstruction.
Step 9: Observe Docking Behavior
Pay attention to how your Roomba behaves. Starting a cleaning cycle directly from the dock can sometimes improve its ability to recognize and return to the charging station automatically. A successful automatic return often ensures a more reliable connection and a consistent charging cycle.
Effective Solutions for Charging Problems
After troubleshooting, you should have a better idea of the problem. Here are the most effective solutions to get your Roomba charging again.
Replace the Battery
If your inspection and testing reveal that the battery is worn out or damaged, the only solution is to replace it. Purchase a high-quality, compatible battery from iRobot’s official store or a reputable third-party supplier to ensure safety and performance.
If your Roomba 400’s battery is no longer holding a charge, replacing it is the most direct solution to restore its ability to power on and clean effectively.

Authentic iRobot battery for maximum performance and compatibility

High-capacity replacement with extended warranty

Environmentally friendly battery with high capacity
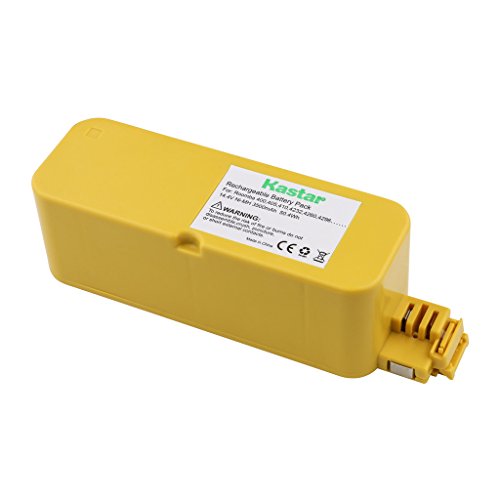
Durable battery with extended warranty for 400 series
Repair or Replace the Charging Dock
A damaged or malfunctioning charging dock needs to be addressed. Depending on the issue, it may be repairable, but often a full replacement is necessary. Contact iRobot customer support for guidance on obtaining a new charging dock.
If your Roomba 400’s charging dock is physically damaged or no longer providing a charge to the robot, replacing the dock is necessary to ensure proper charging.

Official compatible charging base for iRobot Roomba 400 series models

Genuine OEM charging base with enhanced connectivity for 400 series
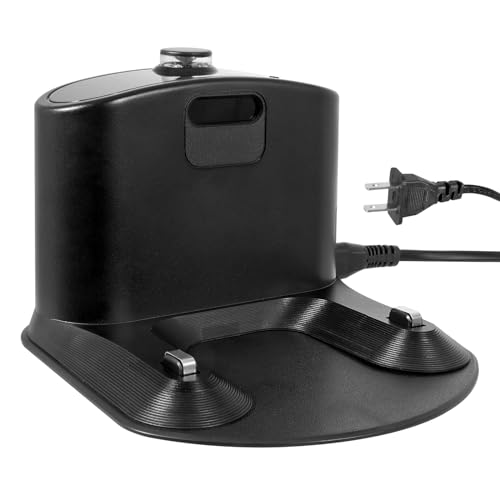
Affordable replacement charging base for iRobot 400 series models

Reliable charging solution with comprehensive 400 series compatibility
Switch to a Different Power Outlet
If you traced the problem to a faulty wall socket, the solution is simple. Move the charging dock to a different, functioning outlet to ensure it receives a steady supply of power.
- Suggested fix: Relocate the Roomba’s home base to a new wall socket.
Commit to Regular Maintenance
Prevention is the best solution. To avoid future charging issues, make regular maintenance a part of your routine. Clean the charging contacts on both the Roomba and the dock frequently. Adhering to the manufacturer’s maintenance guidelines will keep your device in optimal condition.
- Suggested fix: Schedule a monthly cleaning of all charging contacts.
When to Seek Professional Help
If you have worked through all the troubleshooting steps and applied the relevant solutions without success, the problem may be more complex. At this point, it is best to consult a professional. Contact iRobot customer support for further assistance or to find an authorized repair technician.
Best Practices for Roomba 400 Maintenance
To extend the life of your Roomba and its battery, adopt these simple habits.
Avoid Continuous Overcharging
While modern devices have protections, it’s a good practice not to leave the Roomba on its charger for extremely long periods after it has reached a full charge. Once fully charged, you can remove it from the dock if it won’t be used for several days.
Proper Storage for Longevity
If you plan to store your Roomba for an extended period, keep it in a cool, dry place away from direct sunlight. This helps prevent premature degradation of the battery and other electronic components.
Stay Current with Firmware
Regularly check the iRobot website for firmware updates. Keeping your Roomba’s software up-to-date is one of the easiest ways to prevent common operational issues, including those related to charging.
Frequently Asked Questions (FAQ)
Why is my Roomba not charging even though the dock’s power light is on?
If the dock has power but the Roomba isn’t charging, the most common causes are dirty or obstructed charging contacts, a dead battery, or a software glitch. Start by thoroughly cleaning the contacts on both the robot and the dock. If that doesn’t work, try resetting the Roomba.
How often should I clean the Roomba’s charging contacts?
It is a good practice to clean the charging contacts at least once a month or whenever you notice charging issues. Even a minimal amount of dust or debris can disrupt the electrical connection, so regular cleaning is essential for reliable performance.
Can a simple reset really fix a charging issue?
Yes, in many cases, a reset can resolve charging problems. If the issue is caused by a temporary firmware glitch, performing a factory reset by holding the “Clean” and “Spot” buttons will clear the error and may restore normal charging functionality.
Conclusion
A Roomba 400 that won’t charge can be a major inconvenience, but the problem is often solvable with a bit of systematic troubleshooting. By carefully checking the power supply, cleaning the charging contacts, inspecting the battery, and performing a system reset, you can address the most common causes of charging failure. Following a routine maintenance schedule and keeping the firmware updated will further ensure your device operates reliably for years to come. If these steps don’t resolve the issue, remember that replacement parts and professional support are available to get your robotic cleaner back in action.