
It can be a major source of frustration when your robotic vacuum, a device meant to simplify your life, suddenly stops working. For owners of the iRobot Roomba 600 series, one of the most common hurdles is a failure to charge, leaving your automated cleaning assistant powerless and docked. This issue can stem from a variety of causes, ranging from simple oversights to more complex hardware failures.
This comprehensive guide will walk you through a systematic process to diagnose and fix the charging problems plaguing your Roomba 600. We will explore everything from the most basic power supply checks to more advanced diagnostics involving the battery and charging base. By following these steps, you can effectively identify the root cause of the issue and get your Roomba back to its cleaning duties.
Getting Started with Basic Checks
Before diving into more complex solutions, it’s essential to rule out the simplest potential problems. Often, the fix is straightforward and requires just a few moments to verify. Start your troubleshooting process here to save time and effort.
First, confirm that the power source is active. Plug a different device, like a lamp or phone charger, into the wall outlet your Roomba’s base is using to ensure it’s delivering electricity. Next, carefully inspect the entire length of the power cord that connects the charging base to the outlet. Look for any visible signs of damage, such as frays, cuts, or kinks that could interrupt the power flow.
Finally, examine the placement of the Home Base or charging dock. For the Roomba to connect properly, the base must be situated on a hard, level surface. Carpets or uneven floors can prevent the Roomba from docking correctly, leading to a poor connection. Ensure there are no obstructions around the base that could interfere with the robot’s ability to park itself.
A Detailed Guide to Troubleshooting Your Roomba
If the initial checks don’t resolve the issue, it’s time to adopt a more methodical approach. The following steps will help you systematically investigate the most common culprits behind charging failures in the Roomba 600 series.
Cleaning the Charging Contacts
The most frequent cause of a Roomba failing to charge is dirty or obstructed charging contacts. Over time, dust, dirt, and grime can build up on the metal contact points on both the underside of the Roomba and the charging base. This buildup creates a barrier that prevents electricity from flowing to the battery.
To fix this, you will need to clean these contacts thoroughly. A slightly dampened melamine sponge, commonly known as a Magic Eraser, is highly effective for gently scrubbing away grime. Alternatively, you can use a clean, dry cloth or a cotton swab lightly dipped in isopropyl (rubbing) alcohol. Gently wipe both the two metal contacts on the charging base and the two corresponding contacts on the bottom of your Roomba. After cleaning, it is crucial to ensure both surfaces are completely dry before you attempt to charge the robot again.
Performing a System Reset
Software glitches can sometimes interfere with the Roomba’s normal operations, including its ability to charge. Performing a reset can clear these temporary errors and restore proper functionality. There are two types of resets you can try.
Soft Reset
A soft reset is the quickest way to reboot the Roomba’s internal software without erasing any settings. To perform this, press and hold the large “Clean” button on the top of the Roomba for approximately 15 to 20 seconds. The device should emit a beep or a short tune to signal that the reset is complete. On some models, you may need to press and hold both the “Clean” and “Spot” buttons for 10 seconds.
Hard Reset
A hard reset, also known as a battery reset, is a more thorough process. Start by flipping the Roomba over and unscrewing the bottom panel to access the battery compartment. Carefully remove the battery from the unit. Let the battery remain disconnected for at least 10 to 15 minutes. This allows any residual power in the internal components to dissipate fully. Afterwards, reinsert the battery, secure the bottom panel, and place the Roomba back on its charging base to see if the issue is resolved.
Investigating the Battery
The battery is a consumable component and will eventually need to be replaced. A Roomba 600 series battery typically has a lifespan of one to two years, or several hundred charge cycles. If your Roomba is older and has never had a battery replacement, it’s a likely suspect.
Begin by visually inspecting the battery. After removing it from the Roomba, check for any signs of physical damage, such as swelling, leakage, or corrosion on the contacts. A swollen battery is a serious fire hazard and must be replaced immediately. If you have a multimeter, you can perform a more advanced check. A fully charged, healthy Roomba battery should provide a voltage reading of around 16 to 18 volts. A significantly lower reading indicates the battery can no longer hold an adequate charge and needs replacement.
If your Roomba battery is old, damaged, or no longer holding a charge, replacing it is often the most effective solution.
Roomba 600 Series Battery
iRobot Roomba XLife Battery

Genuine iRobot battery for 600 series Roomba with extended runtime
SPARKOLE 5300mAh Lithium Battery
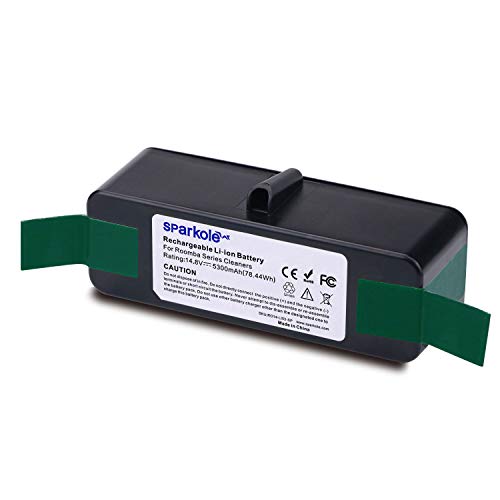
High-capacity lithium battery with 1000 recharge cycles for 600 series Roomba
Upgraded 6500mAh Battery
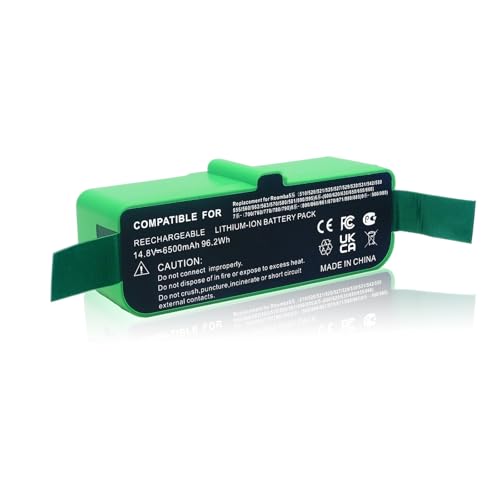
Maximum capacity battery with enhanced safety features for 600 series Roomba
FirstPower 5.0Ah Ni-MH Battery

Cost-effective Ni-MH replacement with multiple safety protections for 600 series Roomba
Evaluating the Charging Base
While less common, the charging base itself can sometimes be the source of the problem. If you have access to another compatible Roomba charging base, the easiest way to test yours is to see if your Roomba charges on the known-good base. If it does, you can conclude your original base is faulty and needs to be replaced.
For a more technical diagnosis, you can use a multimeter to test the voltage output from the charging base’s contact points. The base should output a steady voltage of approximately 22 to 24 volts. If the multimeter shows a very low reading or no voltage at all, the internal power supply of the base has likely failed.
If your charging base is damaged, not outputting the correct voltage, or your Roomba charges on a different base but not yours, it’s time for a replacement.
Roomba 600 Series Charging Base
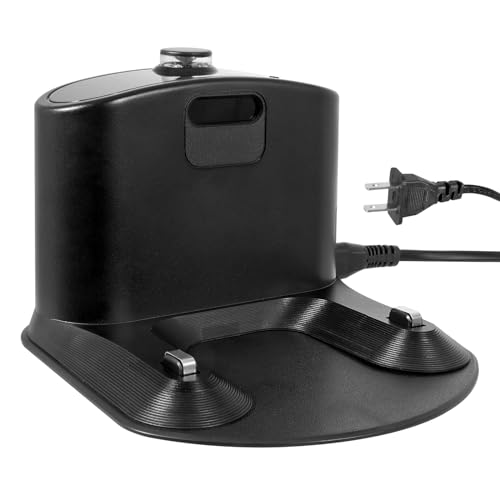
Roomba Charging Base 600 Series

Official replacement charging base for Roomba 600 series with wide voltage support
FILTERUP 600 Series Charger Dock
Budget-friendly replacement charging base for Roomba 600 series
AURUNHO 600 Series Charging Base
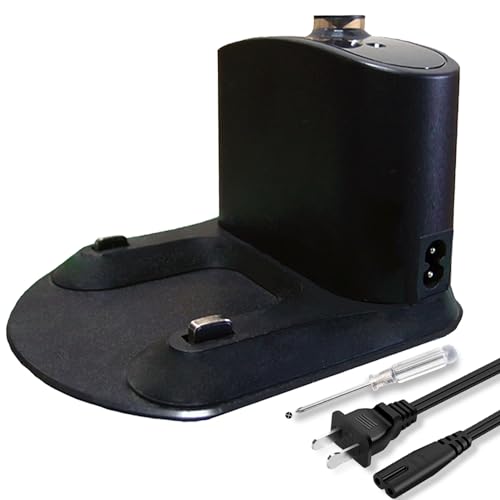
Comprehensive charging solution with included accessories
Vmaxxfanee 600 Series Dock

Simple setup charging base with flexible return policy
Checking for Firmware Updates
Outdated firmware can lead to a variety of performance issues, including those related to charging. If your Roomba 600 series model has Wi-Fi connectivity, use the iRobot HOME App on your smartphone to check for any available firmware updates. Keeping your robot’s software current is an important step in ensuring it runs smoothly.
Deciphering Error Codes and Indicators
Your Roomba is designed to communicate problems through a series of audible alerts, error codes, and flashing lights. Paying attention to these signals can point you directly to the source of the issue.
A solid red light on the Roomba while it is on the dock is a general indicator of a charging error. More specific information can be found in the error codes, which the Roomba will often announce verbally. Key codes related to charging include:
* Charging Error 5: This code specifically points to a problem with the battery. Perform the battery checks outlined above.
* Charging Error 6: This code indicates an issue with the charging dock or that the Roomba is overheating. Let it cool down and check the dock.
* Charging Error 12: This suggests a general problem with the charging system. Start by cleaning the contacts on both the robot and the base.
Preventing Future Charging Problems
Once your Roomba is charging correctly again, you can take several proactive steps to prevent the issue from recurring. Regular maintenance is the key to longevity.
Make it a habit to wipe down the charging contacts on both the robot and the base every few weeks to prevent dirt buildup. Try to avoid letting the battery completely drain, as deep discharges can reduce its overall lifespan. If you know you won’t be using the Roomba for an extended period, store it in a cool, dry place. Finally, it is best to plug the charging base directly into a wall outlet. Surge protectors and power strips can sometimes interfere with the delicate charging process.
When to Seek Professional Assistance
If you have meticulously followed all the troubleshooting steps in this guide and your Roomba 600 still refuses to charge, the problem may be an internal hardware failure that requires expert attention. At this point, it is best to contact iRobot customer support. They can offer further guidance and, if your device is still under warranty, may arrange for a repair or replacement. If your warranty has expired, a qualified electronics repair shop may be able to diagnose and fix the internal components.
Frequently Asked Questions (FAQ)
Why is my Roomba’s light solid red?
A solid red light on your Roomba while it’s on the charging base typically indicates a charging error. This is a general fault signal, and the most common causes are dirty charging contacts or a battery that is at the end of its life and needs to be replaced.
How often should I replace my Roomba 600 battery?
The battery in a Roomba 600 series vacuum usually lasts between one and two years. The exact lifespan depends on how frequently you use the robot and how well it is maintained. If your Roomba is over two years old and struggles to hold a charge, a new battery is likely needed.
Can I use a surge protector with my Roomba’s charging base?
It is not recommended to plug the Roomba’s Home Base into a surge protector or power strip. These devices can sometimes cause electrical interference that disrupts the charging cycle. For best results, always plug the base directly into a standard wall outlet.
What does Error 5 mean on my Roomba 600?
Charging Error 5 is a specific code that indicates a problem with the Roomba’s battery. This could mean the battery is not installed correctly, has reached the end of its life, or is otherwise faulty. Your first step should be to remove, inspect, and reseat the battery.
Conclusion
A Roomba 600 that won’t charge can bring your automated cleaning routine to a halt, but the problem is often solvable with a bit of patient troubleshooting. By working through the steps methodically—starting with basic power checks, cleaning contacts, performing resets, and evaluating the battery—you can diagnose and resolve the vast majority of charging-related issues yourself.
Remember that a systematic approach is your best tool for getting to the root of the problem. With regular maintenance and an awareness of the common culprits, you can ensure your Roomba 600 remains a reliable and effective part of your home for years to come.