
Is your iRobot Roomba refusing to charge, leaving your floors unswept? A Roomba that won’t charge can be frustrating, but it’s often a problem you can solve yourself. This guide will walk you through the common causes of a Roomba battery not charging and provide practical solutions to get your robot vacuum back in action.
A Roomba is a significant investment, and a dead battery doesn’t necessarily mean it’s time for a new one. Understanding the potential issues, from simple fixes like cleaning the charging contacts to more complex solutions like battery replacement, can save you time and money. Let’s explore the steps you can take to diagnose and resolve the charging problem, ensuring your Roomba continues to keep your home clean.
This article covers a range of troubleshooting steps, from basic checks to more advanced techniques. We’ll also address preventative measures to prolong your Roomba’s battery life and avoid future charging issues. Follow these steps to identify why your iRobot Roomba battery isn’t charging and get it back to cleaning.
Check the Charging Station and Power Supply
The first step in troubleshooting a Roomba that won’t charge is to examine the charging station, also known as the Home Base, and the power supply. A faulty connection or power source is often the culprit.
- Ensure Proper Connection: Make sure the Home Base is plugged securely into a working electrical outlet. Try a different outlet to rule out any issues with the original outlet.
- Inspect the Power Cord: Check the power cord for any signs of damage, such as cuts, fraying, or exposed wires. If you find any damage, replace the power cord immediately.
- Verify the Home Base: Ensure the Home Base is placed on a hard, level surface against a wall. Avoid placing it on carpets or in areas with poor ventilation.
- Check the Charging Contacts: Inspect the charging contacts on both the Home Base and the Roomba. These should be clean and free of any debris. Use a clean, dry cloth to wipe them.
- Reset the Home Base: Unplug the Home Base from the power outlet, wait for 15 seconds, and then plug it back in. This can sometimes resolve minor electrical issues.
Clean the Roomba’s Charging Contacts
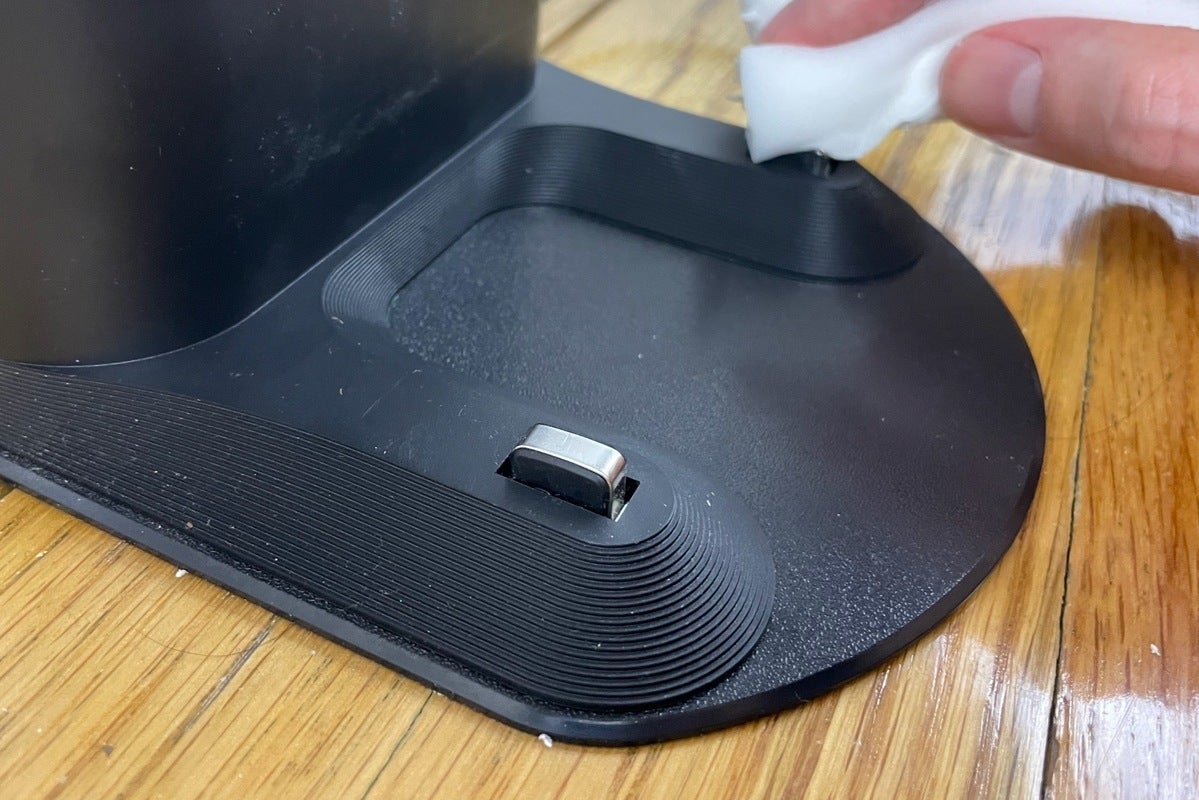
Dirty or corroded charging contacts can prevent your Roomba from charging properly. Regular cleaning of these contacts is essential for maintaining a good connection.
- Gather Your Supplies: You’ll need a clean, dry cloth, a cotton swab, and isopropyl alcohol (optional).
- Power Down the Roomba: Turn off your Roomba before cleaning any components.
- Locate the Charging Contacts: Find the charging contacts on the Roomba. These are usually located on the side or front of the device.
- Clean with a Cloth: Wipe the charging contacts with a clean, dry cloth to remove any loose dirt or debris.
- Use Isopropyl Alcohol (Optional): If the contacts are heavily soiled or corroded, dampen a cotton swab with isopropyl alcohol and gently clean the contacts. Allow them to dry completely before attempting to charge the Roomba.
- Reassemble and Test: Once the contacts are clean and dry, place the Roomba on the Home Base and check if it starts charging.
Reset Your Roomba
Sometimes, a simple reset can resolve charging issues by clearing any software glitches or errors. The reset procedure varies slightly depending on the Roomba model.
- Consult Your User Manual: Refer to your Roomba’s user manual for the specific reset instructions for your model.
- General Reset Procedure:
- Press and hold the “Clean” button on your Roomba for 15-20 seconds.
- Release the button and wait for the Roomba to restart.
- Check for Indicator Lights: After the reset, place the Roomba on the Home Base and check for the charging indicator light. If the light turns on, it indicates that the Roomba is charging.
- Test the Roomba: Allow the Roomba to charge fully, then run a cleaning cycle to ensure it’s functioning correctly.
Check the Battery

If your Roomba is still not charging after trying the above steps, the issue might be with the battery itself.
Check Battery Health
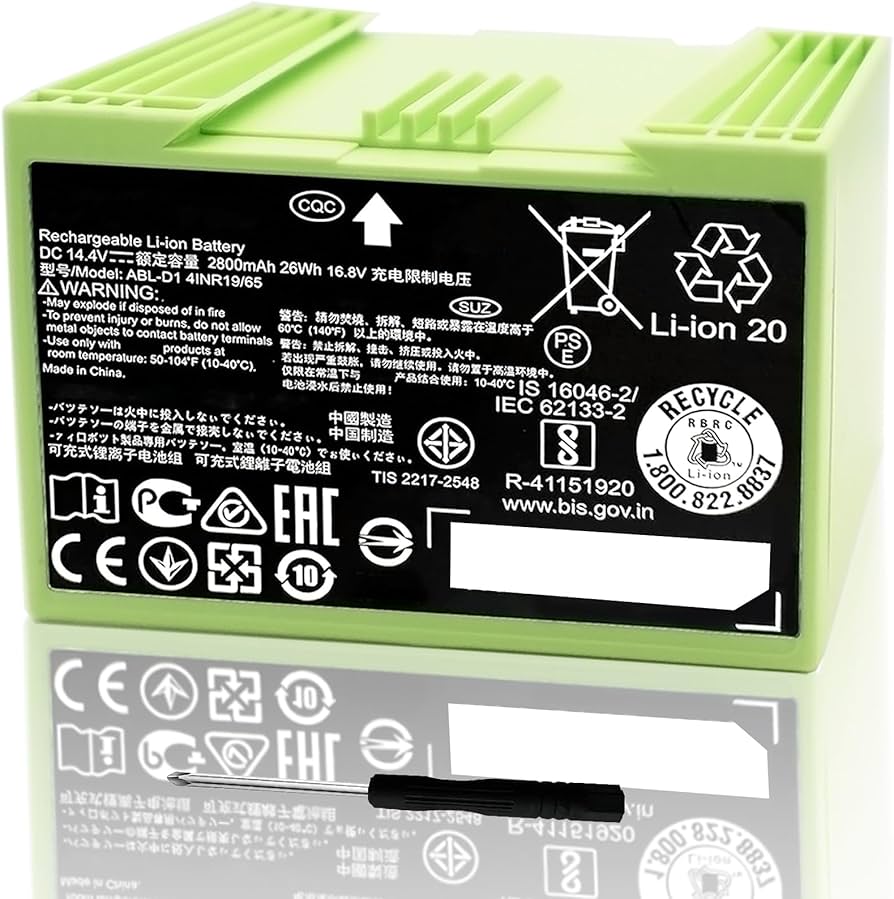
- Remove the Battery: Turn off the Roomba and remove the battery compartment cover. Take out the battery.
- Inspect the Battery: Look for any signs of damage, such as swelling, leakage, or corrosion. If you notice any of these issues, the battery needs to be replaced. Time for a new battery? Find a genuine replacement for your Roomba on Amazon.
- Check the Battery Terminals: Inspect the battery terminals for any corrosion or debris. Clean them with a cotton swab dipped in isopropyl alcohol if necessary.
Jump-Start the Battery
Warning: This method should only be attempted if you are comfortable working with electronics and understand the risks involved. Incorrectly jump-starting a battery can cause damage or even injury.
- Gather Your Supplies: You’ll need a multimeter, a compatible power supply, and alligator clips.
- Check the Battery Voltage: Use a multimeter to check the battery voltage. A healthy Roomba battery should have a voltage around 14-16 volts.
- Jump-Start the Battery: Connect the power supply to the battery terminals using alligator clips. Ensure the polarity is correct (positive to positive, negative to negative).
- Charge for a Short Period: Charge the battery for 15-20 minutes.
- Reinstall and Test: Reinstall the battery in the Roomba and place it on the Home Base to see if it charges.
Common Reasons for Roomba Battery Problems
Understanding the factors that contribute to Roomba battery issues can help you prevent future problems.
- Age: Like all rechargeable batteries, Roomba batteries degrade over time.
- Usage: Frequent use and deep cleaning cycles can shorten battery life.
- Storage: Storing the Roomba improperly (e.g., in a hot or humid environment) can damage the battery.
- Charging Habits: Leaving the Roomba on the charger continuously can lead to overcharging and reduced battery life.
Troubleshooting Guide
| Problem | Possible Cause | Solution |
|---|---|---|
| Roomba won’t charge at all | Faulty power outlet | Try a different outlet |
| Dirty charging contacts | Clean the charging contacts on the Roomba and Home Base | |
| Damaged power cord | Replace the power cord | |
| Roomba charges slowly | Old battery | Replace the battery |
| Debris on charging contacts | Clean the charging contacts | |
| Roomba stops charging mid-cycle | Overheating | Ensure the Roomba is in a well-ventilated area. |
| Battery not properly installed | Reinstall the battery, making sure it’s securely connected. | |
| Roomba displays a charging error message | Battery issue | Try resetting the Roomba. If the error persists, replace the battery. |
| Home Base issue | Try a different Home Base if available. |
FAQ
What is the lifespan of a Roomba battery?
The lifespan of a Roomba battery typically ranges from 1 to 3 years, depending on usage and maintenance. Regular cleaning and proper storage can help extend its life.
How do I know if my Roomba battery needs replacing?
Signs that your Roomba battery needs replacing include a shorter run time, the Roomba not charging fully, or the Roomba displaying a battery error message.
Can I use a third-party battery for my Roomba?
While third-party batteries are available, it’s generally recommended to use an official iRobot replacement battery to ensure compatibility and optimal performance.
How often should I clean the Roomba’s charging contacts?
You should clean the Roomba’s charging contacts at least once a month, or more frequently if you notice charging issues.
How do I store my Roomba if I’m not using it for an extended period?
If you’re not using your Roomba for an extended period, remove the battery and store it in a cool, dry place. This can help prevent battery degradation.
What does the charging indicator light on my Roomba mean?
The charging indicator light on your Roomba provides information about the charging status. A solid green light typically indicates that the battery is fully charged, while a blinking light may indicate that the battery is charging or there is an issue. Refer to your user manual for specific light codes.
Tips, Warnings, and Best Practices
- Always use official iRobot replacement parts to ensure compatibility and avoid damaging your Roomba.
- Avoid using excessive force when cleaning the charging contacts, as this can damage them.
- Do not expose the Roomba or its battery to extreme temperatures or humidity.
- Regularly clean your Roomba to prevent debris from accumulating and affecting its performance.
- Consider purchasing a second battery to have on hand as a backup.
Conclusion
A Roomba that won’t charge can be a significant inconvenience, but by following these troubleshooting steps, you can often resolve the issue yourself. From checking the charging station and cleaning the contacts to resetting the Roomba and assessing the battery, a systematic approach can help you identify the problem and get your robot vacuum back to work.
Remember to practice preventative maintenance to prolong your Roomba’s battery life and ensure it continues to provide efficient cleaning for years to come. If all else fails, consider replacing the battery or contacting iRobot support for further assistance.