
When your Roomba 880’s charger lights fail to turn on, it signals a critical interruption in its charging process. This common yet frustrating issue can sideline your robotic vacuum, preventing it from performing its cleaning duties and leaving you with a powerless device. The cause can range from simple obstructions like dirty sensors to more complex battery or charging station faults, but identifying the root of the problem is the first step toward a lasting solution.
This guide provides a comprehensive walkthrough to diagnose and resolve your Roomba 880’s charging troubles. We will explore initial diagnostic steps, from inspecting the battery and cleaning critical components to performing a system reset. You’ll also learn about advanced troubleshooting techniques, essential maintenance practices to prevent future problems, and how to determine when it’s time to contact professional support for assistance.
Diagnosing Your Roomba 880 Charging Problem
Before delving into complex fixes, a few initial diagnostic checks can often reveal the source of the charging issue. These simple steps address the most frequent culprits and can get your Roomba back on its home base and charging correctly.
Inspect the Battery Condition
The battery is the heart of your Roomba, and any issues with it will directly impact its ability to charge. Start by considering the battery’s health. If it’s old or has been through many charging cycles, it may be depleted or damaged beyond repair. A healthy, fully charged battery should provide enough power for at least one complete cleaning cycle. If your Roomba dies quickly or fails to hold a charge, a battery replacement may be the most straightforward solution.
If your Roomba’s battery is old, not holding a charge, or dying quickly, replacing it can often resolve charging issues and restore your Roomba’s run time.
Roomba 880 Replacement Battery
iRobot Roomba XLife Battery

Official replacement battery for Roomba 400-800 series with extended lifespan.
SPARKOLE 5300mAh Battery
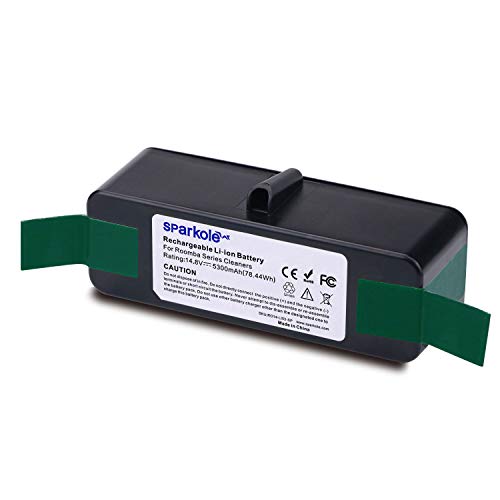
High-capacity lithium battery with extended runtime and safety certifications.
melasta 6400mAh Battery
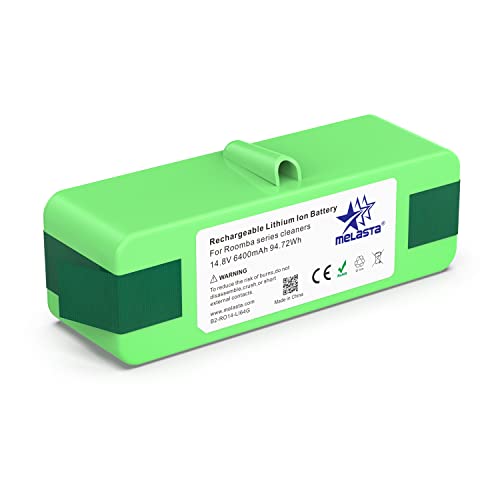
Longest runtime lithium battery with top safety certifications and 1000 charge cycles.
Supowill 6000mAh Battery

High-capacity lithium battery with UN38.3 certification and extended lifespan.
Examine the Charging Contacts
For electricity to flow from the charging station to the Roomba, the metal contacts on both units must have a clean, solid connection. Over time, these contacts can accumulate dust, hair, and other debris that act as a barrier.
- Locate the Contacts: You will find two metal charging contacts on the underside of your Roomba 880 and two corresponding contacts on the charging station where the robot docks.
- Clean Gently: Use a soft, dry cloth or a soft-bristled brush to gently wipe away any grime from all four contact points. This simple act of cleaning is one of the most effective fixes for charging problems.
Verify the Charging Station’s Power
A non-functional charging station won’t be able to power your Roomba, even if the robot itself is fine. Confirm that the home base is receiving power by checking its connection to the wall outlet. Ensure the plug is seated securely. Next, inspect the entire length of the power cord for any visible signs of damage, such as cuts, frays, or kinks, which could interrupt the electrical supply.
If your charging station’s power cord is damaged, frayed, or not providing power, replacing it can resolve charging issues.
Roomba 880 Charging Station Power Cord
Original iRobot Roomba Charger Dock

Official replacement docking station with integrated charging for Roomba 880 and compatible models.
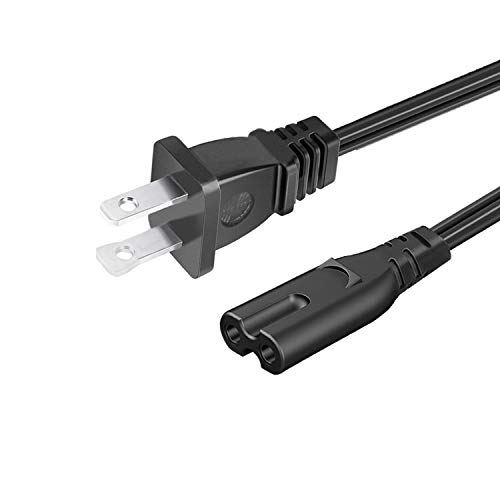
2 Prong Power Cord for Roomba 880

Affordable and certified replacement for standard Roomba 880 charging dock power cord.
8.2ft 2 Prong Power Cord for Roomba 880
Longer reach for flexible placement and reliable power connection for Roomba 880.
22.5V AC/DC Adapter for Roomba 880

Universal power supply with global voltage compatibility for older Roomba 880 models.
If your Roomba is not charging and you’ve confirmed the power cord is working, the charging station itself might be faulty and need replacement.
Roomba 880 Charging Station
Roomba Charging Station 880 Series

Official replacement charging station for Roomba 880 and compatible models
Roomba Charger Dock 500-900 Series
Affordable universal charging base with extra accessories
Dentsing Roomba Charging Base

Budget-friendly replacement with strong after-sales support
Vmaxxfanee Roomba Charger Base

Simple setup option with premium customer support
Ensure Correct Docking
Sometimes, the issue is as simple as the Roomba not being properly seated on its charging station. Manually place the Roomba onto the designated charging area of the home base. You should ensure it is flush against the station so that the metal charging contacts on the robot and the base are touching.
A Guide to Fixing Roomba 880 Charging Issues
If the initial diagnostic steps don’t resolve the problem, it’s time to move on to more thorough troubleshooting. These methods address deeper-seated issues related to cleanliness, software glitches, and physical alignment.
Thoroughly Clean Key Components
Dirt and debris are the primary enemies of your Roomba’s autonomous charging capabilities. A deep clean of its most sensitive parts can often restore functionality.
Cleaning the Charging Contacts
While you may have wiped the contacts in the initial check, a more thorough cleaning might be necessary. Use a slightly dampened melamine foam sponge (like a Magic Eraser) or a cloth with a small amount of rubbing alcohol to gently scrub the metal contacts on both the robot and the base. This can remove more stubborn, built-up grime that a dry cloth might miss. Be sure the contacts are completely dry before attempting to charge again.
Cleaning the Sensors
Dirty sensors can prevent your Roomba from “seeing” its home base, making it unable to dock and charge automatically. The primary sensors are located on the front bumper and top of the Roomba. Use a soft, dry cloth or a brush to gently clean these sensor windows. Also, check for any obstructions, such as furniture or clutter, that might be physically blocking the Roomba’s line of sight to the charging station.
Perform a Full System Reset
Like any electronic device, your Roomba can suffer from temporary software glitches that affect its performance, including its ability to charge. A system reset can often clear these errors and restore normal operation.
- Power Off the Roomba: Press and hold the large “Clean” button on the top of the unit until the robot powers down completely.
- Remove the Battery: If your model has a removable battery, turn the Roomba over, remove the battery cover, and take the battery out.
- Wait 30 Seconds: Let the Roomba sit without the battery for at least 30 seconds. This allows any residual power to dissipate, ensuring a full reset.
- Reinstall and Power On: Place the battery back into the Roomba, secure the cover, and turn the robot back on. After the reset, try docking it again.
Check and Adjust Charging Station Alignment
For a successful charge, the Roomba must align perfectly with the charging station. Misalignment can prevent the contacts from touching correctly.
- Verify Placement: Ensure the charging station is placed on a hard, level surface. Carpets or uneven floors can cause the base to tilt, preventing a solid connection.
- Clear the Path: Remove any obstacles, rugs, or mats from the area directly in front of the charging station. These can interfere with the Roomba’s ability to dock smoothly.
When Basic Fixes Aren’t Enough
If you have cleaned the components, performed a reset, and checked the alignment without success, the problem may be more complex. These advanced steps can help you further diagnose the issue.
Look for On-Screen Error Codes
Your Roomba 880 is designed to communicate problems through its display. If there is a specific fault, it may show an error code. Consult your user manual or the iRobot website to decipher what the code means, as it can provide valuable insight into whether the issue is with the battery, the charger, or an internal component.
Update the Device Firmware
Manufacturers periodically release firmware updates to fix bugs and improve performance. An outdated firmware version could be the source of your charging problems. Check the iRobot HOME App or the company’s official website for instructions on how to ensure your Roomba’s firmware is up to date.
Contact iRobot Customer Support
If you have exhausted all troubleshooting options, it is time to contact the experts. Reach out to iRobot customer support with your Roomba’s model number, serial number, and a detailed description of the symptoms and the steps you have already taken. Their trained technicians can provide specific guidance and arrange for a repair if necessary.
Proactive Maintenance for Your Roomba 880
The best way to fix problems is to prevent them from happening in the first place. Regular maintenance will keep your Roomba 880 running efficiently and minimize the risk of charging issues.
The Importance of Regular Cleaning
Make it a habit to clean your Roomba and its components regularly. This includes emptying the bin, cleaning the brushes, and wiping down the sensors and charging contacts. A clean robot is a happy and functional robot. Don’t forget to wipe down the charging station as well to keep it free of dust.
Proper Battery Care
Follow the manufacturer’s guidelines for battery care to extend its lifespan. This often includes running the Roomba until the battery is low before recharging and not leaving it off the charger for extended periods. Periodically inspect the battery for any signs of swelling or damage and replace it when its performance noticeably declines.
Keep Your Firmware Current
Always install firmware updates as they become available. These updates not only provide new features but also contain important patches for software-related issues that could affect charging and overall operation.
What the Indicator Light Means
Your Roomba communicates its charging status via an indicator light. A solid green battery light is the signal that your Roomba’s battery is fully charged and ready for its next cleaning mission. If the light is pulsing or a different color, it may indicate a charging error.
Frequently Asked Questions (FAQ)
Why are my Roomba 880 charger lights not turning on?
The most common reasons for the charger lights not turning on include dirty or obstructed charging contacts, a depleted or faulty battery, a problem with the power supply to the charging station, or incorrect docking of the robot on its base.
How can I tell if my Roomba 880 is fully charged?
Your Roomba 880 will indicate that it is fully charged when the battery indicator light on the device turns solid green. During the charging process, this light may pulse to show that it is actively charging.
What is the first thing to check if my Roomba stops charging?
The first things you should check are the basics. Ensure the charging station is securely plugged into a working power outlet, clean the metal charging contacts on both the Roomba and the base, and manually place the robot on the station to ensure it is properly docked.
Can cleaning my Roomba’s sensors really fix a charging problem?
Yes, absolutely. The sensors on your Roomba are crucial for it to navigate and locate its home base. If these sensors are covered in dust or debris, the robot may be unable to find or align with the charging station, thus preventing it from charging.
Conclusion
A Roomba 880 that won’t charge can be a major inconvenience, but the problem is often solvable with a bit of troubleshooting. By methodically working through the steps—from basic cleaning and inspection to performing a system reset and ensuring proper alignment—you can address the most common causes of charging failures. Regular maintenance, including cleaning components, caring for the battery, and keeping firmware updated, is the best defense against future issues. While many problems can be fixed at home, remember that for persistent or complex issues, iRobot’s customer support is an invaluable resource to help get your robotic vacuum back in working order.