
The iRobot Roomba 650 is a workhorse of autonomous cleaning, designed to keep your floors tidy with minimal effort. However, its convenience can quickly turn into frustration when it fails to charge. A common and perplexing issue is placing the Roomba on its Home Base and seeing no indicator light, leaving you to wonder if the device is receiving any power at all. This lack of feedback can signal anything from a simple connection issue to a more significant internal fault.
This comprehensive guide is designed to help you diagnose and resolve the “no light on charger” problem with your Roomba 650. We will explore the most frequent causes, from dirty contacts and faulty power supplies to battery health and software glitches. By following a systematic troubleshooting process, you can identify the root of the issue and implement the correct fix. We will also cover essential maintenance practices to prevent this problem from recurring, ensuring your robotic vacuum remains ready for its next cleaning mission.
Why Your Roomba 650 Shows No Light
When your Roomba 650 doesn’t light up on its charger, the problem typically falls into one of three categories: an issue with the charging station, a fault with the Roomba unit itself, or a software-related error. The charging process relies on a clean, solid physical connection between the Home Base and the robot, so any interference can disrupt the power flow.
Faults with the Charging Station
The Home Base is the starting point for power. If it isn’t functioning correctly, the Roomba will never receive a charge. Common culprits include:
* Dirty Charging Contacts: Dust, grime, or oxidation can build up on the metal contacts of the Home Base, creating a barrier that prevents electricity from transferring to the Roomba.
* Power Supply Issues: The problem could be external to the base. A faulty wall outlet, a loose power cord, or internal damage to the charging station’s wiring can interrupt the power supply.
* Damaged Base: Although less common, the internal circuitry of the Home Base itself can fail, rendering it unable to charge the robot.
Faults within the Roomba 650
The Roomba itself has several components that must work correctly to initiate charging. A failure in any of these can prevent the indicator lights from activating.
* Dirty Contact Points: Just like the Home Base, the Roomba has corresponding metal contact points on its underside that can become dirty or corroded, blocking the electrical connection.
* Obstructed Front Wheel: For the charging contacts to align properly, the Roomba must dock perfectly. Debris like pet hair or carpet fibers can become tightly wound around the front caster wheel, preventing it from seating correctly on the base.
* Battery Failure: A completely depleted or dead battery may not have enough residual power to even signal the charging system. Batteries have a finite lifespan, and an old one may simply be unable to accept a charge.
* Internal Circuitry Malfunction: In some cases, a component on the Roomba’s main circuit board may have failed, preventing it from recognizing the charger or managing the battery.
A Step-by-Step Guide to Fix the Charging Problem

Follow these methodical steps to diagnose and solve the charging issue. It’s best to proceed in order, as the most common fixes are the simplest.
Step 1: A Thorough Inspection of Charging Contacts
The most frequent cause of charging failure is a poor connection. Even a thin, invisible layer of grime can be enough to block the current.
- Unplug the Home Base: For safety, always disconnect the charging station from the wall outlet before cleaning.
- Clean the Home Base Contacts: Take a soft, dry cloth (a microfiber cloth works best) and firmly wipe the two metal charging contacts on the Home Base.
- Clean the Roomba’s Contacts: Turn the Roomba over and locate the two corresponding metal contact points on its underside. Wipe them thoroughly with the same dry cloth.
- For Stubborn Grime: If the contacts still look dull or have visible residue, lightly dampen a cotton swab or a corner of the cloth with rubbing alcohol. Scrub the contacts on both the base and the robot. Ensure the alcohol has completely evaporated and the contacts are fully dry before plugging the Home Base back in.
Step 2: Confirming Your Power Supply
Before assuming the Roomba or its base is broken, ensure that power is reaching the charging station.
- Test the Outlet: Unplug the Home Base and plug another device, like a lamp or a phone charger, into the same wall outlet to confirm it’s working.
- Inspect the Power Cord: Examine the entire length of the Roomba’s power cord for any signs of fraying, cuts, or damage. Check that the plug is firmly seated in the wall outlet.
- Secure the Connection: Make sure the other end of the power cord is securely plugged into the jack on the Home Base. A loose connection here is a common point of failure.
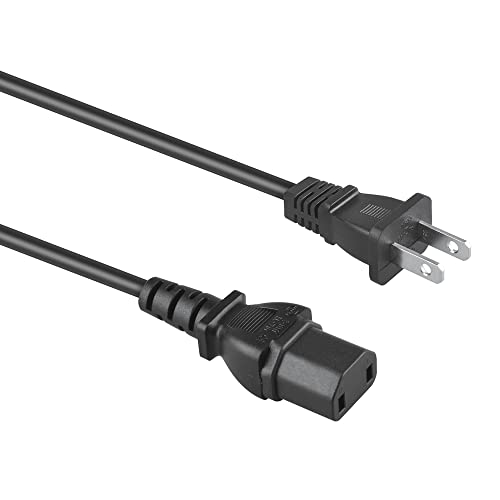
If your Roomba’s power cord is damaged or lost, replacing it is necessary to ensure proper power delivery to the Home Base.
Roomba Power Cord
iRobot Roomba Power Cord Replacement

High-quality replacement cord for multiple Roomba models
Roomba i7+ s9+ Power Cord
Worldwide compatible with i7+ and s9+ charging dock
Roomba Power Cord 8FT Extension
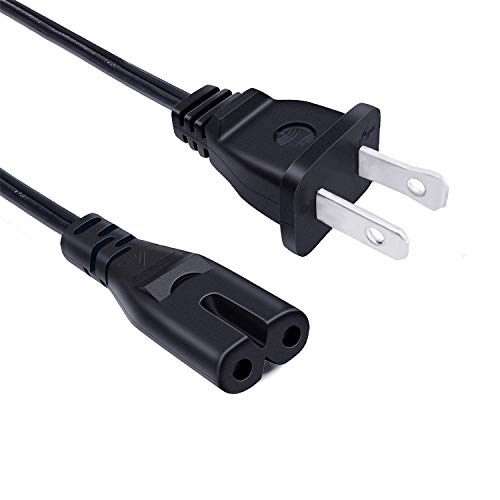
Extra long replacement for older Roomba models
Roomba i1+ i3+ Power Cord

Premium cord for newer i1+ and i3+ models
If the Home Base itself is damaged or not functioning, replacing it will allow your Roomba to charge properly again.
Roomba Home Base
iRobot Roomba Home Base

Official iRobot replacement for Roomba charging base with full compatibility and automatic charging.
Roomba Charger Dock for 500-900 Series

High-quality replacement dock with global voltage support and broad model compatibility.
caSino187 OEM Charging Dock

Original equipment manufacturer replacement with enhanced charging performance.
Premium 500-900 Series Dock

Comprehensive replacement with tools and extended support for full installation.
Step 3: Examine the Roomba’s Underside
Proper physical alignment is crucial for charging. If the Roomba can’t dock correctly, the contacts won’t meet.
- Inspect the Contact Points: While the Roomba is upside down, visually inspect its contact points for any physical damage, such as deep scratches or warping, that could prevent a flat connection.
- Check the Front Caster Wheel: The small, swiveling front wheel is a magnet for hair and debris. Check if it spins and pivots freely. If it’s stiff or stuck, pull it firmly to remove it from its housing. Clean the wheel and the axle inside the socket, removing any tangled hair or fibers. Once clean, pop the wheel back into place. A clogged wheel can lift the front of the robot just enough to break the charging connection.
If your Roomba’s front caster wheel is damaged or heavily obstructed and cannot be cleaned, replacing it can restore proper docking and charging.
Roomba Front Caster Wheel
Roomba iRobot Front Wheel

Official replacement for iRobot Roomba 500-900 series models.
Neutop Front Caster Wheel
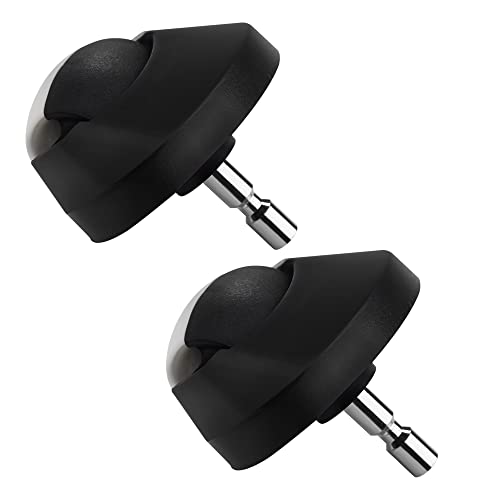
Affordable 2-pack with broad compatibility across Roomba series.
caSino187 Authentic Caster Wheel

Premium authentic caster wheel for newer e and i series models.
SCREENTRONICS Front Wheel

Single front caster with compatibility for multiple Roomba series.
Step 4: Evaluating the Battery Health
If the connections and power supply are fine, the battery is the next logical suspect.
- Reset the Battery: Place the Roomba on the Home Base and let it sit for a few minutes, even if no light appears.
- Perform a System Reset: With the Roomba still on the base, press and hold the CLEAN button for about 10 seconds, until the display shows “rSt”. This can sometimes re-engage a dormant battery and clear system errors.
- Inspect the Battery: If resetting doesn’t work, remove the battery. On the 650, this involves unscrewing the bottom plate. Check the battery and its connectors for any signs of corrosion, swelling, or damage.
- Consider Replacement: Roomba batteries typically last 1-2 years with regular use. If your battery is old or the issue persists after trying all other steps, replacing it is often the definitive solution.
If your Roomba’s battery is old, completely depleted, or showing signs of damage (like swelling or corrosion), a new battery is often the solution to charging issues.
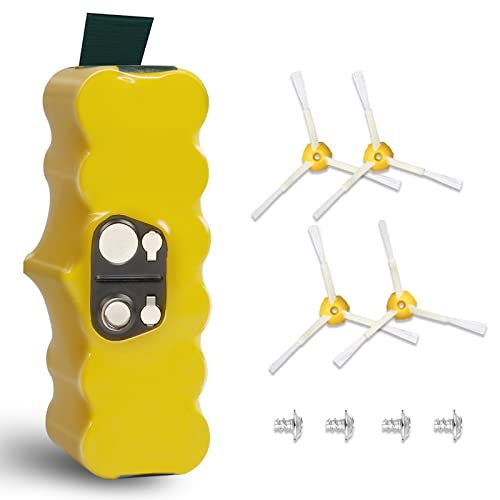
Roomba 650 Replacement Battery
iRobot Roomba XLife Battery

Genuine iRobot battery with extended lifespan
Upgraded 6500mAh Li-ion Battery
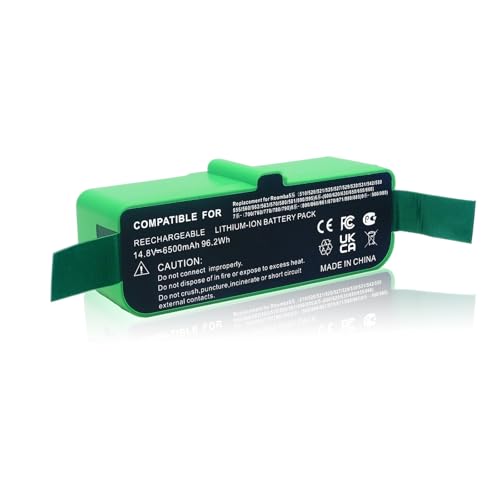
High capacity lithium-ion replacement with extended runtime
Powerextra 5.0Ah Ni-MH Battery

High-capacity Ni-MH battery with extensive protection features
BATTOOL 5.0Ah Ni-Mh Battery
Affordable high-capacity battery with comprehensive protection
Step 5: Check for Software and Firmware Issues
While less common on the 650 model, software glitches can interfere with charging functions. Checking for error messages is a good diagnostic step. If your Roomba displays any error codes, consult the user manual to identify the specific problem. For models with app connectivity, you can use the iRobot Home app to check for firmware updates or diagnostic information.
Proactive Maintenance for Reliable Charging
Preventing problems is always better than fixing them. A few simple, regular habits can keep your Roomba 650 charging reliably for years.
Regular Cleaning Schedule
Once a month, make it a point to wipe down the charging contacts on both the Home Base and the Roomba with a dry cloth. At the same time, pull out the front caster wheel and clean any accumulated debris from the wheel and its housing. This simple five-minute task is the single most effective way to prevent connection-related charging failures.
Smart Battery Management
To maximize the life of your Roomba’s battery, try to keep it on the Home Base whenever it’s not in use. This ensures it’s always topped off and ready to go. Avoid letting the battery sit in a completely discharged state for long periods, as this can permanently reduce its capacity. If you plan to be away for several weeks, fully charge the Roomba and then remove the battery and store it in a cool, dry place.
Frequently Asked Questions (FAQ)
Q1: Why did my Roomba 650’s charging light suddenly stop working?
The most common reasons are dirty charging contacts on the robot or the Home Base, a loose power cord, or a non-working wall outlet. In many cases, simply cleaning the metal contacts and ensuring the base has power will resolve the issue.
Q2: Is there an energy-saving mode where the lights turn off?
While the Roomba 650’s light should stay on while charging, some newer models like the Roomba 675 are designed differently. On those models, the indicator lights turn off after 60 seconds to conserve energy, even though the robot continues to charge. You can press the CLEAN button to check the battery status (amber for charging, green for full).
Q3: How do I perform a reset on my Roomba 650?
To reset your Roomba 650, place it on the Home Base. Press and hold the large CLEAN button for approximately 10 seconds. You should hear a beep or see the display flash “rSt”, indicating the system has been reset. Release the button and allow the Roomba to restart.
Q4: What should I do if none of these troubleshooting steps work?
If you have thoroughly cleaned the contacts, verified the power supply, reset the robot, and the light still won’t turn on, the next step is to consider replacing the battery, especially if it is more than a year or two old. If a new battery doesn’t solve the problem, there may be an internal fault with the Roomba or the Home Base, and you should contact iRobot customer support for professional assistance.
Conclusion
A Roomba 650 that shows no light on its charger is a common but usually fixable problem. By systematically working through the troubleshooting steps—starting with the easiest and most frequent culprits like dirty contacts and power issues—you can often restore your robot’s functionality without much effort. A clean connection is paramount, and debris in unseen places like the front wheel housing can be a surprisingly effective obstacle to proper charging.
Remember that proactive maintenance is your best defense against future issues. Regular cleaning of contacts and wheels, combined with smart battery management, will ensure your Roomba 650 remains a reliable cleaning companion. If all else fails, a battery replacement often provides the final solution, giving your robotic vacuum a new lease of life.