
A Roomba that refuses to charge can bring your automated cleaning routine to a frustrating halt. You place it on the Home Base, expecting it to power up for its next mission, but nothing happens. The indicator lights may stay dark, or you might receive an error message, leaving you with a robotic vacuum that can’t do its job. This common problem often stems from simple issues that can be resolved with a bit of systematic troubleshooting.
This guide will walk you through the entire process of diagnosing and fixing charging problems with your Roomba 620. We will explore the common causes, from dirty contacts to battery failure, and provide a detailed, step-by-step approach to get your device working again. You will learn how to clean critical components, perform resets, and take preventative measures to ensure reliable charging and a longer lifespan for your Roomba.
Exploring Why Your Roomba 620 Won’t Charge

When your Roomba 620 fails to power up on its Home Base, the cause is typically related to the connection between the robot and the dock. Several factors can interrupt this crucial link, preventing electricity from reaching the battery. Pinpointing the exact reason is the first step toward a successful fix.
The most frequent culprit is an accumulation of dust and grime on the metal charging contacts. Over time, these small metal plates on both the Roomba and the Home Base can become coated with debris, creating a barrier that blocks the electrical current. Similarly, physical obstructions around the docking station can prevent the Roomba from aligning correctly. A faulty Home Base, internal software glitches, or an aging battery can also lead to charging failures. In some cases, the small, spring-loaded power-sensor buttons on the Roomba’s underside may be stuck or misaligned, tricking the device into thinking it isn’t docked.
A Guide to Fixing Roomba 620 Charging Problems
Follow these methodical steps to identify and resolve the charging issues with your Roomba 620. Start with the simplest solutions and progress to more complex ones.
Step 1: Thoroughly Clean the Charging Contacts
The most common and easiest fix is to ensure a clean electrical connection. A poor connection is often why charging fails, especially if you notice that applying pressure to the Roomba sometimes makes it start charging.
How to Clean the Contacts
- Unplug the Home Base: For safety, always disconnect the Home Base from the wall outlet before cleaning.
- Locate the Contacts: Identify the two metal contact plates on the top of the Home Base and the corresponding two plates on the underside of your Roomba 620.
- Wipe Down the Contacts: Use a soft, dry cloth to wipe away any loose dust or hair. For more stubborn grime, lightly dampen a Mr. Clean Magic Eraser or a cloth with 91% isopropyl alcohol. Gently scrub the contacts on both the Roomba and the base until they are shiny.
- Dry Completely: Ensure both sets of contacts are completely dry before you plug the Home Base back in and attempt to dock the Roomba. Any moisture can cause further electrical problems.
- Inspect for Damage: While cleaning, check the contacts for signs of corrosion or physical wear. If the contacts appear damaged or the spring-loaded mechanisms feel weak, they may need to be replaced.
If the charging contacts on your Roomba or Home Base are visibly damaged, corroded, or the spring mechanisms are no longer functional, replacing them is necessary to establish a reliable electrical connection.
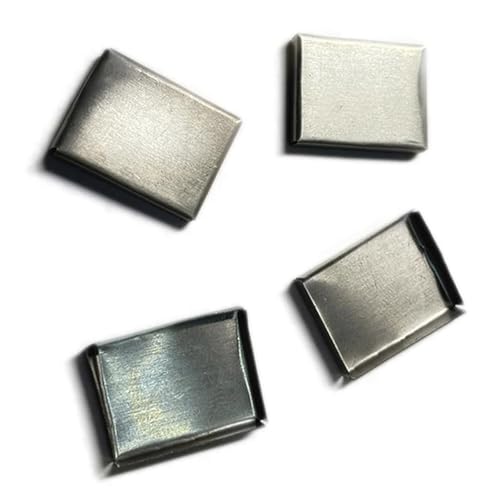
Fix charging issues with durable nickel contacts compatible with multiple Roomba models.

Easy-to-install pads that restore connectivity and prevent wear on older Roomba models.

Direct replacement contacts for common Roomba 600 series charging issues.

Official-style contacts offering better conductivity and compatibility for newer models.
Step 2: Inspect and Clear the Docking Area
Your Roomba needs a clear path and a stable environment to dock successfully. Interference can prevent it from making a solid connection with the Home Base.
- Remove Obstacles: Ensure there are no toys, shoes, cords, or other items blocking the Roomba’s path to the dock. The area should be free of clutter.
- Check the Surface: Highly reflective surfaces or direct sunlight near the base can interfere with the Roomba’s navigation sensors. If your base is on a shiny floor or near a window, try moving it to a different location. Placing a small, non-slip mat under the Home Base can also help with stability and docking accuracy.
Step 3: Verify the Home Base Functionality
Sometimes the problem isn’t the Roomba but the base itself.
- Check the Power Cord: Make sure the power cord is securely plugged into both the Home Base and the wall outlet.
- Look for the Indicator Light: When the Home Base has power, its indicator light should illuminate. If there is no light, try a different wall outlet to rule out a power supply issue. If the light remains off, the Home Base or its power cord may be faulty.
- Test with Another Roomba: If possible, test the Home Base with a different compatible Roomba to confirm if the base is functioning correctly.
If your Roomba Home Base shows no indicator light even when plugged into a working outlet, or if testing confirms it’s not providing power, you’ll need to replace the Home Base or its power adapter.

Official Roomba home base with automatic docking and charging
Authentic OEM home base with better charging contacts

Affordable dock with voltage range and updated contacts
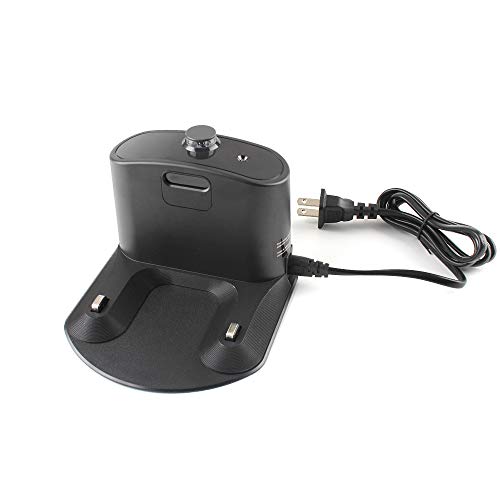
Integrated charging base with energy-saving features
Step 4: Examine the Roomba’s Battery
A dead or dying battery is another primary cause of charging failures. Roomba batteries have a finite lifespan, typically lasting 2,000 to 3,000 charge cycles, which often translates to a replacement every three years for regular users.
How to Inspect the Battery
- Flip the Roomba: Place the Roomba upside down on a soft surface.
- Remove the Bottom Cover: Unscrew the four or five screws holding the bottom plate and side brush in place.
- Access the Battery: Lift the cover to expose the battery compartment.
- Inspect the Battery: Remove the battery and check for any physical damage, such as swelling, leaking, or corrosion. A swollen battery is a clear sign it has failed and must be replaced immediately.
- Clean the Compartment: While the battery is out, clean any dust or debris from the compartment.
- Test with a New Battery: If you suspect the battery is the issue, the most reliable test is to install a new, compatible battery. Aftermarket options are available, but ensure they are designed for the Roomba 620.
If your Roomba’s battery is old, shows signs of physical damage (swelling, leaking), or no longer holds a charge for a reasonable cleaning cycle, replacing it is crucial for your Roomba to function and charge properly.

High-capacity Ni-MH battery with long runtime and safety certifications for Roomba 620.

Lithium-ion upgrade with extended runtime and durability for Roomba 620.
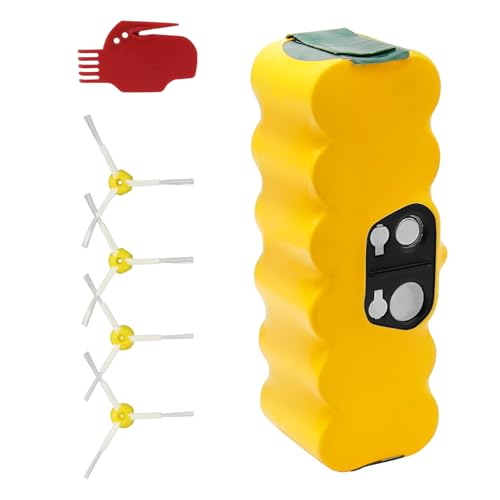
Cost-effective Ni-MH battery with built-in safety features for Roomba 620.
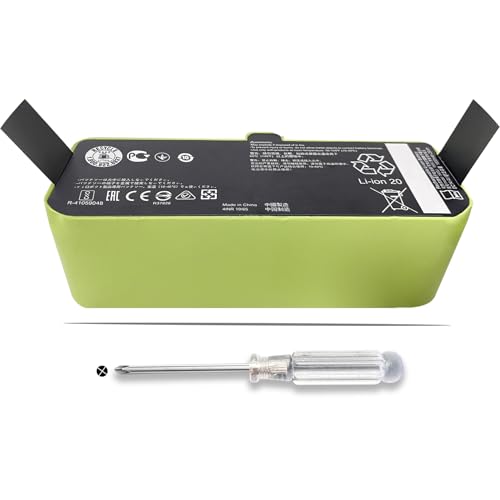
Lithium battery with higher energy density and safety for Roomba 620.
Step 5: Perform a System Reset
Software glitches can sometimes cause the Roomba to stop recognizing the Home Base. A simple reset can clear these temporary errors and restore normal function.
- Soft Reset: Press and hold the CLEAN and SPOT buttons simultaneously for about 10 seconds. You should hear a tone indicating the reset is complete. After the reset, place the Roomba back on the Home Base to see if it begins charging.
- Factory Reset: If a soft reset doesn’t work, a factory reset is a more drastic option that will erase all custom settings. To do this, press and hold the CLEAN, SPOT, and MAX buttons at the same time for 10 seconds.
Step 6: Check Physical Mechanisms
If manual pressure helps the Roomba charge, a physical component may be misaligned.
- Power-Sensor Buttons: On the Roomba’s base, there are two small power-sensor buttons. These buttons must be depressed by the dock for charging to begin. Check that they are not stuck and have proper spring resistance. Clear any debris that may be obstructing them.
- Manual Alignment: If the battery is completely dead, it won’t be able to dock itself. Manually place the Roomba on the Home Base, ensuring the green charging line on the robot aligns perfectly with the contact points on the dock. It may take up to 15 minutes for the charging indicator to activate.
Step 7: When to Contact Support
If you have completed all the troubleshooting steps above and your Roomba 620 still won’t charge, it’s time to seek professional help. Contact iRobot customer support with a detailed description of the problem and the steps you have already taken. They can provide further guidance or arrange for a repair.
Proactive Maintenance for Reliable Charging
Preventing charging issues is easier than fixing them. Incorporate these simple tasks into your regular maintenance routine to keep your Roomba 620 running smoothly.
- Regularly Clean Contacts: Once a month, wipe down the charging contacts on both the robot and the Home Base.
- Keep the Docking Area Clear: Make it a habit to keep the area around the Home Base free of clutter.
- Update Firmware: Check for and install any available firmware updates to resolve potential software bugs.
- Start from the Dock: Always begin a cleaning cycle with the Roomba on its Home Base. This helps it remember the location so it can successfully return and recharge after cleaning.
Key Insights on Batteries and Chargers
A healthy battery and the correct charger are essential for your Roomba’s performance. When it’s time for a replacement, it’s important to choose the right components.
Be aware that different Roomba models use different chargers. For example, the Roomba 675 uses a charger with a power brick that connects to the base, while the newer 690 model uses a different charger without a brick. Always verify you are using a charger compatible with your Roomba 620 to avoid damage or charging failure. For models with a side-mounted charging port, direct charging can be an alternative, but again, using the correct charger is crucial.
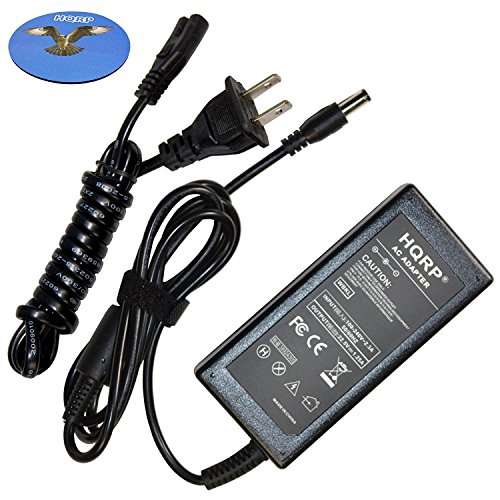
If you suspect your current charger is faulty, or if you need a backup, ensuring you have the correct charging adapter for your specific Roomba model is key to proper charging.
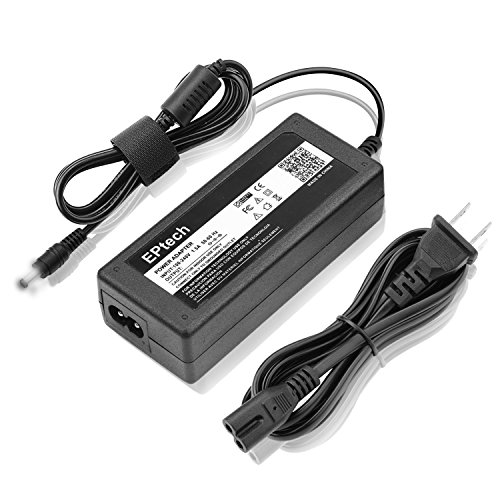
Affordable and compatible charging adapter for Roomba 620 with worldwide voltage support.

Complete charging base with cord for Roomba 620 and other compatible models.

Premium replacement docking station with safety features and accessories included.
High-quality certified adapter with advanced safety protections and wide compatibility.
Frequently Asked Questions (FAQ)
How can I tell if my Roomba’s battery needs to be replaced?
A failing battery often shows clear signs. If your Roomba’s battery appears physically swollen, feels hot to the touch, or is completely unresponsive even after cleaning the contacts and resetting the device, it likely needs replacement. A significant decrease in runtime is another indicator.
What is the first thing I should do if my Roomba stops charging?
The very first and most effective step is to thoroughly clean the metal charging contacts on both the Roomba and the Home Base. Use a soft, dry cloth or a cloth lightly dampened with isopropyl alcohol to remove any dirt or grime.
How do I perform a soft reset on my Roomba 620?
To perform a soft reset, press and hold the “Clean” and “Spot” buttons simultaneously for approximately 10 seconds, until you hear a reset tone. Then, place the Roomba back on its dock to see if it begins to charge.
Can I use a non-iRobot battery or charger?
Yes, aftermarket batteries and chargers are available. However, you must ensure they are fully compatible with your specific Roomba model (the 620 in this case). Using an incompatible component can cause further charging issues or even damage your robot.
Conclusion
A Roomba 620 that won’t charge is a solvable problem. By following a logical troubleshooting process—starting with cleaning the contacts, clearing the docking area, checking the battery, and performing resets—you can resolve the vast majority of charging issues yourself. Regular maintenance is the key to preventing these problems from recurring and ensuring your robotic vacuum is always ready for its next cleaning task. With these steps, you can get your Roomba back on its base, powered up, and back to keeping your floors clean.