
A dependable Roomba 560 is a fantastic tool for keeping your floors clean with minimal effort. However, its automated cleaning cycle is entirely dependent on its ability to return to its dock and successfully recharge. When it fails to do so, it can bring your entire cleaning routine to a halt. This common frustration can leave you with a drained robot and dirty floors, but the good news is that the solution is often straightforward and within your reach.
This comprehensive guide will walk you through everything you need to know to diagnose and resolve charging issues with your Roomba 560. We will explore the most frequent causes of charging failure, from simple maintenance oversights to hardware malfunctions. You will learn a step-by-step troubleshooting process to systematically identify the root of the problem, explore more advanced solutions for persistent issues, and discover proactive measures you can take to prevent these problems from happening again.
Identifying Common Charging Culprits
Before diving into complex repairs, it’s crucial to investigate the most common sources of charging failure. Often, the problem isn’t a major malfunction but a simple issue that can be fixed in minutes. By checking these three key areas first, you can save time and potentially resolve the issue without further troubleshooting.
Dirty Charging Contacts
The most frequent offender behind a Roomba 560 that refuses to charge is a poor connection between the robot and its Home Base. The two small, metallic charging contacts on the underside of your Roomba and the corresponding contacts on the charging dock must make clean, direct contact to transfer power. Over time, these surfaces inevitably accumulate dust, pet hair, and other household debris. This buildup acts as an insulator, physically blocking the flow of electricity and preventing a successful charge, even if the Roomba docks correctly.
To resolve this, you’ll need to clean all four contact points. Gently wipe the contacts on both the robot and the dock using a soft, dry cloth. For more stubborn grime, you can lightly dampen a cotton swab or a soft cloth with rubbing alcohol and carefully clean the metallic surfaces. Ensure the contacts are completely dry before attempting to charge the Roomba again. Clean, gleaming contacts are essential for a reliable charging connection.
A Failing or Disconnected Battery
The battery is the heart of your Roomba, and if it’s failing or not properly seated, charging will be impossible. First, check for a secure connection. Turn your Roomba over and ensure the battery is firmly in its compartment and that there are no obstructions preventing it from making contact with the internal terminals. A loose connection can interrupt the power flow just as effectively as a dead battery.
Second, inspect the battery itself for signs of failure. A battery that needs replacement may show physical signs of wear and tear. Look for any swelling or bulging of the battery casing, which indicates internal cell failure. Check for any signs of leakage or corrosion on the battery terminals. In some cases, a failing battery might even produce unusual noises. If you observe any of these symptoms, it is a clear sign that the battery has reached the end of its life and must be replaced.
If your Roomba’s battery is showing signs of wear, swelling, or is no longer holding a charge, replacing it is often the most effective solution to restore full functionality and charging capability.

High-capacity, long-lasting battery with safety certifications and 24/7 customer support

Durable battery with extended warranty and broad model compatibility

Upgraded capacity with extended warranty and cleaning accessories included

High-performance replacement with added side brushes and durable build
Malfunctions with the Charging Dock
If the Roomba’s contacts are clean and the battery appears fine, the problem may lie with the charging dock, also known as the Home Base. The dock is responsible for converting power from your wall outlet and delivering it to the Roomba. A failure at any point in this process will prevent your robot from charging.
Start by inspecting the power cable that connects the dock to the wall. Look for any visible damage, such as frays, cuts, or bent pins. Ensure the cable is plugged securely into both the back of the charging dock and the wall outlet. Next, verify that the dock itself is receiving power. When plugged in, the power indicator light on the dock should be illuminated and steady. If the light is off, flickering, or behaving erratically, it strongly suggests a problem with the dock itself or its power supply.
If the charging dock’s indicator light is off, flickering, or behaving erratically, or if the power cable shows signs of damage, replacing the charging dock or its power adapter may resolve the issue.

Official compatible replacement for Roomba 560 series with global voltage support
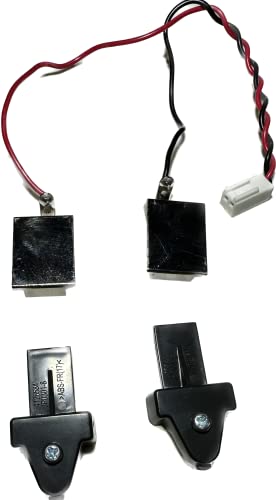
Affordable charging contact replacement for Roomba 560 series models
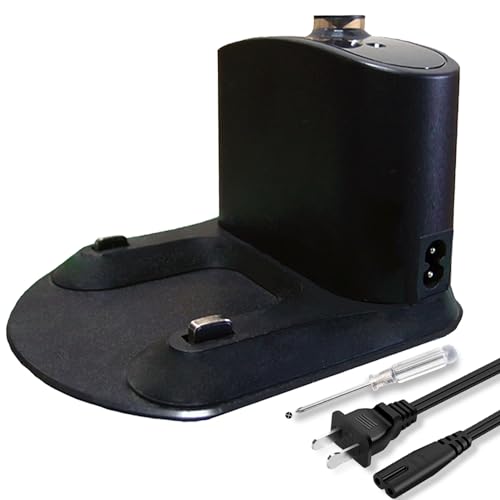
Universal charging station with accessories for Roomba 560 series

Original equipment manufacturer replacement for Roomba 560 series
A Step-by-Step Guide to Troubleshooting
After checking the most common culprits without success, it’s time to follow a more structured troubleshooting process. These steps will help you systematically rule out potential issues and pinpoint the exact cause of the charging failure.
Step 1: Perform a System Reset
Sometimes, the issue is not with the hardware but with the Roomba’s internal software. A simple reset can clear temporary glitches or firmware errors that may be preventing the robot from recognizing the charging dock. A reset will not erase your cleaning schedules or settings but will reboot the robot’s operating system.
To reset your Roomba 560, place it on the floor away from the charging dock. Press and hold both the “Clean” and “Spot” buttons simultaneously. Keep them held down for approximately 10 seconds. You will know the reset is initiating when the “Dock” light begins to blink. Once you release the buttons, the Roomba will play a short tone to indicate it has successfully rebooted. Place the Roomba back on its Home Base and see if the charging process begins.
Step 2: Check the Power Cable and Outlet
A faulty power outlet can easily be mistaken for a broken Roomba or dock. Before assuming your equipment is defective, confirm that the power source is working correctly. Unplug the Roomba’s charging dock and plug a different device that you know is functional, such as a lamp or a phone charger, into the same outlet. If that device doesn’t power on, the problem lies with the outlet or the circuit breaker, not your Roomba.
If the outlet is the issue, try plugging the Roomba’s dock into a different outlet in another room. If it begins working, you know the original outlet requires inspection by an electrician. This simple test can save you from needlessly replacing expensive components.
Step 3: Verify the Power Source Integrity
It’s also important to consider the quality of the power being supplied. Power strips or extension cords that are overloaded with other high-draw appliances can sometimes fail to provide enough stable power for the charging dock to function correctly.
To rule this out, unplug the charging dock from any power strip or extension cord and plug it directly into a dedicated wall outlet. This ensures it is receiving an undiluted and stable power supply. If the Roomba begins charging, the issue was with the overloaded power strip.
Step 4: Test with an Alternate Charging Dock
If you have access to another Roomba charging dock, either from a friend or a second unit in your home, this can be the definitive test to determine whether the issue is with your robot or your dock. Place your Roomba 560 on the alternate, known-working charging dock.
If your Roomba successfully begins to charge on the different dock, you have confirmed that your original dock is faulty and needs to be replaced. If your Roomba still fails to charge on the known-good dock, then the problem lies within the robot itself, likely with the battery or internal charging components.
When Basic Fixes Aren’t Enough: Advanced Solutions
If you’ve worked through the initial checks and troubleshooting steps and your Roomba 560 still won’t charge, the problem may require a component replacement or professional assistance.
Replacing a Worn-Out Battery
As mentioned earlier, batteries have a finite lifespan. If your battery is old or shows signs of physical damage like swelling or leaking, it’s time for a replacement. Purchasing a new battery is a common and relatively simple fix. When buying a replacement, ensure it is compatible with the Roomba 560 model. For detailed instructions on how to safely remove the old battery and install the new one, consult your Roomba’s original user manual. If you no longer have the manual, iRobot’s official website often provides digital copies and support guides.
Repairing Damaged Charging Contacts
In some cases, the charging contacts on the Roomba or the dock can become physically damaged or misaligned rather than just dirty. They might get bent, pushed in, or corroded. Attempting to repair or replace these contacts is a complex task that requires care and precision. If you are not comfortable with electronics repair, it is best to avoid this step, as improper handling could cause further damage. If you suspect damaged contacts are the problem, your best course of action is to contact customer support.
Contacting iRobot Customer Support
When all else fails, it’s time to call in the experts. If your Roomba is still under warranty, iRobot customer support can provide specialized assistance and may offer a repair or replacement. Even if your warranty has expired, their support team can offer further diagnostic advice and guide you on the best options for professional repair services or purchasing genuine replacement parts like a new charging dock or battery.
Proactive Care: Preventing Future Charging Issues
The best way to deal with charging problems is to prevent them from happening in the first place. A little regular maintenance goes a long way in ensuring your Roomba 560 remains reliable for years to come.
Commit to Regular Cleaning
Make cleaning the charging contacts part of your routine maintenance schedule. Once a week or every few cleaning cycles, take a moment to wipe down the contacts on both the robot and the Home Base with a soft, dry cloth. This simple habit prevents the slow buildup of dust and debris that is the leading cause of charging failure.
Store Your Roomba Properly
When your Roomba is not in use for an extended period, store it in a clean, dry, and dust-free environment. Leaving it in a damp basement or a dusty garage can accelerate the corrosion of electrical components and lead to performance issues down the line. Proper storage protects not only the charging components but the entire robot.
Ensure a Stable Power Supply
Periodically check the power outlet where your charging dock is plugged in. Ensure it is not part of an overloaded circuit and provides a stable supply of power. Avoid using cheap, low-quality power strips, as they can fail to deliver consistent voltage, which can stress the charging dock’s internal electronics over time.
Frequently Asked Questions (FAQ)
What is the most common reason a Roomba 560 stops charging?
The most frequent cause of charging failure is dirty charging contacts. Dust, hair, and other debris can build up on the metallic contacts on the underside of the Roomba and on the charging dock, preventing a solid electrical connection.
How do I properly reset my Roomba 560?
To reset the robot, press and hold the “Clean” and “Spot” buttons at the same time for about 10 seconds. You should see the “Dock” indicator light start to blink, and the Roomba will play a sound upon rebooting. This can often resolve software-related charging issues.
What are the signs of a bad Roomba battery?
A failing battery may show physical signs like swelling or bulging of its casing. You might also notice fluid leakage or corrosion around the battery terminals. In some instances, a faulty battery can even produce unusual noises.
My charging dock’s lights are off. What should I do?
First, check that the power cable is securely plugged into both the dock and a functioning wall outlet. Try plugging the dock directly into the wall, bypassing any power strips. If the lights remain off, the dock or its power cable is likely faulty and may need replacement.
Conclusion
A Roomba 560 that won’t charge can be a major inconvenience, but the problem is often solvable with a bit of systematic investigation. By starting with the most common culprits—dirty contacts, a faulty battery, or a malfunctioning dock—you can often find a quick fix. If those initial checks don’t work, following a clear troubleshooting process, from resetting the robot to testing the power source, will help you narrow down the cause.
Ultimately, maintaining your Roomba through regular cleaning and proper storage is the best defense against future charging problems. By taking these proactive steps and knowing how to troubleshoot when issues do arise, you can ensure your robotic vacuum is always charged, ready, and able to keep your home clean. If you exhaust all options, remember that professional help from iRobot customer support is always available.