
A Roomba 552 is a powerful tool for maintaining a clean home, but its effectiveness plummets when its core cleaning components—the brushes—stop turning. This common issue can transform your automated cleaning assistant into a device that merely pushes dirt around. The problem isn’t unique to the 552 model; it affects others like the 650 and can be frustrating for any owner. Fortunately, the causes behind non-spinning brushes are well-documented and, in many cases, can be resolved with a bit of troubleshooting and maintenance.
This comprehensive guide will walk you through the entire process of diagnosing and fixing your Roomba’s brush issue. We will explore the tell-tale symptoms that indicate a problem, delve into the primary causes ranging from simple obstructions to more complex motor failures, and provide a step-by-step troubleshooting plan. You will also find detailed instructions for DIY repairs and proactive maintenance tips to prevent the problem from recurring, empowering you to restore your Roomba to its full cleaning potential.
Identifying the Symptoms of Failing Brushes

Before you can fix the problem, you need to recognize the signs. A Roomba 552 with malfunctioning brushes will exhibit several distinct symptoms that signal something is wrong with its cleaning mechanism. Paying attention to these indicators can help you catch the issue early and simplify the repair process.
Key symptoms include a noticeable drop in cleaning performance, as the vacuum struggles to lift dirt and debris from your floors. You might also observe the device moving erratically or getting stuck more often than usual, as the brushes play a role in navigating over different surfaces. The Roomba may even tell you what’s wrong directly, displaying error messages like “Clean Brushes” or “Brush Stuck” on its interface. A quick visual inspection might reveal hair, string, or other debris tightly wound around the brushes. Finally, listen for any unusual grinding or whirring sounds, which often point to a mechanical problem with the brush motor or gears.
Key Reasons Your Roomba’s Brushes Stop Spinning
Several underlying issues can cause your Roomba’s brushes to stop rotating. These problems range from simple blockages that are easy to fix to internal component failures that require more technical attention.
Foreign Object Obstructions
The most frequent culprit is a simple obstruction. Hair, string, carpet fibers, and other small debris can become tightly wrapped around the brushes or their axles. When this happens, the entanglement creates too much resistance, preventing the brushes from spinning. In some cases, this can cause the brush motor to strain and overheat, triggering an automatic shutdown to prevent permanent damage.
Worn or Damaged Components
Over time, the bristles on your Roomba’s brushes naturally wear down, becoming frayed and less effective. If they become severely damaged or bent, they may fail to spin correctly. The quality of replacement parts also matters significantly. Using low-quality, third-party brushes can introduce excessive resistance into the system, leading to mechanical stress that can strip the gears responsible for turning the brushes. Similarly, the small gear that transfers power from the motor to the brush can wear out, losing teeth and failing to engage properly.
Motor and Electrical Failures
The brush motor itself is a critical component that can fail due to age, overuse, or an internal electrical fault. If the motor burns out, it will no longer provide the power needed to rotate the brushes. Beyond the motor, the problem can also lie in the electrical connections. Wires leading to the motor can become loose, disconnected, or frayed over time, interrupting the power supply and causing the brushes to work intermittently or stop altogether.
Firmware Glitches
Less commonly, the issue can be rooted in the Roomba’s software. Outdated or corrupted firmware can cause a variety of operational problems, including the failure of mechanical parts like the brush system to activate. A software glitch can interfere with the commands sent to the motor, effectively disabling the brushes even if all the hardware is in perfect working order.
A Step-by-Step Guide to Troubleshooting
When your Roomba’s brushes stop working, follow these logical steps to diagnose and resolve the issue. Start with the simplest fixes before moving on to more complex inspections.
Step 1: Perform a Thorough Visual Inspection and Cleaning
Begin by turning the Roomba off and flipping it over to access the brushes. Your first task is to clear any and all obstructions.
* Remove Debris: Carefully examine the main bristle and rubber brushes. Use scissors or the included cleaning tool to cut away any tangled hair, string, or fibers.
* Check for Free Rotation: Once the brushes are clean, try to spin them by hand. They should rotate freely with minimal resistance. If they still feel stuck, you may need to remove them completely to check for debris caught in the bearings or end caps.
* Inspect for Damage: While the brushes are out, examine them for signs of significant wear. Look for frayed or broken bristles, cracks in the plastic, or a bent shape. If the brushes are visibly damaged, they will need to be replaced.
If your brushes are visibly damaged or worn, replacing them can restore your Roomba’s cleaning performance.

High-quality replacement brushes for optimal cleaning performance.

Comprehensive kit to restore your Roomba 552 to peak performance.
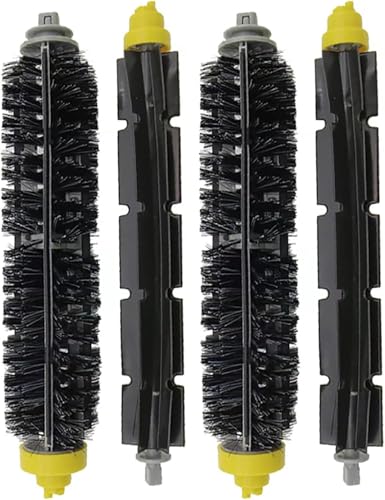
Durable replacement brushes for efficient cleaning on all floor types.
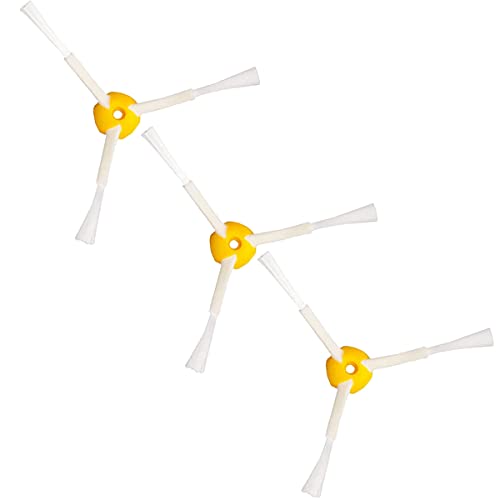
Improved corner cleaning with easy installation for Roomba 552.
Step 2: Conduct a System Reset
If cleaning the brushes doesn’t solve the problem, a system reset can often clear internal errors or firmware glitches. This process recalibrates the Roomba’s internal systems. To perform a reset on the Roomba 552, press and hold the “Clean” button and the “Spot” button simultaneously for about 10-15 seconds. The Roomba will emit a series of beeps, signaling that the reset is complete. Allow it to restart and then run a new cleaning cycle to see if the brushes are working.
Step 3: Check for Firmware Updates
Outdated software can cause unexpected behavior. Ensure your Roomba 552 is connected to a power source via its charging dock. If your model connects to the iRobot Home app, open the app to check for any available firmware updates. The app will provide on-screen prompts to guide you through the installation process. Keeping the firmware current is crucial for optimal performance.
Step 4: Examine Internal Electrical Connections
If the previous steps fail, the problem may be internal. This step requires more confidence with electronics. After ensuring the Roomba is off and the battery is removed, you can open the main housing to inspect the brush motor module. Look for any wires that appear loose, disconnected, or damaged. Gently reseat any loose connectors. For a more advanced check, you can use a multimeter to test the continuity of the wires leading to the motor to confirm they are not broken internally. If you find damaged wires, they will need to be replaced.
Advanced Repair Solutions for Your Roomba 552
For those comfortable with DIY repairs, replacing specific parts can be a highly cost-effective way to fix the brush issue permanently.
DIY Brush Replacement
If your inspection revealed worn or damaged brushes, replacing them is a simple and effective solution. You can purchase official replacement brushes directly from iRobot or from a trusted third-party supplier. Be mindful that very cheap, low-quality parts can cause more harm than good. Follow the instructions in your user manual to remove the old brushes and install the new ones, ensuring they are seated correctly in the cleaning head module.
The Cost-Effective Gear Replacement
A very common point of failure, especially for the side spinning brush, is a small plastic gear within the motor module. Over time, the teeth on this gear can strip and wear away, causing it to slip or fail to turn the brush. Instead of replacing the entire motor assembly, you can often replace just this gear.
* Cost: Replacement gears are widely available online and typically cost less than $5.
* Process: This repair involves disassembling the brush motor module, removing the old damaged gear, and installing the new one.
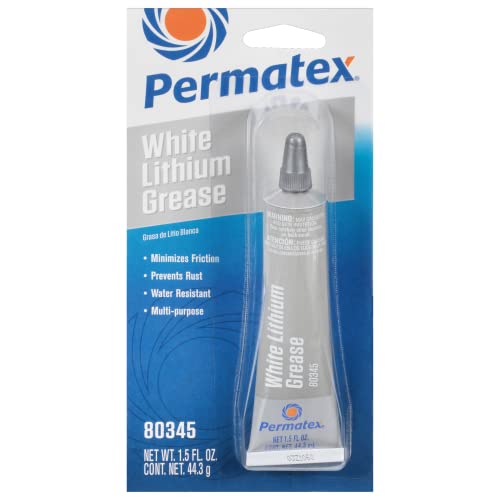
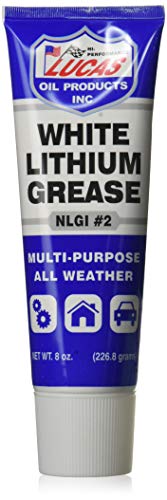
* Crucial Tip: Before installing the new gear, it is essential to apply a small amount of new lubricant, such as a lithium-based or silicone-based grease. This reduces friction and prevents premature wear on the new part.
If you’ve identified a stripped gear inside the brush motor module, replacing just the gear can be a very economical fix.

Complete replacement gearbox for Roomba 600 and 700 series models.

Authentic OEM side brush module with improved durability for Roomba models.

High-quality side brush motor module compatible with multiple iRobot Roomba series.

Official iRobot replacement brushes designed for optimal cleaning performance.
If you’re replacing the gear, you’ll need a suitable lubricant to ensure smooth operation and prevent future wear.
All-purpose lubricant for plastic and metal parts with rust protection
Durable household lubricant for hinges and garage doors

All-weather protection for plastic and metal components
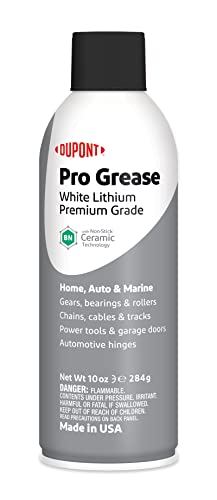
High-performance spray for plastic and metal lubrication
When to Opt for a Full Motor Replacement
If the motor itself has burned out or if the gear replacement seems too intricate, replacing the entire brush motor module is the next logical step.
* Cost: A full motor replacement is more expensive than just the gear, costing approximately $25 for the part. The side brush motor module for models like the Roomba 650 is available directly from iRobot for around $16.
* Process: The replacement involves disconnecting the old module and securing the new one in its housing.
* Greasing: Just as with a gear replacement, ensuring the gears in the new motor assembly are properly greased is vital for longevity.
If the brush motor is completely dead or you prefer to replace the entire module rather than just the gear, a new brush motor module is necessary.
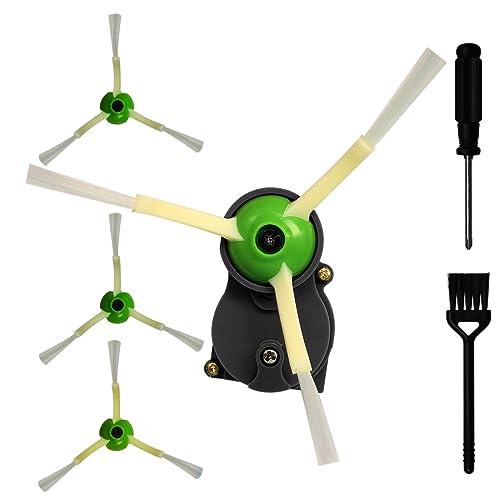
Official-like replacement with extra brushes and tools

Affordable replacement with improved design

Budget-friendly option with hair prevention design

Premium option with enhanced performance features
Proactive Maintenance to Prevent Future Issues
The best way to deal with problems is to prevent them from happening in the first place. A consistent maintenance routine will keep your Roomba 552 running smoothly.
Establish a Regular Cleaning Routine
Make it a habit to clean the brushes after every few uses, or at least once a week. Remove any accumulated hair and debris before it becomes a major obstruction. At the same time, check the filter and empty the dustbin to ensure strong suction power.
Create a Safe Cleaning Environment
Prepare the cleaning area before starting your Roomba. Pick up large objects, cables, and anything else that could easily get tangled in the brushes. For areas with consistently high traffic or debris, consider using virtual walls to block the Roomba from entering them until they can be pre-cleaned.
If you need to define boundaries for your Roomba to prevent it from entering certain areas with potential obstructions, virtual walls can be very helpful.

Official replacement with dual modes for room control and pet area protection

Affordable dual-mode barriers with 4′ halo and 10′ beam options

Broad compatibility with 500-900 series and dual barrier modes
Effective pet area protection with dual barrier settings
When to Call for Professional Help
If you’ve gone through all the troubleshooting and DIY repair steps and the brushes still won’t turn, it may be time for professional assistance. Contact iRobot customer support for further guidance. They can advise you on whether the unit needs to be sent to an authorized service center for diagnosis and repair.
Frequently Asked Questions (FAQ)
What are the first signs my Roomba’s brushes are failing?
The earliest signs include a noticeable decrease in suction power, leaving behind dirt it would normally pick up. You might also hear new or unusual sounds like grinding or whirring, see error messages on the device, or notice it moving erratically and getting stuck more frequently.
Can I use third-party replacement brushes for my Roomba?
While you can use third-party parts, it comes with a risk. Low-quality replacement brushes may not fit perfectly and can create excessive resistance. This extra strain can put stress on the motor and, more importantly, can lead to the stripping of the delicate plastic gears inside the motor module, causing a more significant failure. It is recommended to use official iRobot parts or those from a highly reputable supplier.
Is it cheaper to replace just the gear or the whole motor?
It is significantly cheaper to replace only the damaged gear. A replacement gear can often be purchased for under $5, whereas a complete motor assembly typically costs around $25. If you can confirm that a stripped gear is the sole cause of the problem, replacing it is the most economical solution.
Conclusion
A Roomba 552 with brushes that won’t turn can be a major inconvenience, but it is rarely a fatal flaw. By systematically working through the symptoms, causes, and solutions outlined in this guide, you can effectively diagnose and fix the problem. The solution is often as simple as a thorough cleaning, but even if it requires a more hands-on part replacement like a new gear or motor, the repair is well within the reach of a determined owner.
Ultimately, the key to a long and productive life for your Roomba is consistent, proactive maintenance. Regular cleaning and care will not only prevent brush failures but will also ensure your robotic vacuum continues to clean effectively for years to come. With the right approach, you can easily overcome this common issue and get your Roomba 552 back to work.