
A Roomba is a fantastic tool for keeping floors clean with minimal effort, but its effectiveness drops significantly when the main brushes stop spinning. This common issue transforms your powerful robotic vacuum into a mere dust collector, leaving behind larger debris it was designed to sweep up. When you notice your Roomba 500 series vacuum running but failing to pick up anything more than fine lint, it’s a clear sign that the brush system needs attention.
Fortunately, a non-spinning brush is often a problem you can fix yourself without needing a costly professional repair or a brand-new device. The solution typically involves one of two key repairs: replacing the entire cleaning head module or swapping out the dedicated brush motor. This guide provides a detailed walkthrough for both procedures, empowering you to diagnose the issue and restore your Roomba’s full cleaning capabilities with just a few tools and a little patience.
Pinpointing the Core Issue
Before you start unscrewing panels, it’s helpful to determine the likely source of the problem. A simple check of your Roomba’s dustbin after a cleaning cycle can reveal a lot. If the bin contains only fine dust and lint but is missing the usual larger items like crumbs, hair, and other debris, it’s a strong indicator that the brushes are stationary. The vacuum suction is still working, but the brushes aren’t doing their job of agitating and lifting particles from the floor.
This specific symptom almost always points to a failure in the brush drive system. The problem lies either with the motor that powers the brushes or within the gearbox and components of the cleaning head assembly itself. Your next step is to decide which component to replace. Replacing the entire brush head is often a more straightforward fix and an upgrade, while replacing just the motor can be a more targeted and cost-effective solution if you’re confident the motor is the sole point of failure.
Troubleshooting Your Roomba’s Brush System
Once you’ve confirmed the brushes aren’t moving, you can proceed with one of two effective repair strategies. Below are detailed, step-by-step instructions for replacing the entire brush head assembly or just the brush motor for relevant Roomba 500 series models.
Solution 1: Replacing the Entire Brush Head Assembly
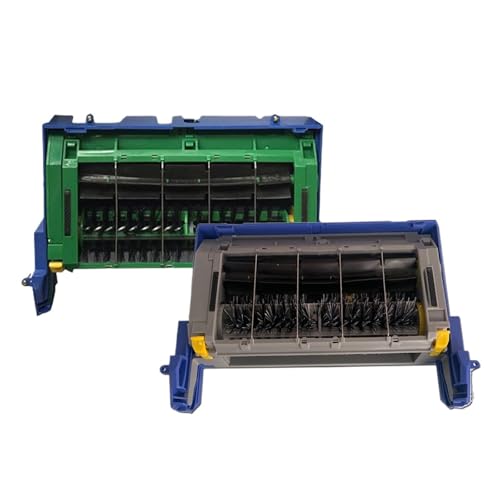
For many owners of Roomba 500, 600, and 700 series models, the most efficient fix is to replace the entire cleaning head module. The available replacement, known as the Roomba 5600/700 Enhanced Brush Head, is an updated unit designed for improved performance and is fully compatible with the 500 series. This approach replaces the motor, gearbox, and brushes all at once, eliminating any guesswork.
Key Features of the Replacement Head
- Wide Compatibility: The enhanced assembly works with all Roomba 500, 600, and 700 series models.
- Upgraded Design: It’s an improved version intended to offer better cleaning performance.
- Simple Connection: It features a dedicated plug that connects directly to the Roomba’s internal wiring, making installation simple.
- Recommended Tool: A smaller screwdriver is advised to prevent stripping the screw heads during installation.
If you’ve determined that replacing the entire cleaning head module is the best solution for your Roomba, you’ll need to purchase a compatible replacement part.

Official replacement for peak Roomba performance

Improved brush assembly for better floor cleaning
Efficient cleaning with reduced hair entanglement

High-quality motor module with extra tools included
Step-by-Step Installation Guide
- Remove the Side Brush: Begin by unscrewing and removing the spinning side brush from the Roomba. If your Roomba’s side brush is worn out or damaged, replacing it can improve cleaning performance and prevent further issues.

Official iRobot replacement for e/i/j series Roombas

Broadest model compatibility with pre-installed hardware

Budget-friendly option for older Roomba models

Premium bulk pack for newer smart Roomba models
- Loosen the Main Screws: Turn the Roomba over. You will see four screws that secure the main brush head assembly. Loosen these screws until they pop up; they are designed to stay attached to the bottom plate and do not need to be fully removed.
- Remove the Cleaning Head Screws: Locate and remove the four additional screws that hold the cleaning head itself in place.
- Take Out the Dust Bin: If you haven’t already, pull the dust bin out from the back of the Roomba.
- Lift Out the Old Assembly: Carefully lift the entire old cleaning head assembly out of the Roomba’s main body.
- Clean the Interior: With the assembly removed, take the opportunity to clean out any dust and debris from the internal cavity using a vacuum cleaner or a dry cloth.
- Install the New Brush Head: Position the new brush head assembly in the Roomba. Ensure its dedicated plug aligns correctly and connects securely with the Roomba’s internal connector.
- Secure the New Head: Use the provided screws to fasten the new brush head firmly in place.
- Reattach Bottom Plate and Side Brush: Place the bottom plate back on and tighten the four screws. Finally, reattach the side brush to complete the installation.
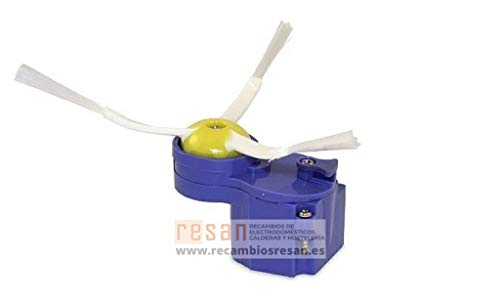
Solution 2: Replacing Only the Brush Motor
If you have a Roomba model 560, 565, or a 700 series unit with a non-arrow-style brush, and you’re confident the motor is the problem, you can opt to replace only that component. This can be a more intricate but also more targeted repair.
Important Notes on Motor Replacement
- This procedure is specifically for models with the non-arrow-style brush.
- The replacement motor comes with an updated, longer shroud and new seals designed to improve performance.
- If your Roomba’s existing seals are still in good condition, they may be reused.
If you’ve identified that only the brush motor needs replacement, you’ll need to acquire the correct motor for your Roomba model.
Authentic official replacement side brush motor for Roomba 500/600/700 series.

Improved performance with durable side brush and screwdriver included.

Budget-friendly option with easy installation and improved performance.

Durable replacement motor with upgraded gear for better longevity.
Step-by-Step Motor Replacement
- Remove the Battery: This is a crucial first step. Before starting any work, remove the Roomba’s battery to prevent any risk of electrical shorts. If your Roomba’s battery is old or not holding a charge, replacing it can improve run time and overall performance.

High-capacity Ni-MH battery with CE/FCC certification for extended runtime.

Durable Ni-MH battery with overcharge and over-discharge protection.
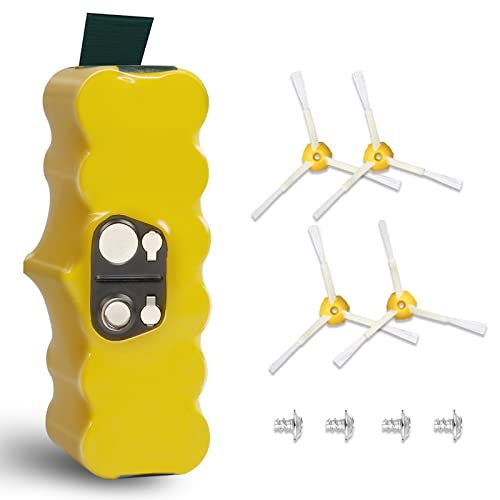
Upgraded battery with CE/FCC certification and long runtime performance.
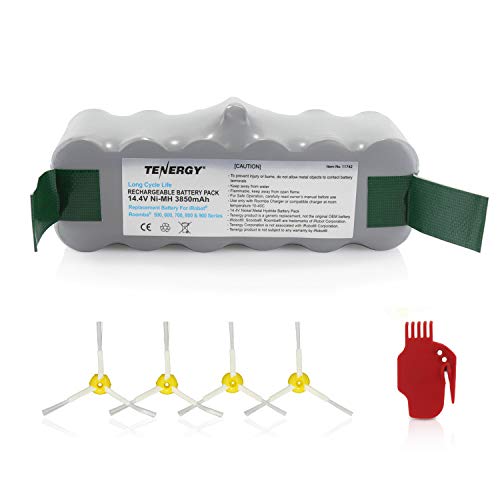
Extended-life battery with 1000-cycle longevity and built-in protections.
- Access the Motor Housing: Locate the motor housing. It is typically covered by a sticker that conceals the access point.
- Uncover and Access the Motor: Carefully lift or peel back the sticker. Remove the screw underneath it that secures the motor cover.
- Extract the Old Motor: Gently pull out the old motor. Pay close attention to the clips and grooves that hold it in place, as you will need to align the new motor in the same way.
- Prepare the New Motor: The old motor has a short shroud that you may need to remove. The replacement motor features a longer, updated shroud.
- Install the Replacement Motor: Fit the new motor into the housing, ensuring it sits correctly in the alignment clips and grooves. The longer shroud may require a slight adjustment to fit perfectly.
- Secure the New Motor: Fasten the new motor in place with its securing screw.
- Manage the Cables: Properly route the motor’s cables and clip them into their designated holders. This prevents them from being pinched or interfering with other components during operation.
- Reseal the Access Point: Use a small piece of tape to press the sticker back down over the screw hole, securing the housing.
Frequently Asked Questions (FAQ)
How can I tell if my Roomba’s brush motor is broken?
A primary indicator of a failed brush motor is a change in what your Roomba collects. If the vacuum’s suction still works and the dustbin fills with fine lint and dust but contains no larger debris like crumbs or hair, it strongly suggests the brushes are not spinning to sweep particles into the vacuum’s path.
Is the enhanced brush head compatible with my Roomba 500?
Yes, the Roomba 5600/700 Enhanced Brush Head is designed to be fully compatible with all models in the Roomba 500, 600, and 700 series, making it a reliable upgrade for older units.
What tool is recommended for replacing the brush head screws?
When replacing the brush head assembly, it is best to use a smaller screwdriver. This helps prevent the soft metal of the screw heads from being stripped, which can make them difficult to tighten or remove in the future.
Do I need to remove the battery before working on my Roomba?
Yes, especially for an internal repair like the brush motor replacement. Removing the battery is a critical safety measure to prevent any electrical shorts that could damage the Roomba’s circuitry or cause injury.
Conclusion
A Roomba with a non-spinning brush can be a source of frustration, but it doesn’t have to signal the end of your device’s useful life. As we’ve explored, this common problem is highly fixable with the right approach. By first diagnosing whether the issue lies with the entire assembly or just the motor, you can choose the most effective repair path for your specific model and situation.
Whether you opt for the comprehensive upgrade of a new cleaning head assembly or the targeted replacement of the brush motor, following the detailed steps in this guide can get your robotic vacuum back to peak performance. Taking on this DIY repair not only saves you money but also extends the longevity of your Roomba, ensuring it continues to keep your floors clean for years to come.