
A Roomba that refuses to charge can bring your automated cleaning routine to a sudden halt. This convenient household helper relies on its ability to return to its dock and power up for the next job. When it fails to do so, it’s not just an inconvenience; it can be a sign of an underlying issue that needs attention. These problems can range from simple maintenance oversights to more complex hardware failures.
This comprehensive guide is designed to walk you through the entire diagnostic and repair process. We will explore the most common reasons why your Roomba 4110 might not be charging, from dirty electrical contacts to software glitches. You will learn detailed, step-by-step troubleshooting methods to systematically identify and resolve the problem, as well as practical solutions like battery replacement and proactive maintenance tips to prevent future charging failures.
Pinpointing Why Your Roomba 4110 Won’t Charge
Before you can find a solution, you must first identify the root cause of the charging failure. Several factors can interrupt the flow of power from the charging station to your Roomba’s battery. Here are the most common culprits.
- Dirty Charging Contacts: Over time, the metal contacts on the underside of your Roomba and on the charging station can accumulate dust, pet hair, and other debris. This buildup creates a barrier that prevents a solid electrical connection, which is one of the most frequent causes of charging problems.
- A Faulty Battery: Like all rechargeable batteries, your Roomba’s battery has a finite lifespan. After years of use and hundreds of charging cycles (up to 2,000-3,000 over its life), it can lose its ability to hold a charge. Physical damage, such as swelling or leaking, is a clear indicator that the battery needs to be replaced.
- Charging Station Problems: The issue might not be with the robot itself but with its Home Base. A loose power cord, a malfunctioning internal component, or physical damage to the station can prevent it from delivering power to the Roomba.
- Software and Firmware Glitches: Occasionally, the robot’s internal software can encounter a bug that disrupts the charging process. These glitches can sometimes prevent the Roomba from recognizing the charging dock or initiating the charging sequence correctly.
- Issues with Your Power Source: The problem could be as simple as a faulty wall outlet or a damaged extension cord. Power surges or fluctuations can also damage the charging station, making a surge protector a wise investment.
- Damaged Internal Wiring: While less common, it’s possible for the internal wiring within the Roomba to become loose, frayed, or damaged, leading to a complete charging failure.
- Overheating: Both the Roomba and its charging station can generate heat during operation and charging. If they are located in a poorly ventilated area, they can overheat, triggering a safety mechanism that halts the charging process to prevent damage.
A Step-by-Step Guide to Fixing Charging Failures

Follow these steps methodically to diagnose and fix your Roomba 4110’s charging problem. Start with the simplest fixes before moving on to more complex solutions.
Step 1: Inspect and Clean Charging Contacts
This is the most crucial first step. Even a thin layer of grime can interrupt the electrical connection.
How to Clean the Contacts
- Unplug the charging station from the wall outlet for safety.
- Locate the two metal charging pads on the top surface of the Home Base.
- Locate the corresponding metal contacts on the bottom of your Roomba 4110.
- Use a clean, dry microfiber cloth or a cotton swab to gently wipe away any visible dust or debris from all four contact points.
- For more stubborn residue, lightly dampen a cloth or cotton swab with 91% isopropyl alcohol and thoroughly clean the contacts. The alcohol will evaporate quickly without leaving a residue.
Check the Dock’s Contact Pads
While cleaning, inspect the spring-loaded contact pads on the charging dock. Gently press them down to ensure they move freely and spring back into place. If a spring is broken or stuck, the pad won’t make proper contact with the robot, and the dock may need to be repaired or replaced.
Step 2: Evaluate the Battery’s Condition
If cleaning the contacts doesn’t work, the battery is the next component to check.
Visual Inspection
You will need a Phillips head screwdriver to access the battery compartment on the bottom of the Roomba. Remove the screws holding the bottom cover and the battery in place. Carefully lift the battery out and examine it for any of the following signs of failure: * Swelling or puffiness: A swollen battery is dangerous and must be replaced immediately. * Leaking fluid: Any sign of corrosion or leakage means the battery is compromised. * Excessive heat: If the battery feels unusually hot to the touch after a charging attempt, it may be faulty.
If you observe any of these issues, do not attempt to use the battery again. It’s time for a replacement.
Voltage Test
For a more technical assessment, you can use a multimeter to check the battery’s voltage. A healthy but discharged battery should still show some voltage. A reading of zero volts indicates a completely dead battery that is likely beyond recovery.
Step 3: Examine the Charging Station and Power Source
Confirm that the Home Base is receiving power and functioning correctly.
- Check the Power Cord: Ensure the power cord is securely plugged into both the charging station and the wall outlet.
- Test the Outlet: Plug another device, like a lamp, into the same outlet to confirm it’s working. If not, check your home’s circuit breaker. It is also recommended to plug the Roomba’s charger into a surge protector to shield it from voltage fluctuations.
- Manual Docking: Sometimes the robot fails to align itself perfectly. Manually place the Roomba on the charging station, ensuring the contacts on the robot are touching the pads on the dock. Watch for the green charging indicator light on the dock to activate. Note that a fully depleted battery may take up to 15 minutes to wake up and begin displaying a charging light.
- Wake Up the Robot: Some models enter a deep sleep mode and won’t charge until awakened. Press the “Clean” button once to see if it responds before placing it on the dock.
If your Roomba’s charging station appears damaged or is not providing power, you may need a replacement.

Official compatible replacement charging station for Roomba 4110 and other models.

Affordable and reliable charging solution for Roomba 4110 and similar models.

Genuine OEM replacement for superior performance and reliability.

Value pack with extra tools and strong after-sales support.
Step 4: Address Potential Software Glitches
If the hardware seems fine, a software issue could be the culprit.
Perform a Robot Reset
Resetting the Roomba can clear temporary glitches without deleting your settings or schedules. To do this, press and hold the “Clean” and “Spot” buttons simultaneously for about 10 seconds. The Roomba should make a reboot sound. After the reset is complete, place it back on the charging station to see if it begins charging.
Update the Firmware
Outdated firmware can cause various performance issues, including charging problems. Connect your Roomba to your Wi-Fi network and use the iRobot HOME App on your smartphone to check for available firmware updates. If an update is available, follow the on-screen instructions to install it.
Step 5: Check for Environmental and Internal Issues
Monitor Temperature
Ensure your Roomba and its charging station are in a cool, well-ventilated area away from direct sunlight or heat sources like radiators. If the robot feels hot after a cleaning cycle, let it cool down for at least 30 minutes before attempting to charge it.
Inspect Internal Wiring
This step is for users comfortable with basic electronics repair. With the battery removed, you can look inside the battery compartment for any obviously loose, disconnected, or frayed wires. If you find a loose wire and can safely reconnect it, this may solve the problem. Otherwise, it is best to seek professional help.
Implementing Key Solutions for Your Roomba
If troubleshooting points to a specific failed component, here are the most effective solutions.
Replacing a Faulty Battery
A battery replacement is necessary if it’s old (typically over three years), visibly damaged, or fails to hold a charge. Inconsistent charging habits or frequent power outages can accelerate battery wear.
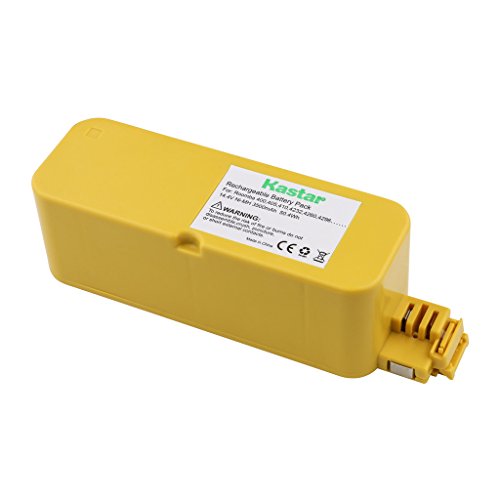
If your Roomba’s battery is old, visibly damaged (swollen, leaking), or no longer holds a charge, it’s time for a replacement.

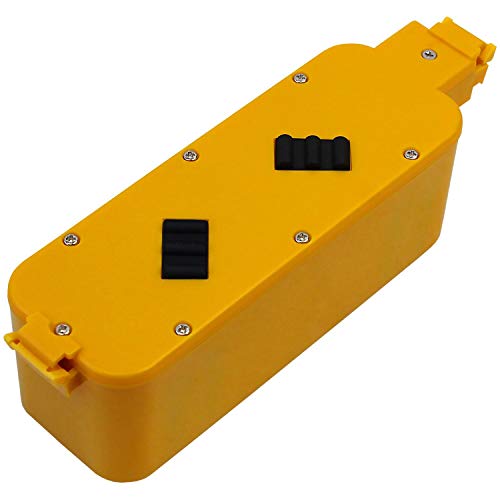
High-capacity Ni-MH replacement battery with built-in safety protections and OEM-level performance.
Durable Ni-MH battery with 3-year warranty and high-quality cell protection.

High-capacity and environmentally friendly battery with global certification and extended warranty.
Affordable NiCD battery with one-year warranty and full compatibility for Roomba FloorVac models.
Getting a New Charging Station
If you determine the charging dock is faulty, you have two options. An original iRobot charger can cost up to $80, while aftermarket chargers are significantly cheaper, often available for $20 to $25.
If your Roomba’s charging station is damaged or no longer providing power, a replacement may be needed.
Official OEM replacement charging base with improved charging contacts for Roomba 4110 and compatible models.

Universal replacement docking station with enhanced power compatibility for Roomba 4110 and other series.
Affordable replacement charging base with wide compatibility for Roomba 4110 and other models.
Cost-effective replacement with accessories and support for Roomba 4110 and compatible models.
A Note on Charger Compatibility
Be aware that not all iRobot chargers are interchangeable. For example, the charger for a Roomba 675 model has a side port, while the charger for a 690 model is different and lacks a power brick. Even if two chargers look identical, they may not be compatible. Always verify that a new charger is designed specifically for your Roomba 4110 model before purchasing.
When to Contact iRobot Support
If you have exhausted all the steps above and your Roomba 4110 still won’t charge, it’s time to contact iRobot customer support. Be prepared to provide them with the robot’s serial number, a detailed description of the problem, and a list of the troubleshooting steps you have already performed.
Proactive Maintenance for a Healthy Roomba
Proper care can extend the life of your Roomba and prevent charging issues from occurring in the first place.
- Regular Cleaning: At least once a week, wipe down the charging contacts on both the robot and the dock to prevent dirt buildup.
- Avoid Overuse: While Roombas are designed for regular use, running multiple back-to-back cleaning cycles without a rest period can contribute to overheating. Allow the unit to cool down between long sessions.
- Proper Storage: If you plan to store your Roomba for an extended period, fully charge the battery and store the robot in a cool, dry place.
Frequently Asked Questions (FAQ)
How do I perform a reset on my Roomba 4110?
To reset the robot, press and hold the “Clean” and “Spot” buttons together for approximately 10 seconds until you hear the reboot tone. This action can resolve many software-related issues without erasing your saved settings.
How long does a Roomba battery typically last before it needs replacement?
A Roomba battery generally needs to be replaced after about three years of regular use. However, its lifespan can be shorter if it’s subjected to frequent deep discharges or inconsistent charging. Signs of degradation, like shorter run times, are a good indicator that it’s time for a new one.
If your Roomba battery is showing signs of degradation or has reached the end of its typical lifespan, a replacement will restore its performance.
High-capacity Ni-MH battery with built-in protections and OEM compatibility.
Durable Ni-MH battery with high-quality cells and extended warranty.
Upgraded Ni-MH battery with enhanced safety and global certification.
Durable NiCD battery with strong build and one-year warranty.
Can I use a charger from a different Roomba model?
No, it is not recommended. Chargers can vary significantly between models, even if they appear physically similar. Using an incompatible charger can fail to charge your robot or potentially damage its electronics. Always use a charger that is specified for the Roomba 4110.
If you suspect your current charger is faulty or incompatible, ensure you purchase one specifically designed for your Roomba 4110.
Official OEM replacement with better charging contacts and wide compatibility.
Affordable replacement with global voltage support and 12-month warranty.
Comes with extra tools and accessories for enhanced usability.
Durable replacement with OEM components and excellent customer support.
What is the very first thing I should do if my Roomba stops charging?
The first and most common fix is to thoroughly clean the metal charging contacts on the bottom of the Roomba and on the charging station. Use a dry cloth or a cotton swab with isopropyl alcohol to remove any grime that could be blocking the electrical connection.
Conclusion
A Roomba 4110 that fails to charge is a solvable problem. By systematically working through the diagnostic steps—starting with cleaning the contacts, checking the battery, and inspecting the power source—you can often identify the issue quickly. Simple actions like resetting the software or ensuring the device doesn’t overheat can also make a significant difference. If a hardware component like the battery or charging station has failed, replacements are readily available. By following this guide and adopting a routine of regular maintenance, you can ensure your robotic vacuum remains a reliable and effective part of your home for years to come.