
Is your Roomba handle broken, making it difficult to move your trusty cleaning companion? Don’t worry, replacing it is a straightforward process. This guide will walk you through the steps to replace your Roomba handle, whether you opt for an official replacement or a creative DIY solution.
Why Replacing Your Roomba Handle Matters
A broken Roomba handle can be more than just an inconvenience. It can make it difficult to carry the Roomba, especially up and down stairs, potentially leading to further damage. Replacing the handle ensures you can easily transport your Roomba and maintain its longevity. In this article, you’ll learn how to identify the right replacement handle, safely disassemble your Roomba, and install the new handle securely.
Identifying the Right Replacement Handle
Before you start, you need to determine the correct replacement handle for your Roomba model. Roomba handles vary depending on the series (e.g., 500, 600, 700, 800, i series). Here’s how to find the right one:
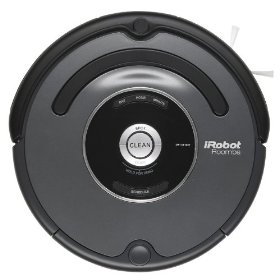
- Check Your Roomba Model: Look for the model number on the bottom of your Roomba.
- Official iRobot Parts: Visit the iRobot website or authorized retailers to find genuine replacement handles.
- Third-Party Options: Websites like Amazon, eBay, and AliExpress offer a variety of aftermarket handles. Be sure to check compatibility and read reviews.
- DIY Alternatives: Consider using a drawer handle or 3D-printed handle for a more durable and cost-effective solution.
Tools and Materials You’ll Need
Having the right tools and materials will make the replacement process smoother and more efficient. Here’s a checklist of what you’ll need:
- Replacement Handle: Official iRobot handle or a suitable alternative.
- Screwdriver: Usually a Phillips head screwdriver. The size will depend on your Roomba model.
- Small Drills (for DIY): 3/4/5mm drills may be needed if you opt for a drawer handle.
- Drawer Handle (for DIY): A door or drawer handle with a screw hole distance of about 13cm.
- Screws (for DIY): Ensure they fit your chosen handle and are suitable for the Roomba’s plastic.
- Washers (optional): For added stability with DIY handles.
- Prying Tool or Screwdriver: For gently removing the Roomba’s faceplate.
- Clean Cloth: To clean the camera lens (if applicable).
Step-by-Step Guide to Replacing the Roomba Handle
Follow these steps to safely and effectively replace your Roomba handle:
- Preparation:
- Turn off the Roomba and place it on a flat surface.
- Remove the dust bin.
- Disassembly:
- Gently remove the faceplate. For some models, you can use a prying tool or screwdriver to lift the edges. On i-series models, tilt the robot with the bumper facing down, locate the finger holes, and use gentle pressure to release the faceplate
- Remove the battery, side brush, bottom cover, and brush cage (if necessary for your model).
- Handle Removal:
- Locate the screws holding the broken handle in place. These are usually underneath the faceplate.
- Unscrew and remove the broken handle.
- DIY Handle Preparation (if applicable):
- If using a drawer handle, mark the drill points on the Roomba’s base.
- Drill two holes into the base plastic piece from above to avoid damaging internal components
- Reinstall the top cover, then drill from below through the holes to align with the top cover.
- Handle Installation:
- Position the new handle and align the screw holes.
- Screw the new handle into place. If using a DIY handle, use appropriate screws and washers for stability
- Reassembly:
- Reattach the faceplate by pressing down until it snaps into place
- Reinstall the battery, side brush, bottom cover, and brush cage.
- Replace the dust bin.
- Testing:
- Turn on the Roomba and ensure the new handle is secure and functional.
Pro Tips for a Smooth Replacement

- Take Photos: Before disassembling, take photos to remember the placement of parts.
- Gentle Prying: When removing the faceplate, use gentle pressure to avoid cracking the plastic.
- Screw Management: Keep screws organized to prevent losing them or mixing up sizes.
- Test Fit: Before securing the new handle, test the fit to ensure proper alignment.
- Cleanliness: Wipe down the Roomba’s surface and camera lens (if applicable) during reassembly.
Troubleshooting Common Problems

- Faceplate Won’t Come Off: Ensure you are applying pressure at the correct points. Use a plastic prying tool to avoid damage.
- Screws Won’t Tighten: Check if the screw holes are stripped. Use slightly larger screws or螺纹 sealants to create a tighter grip.
- DIY Handle is Unstable: Ensure the screws are long enough and consider using washers for added stability.
- Roomba Not Working After Reassembly: Double-check all connections and ensure all parts are correctly installed.
Alternatives to Replacing the Handle
If you’re not ready to replace the handle, consider these temporary fixes:
- Super Glue: For minor cracks, super glue can provide a temporary hold.
- Epoxy: A stronger adhesive for more significant damage.
- 3D-Printed Brackets: Design and print custom brackets to reinforce the broken handle.
FAQ
What if I can’t find a replacement handle for my specific model?
Check for handles from similar models within the same series. They may be compatible. If not, consider a DIY solution.
How much does it cost to replace a Roomba handle?
Official replacement handles can range from $20 to $50, depending on the model. DIY solutions can cost as little as $5-$10.
Can I use a 3D-printed handle?
Yes, many users have successfully used 3D-printed handles. Ensure the material is durable and the design is robust.
Is it worth replacing the handle, or should I buy a new Roomba?
If your Roomba is otherwise functioning well, replacing the handle is a cost-effective solution.
Where can I find a disassembly video for my Roomba model?
YouTube is a great resource for finding disassembly videos. Search for “Roomba [Your Model Number] Disassembly.”
What are the most common reasons for a Roomba handle to break?
Common causes include carrying the Roomba improperly, children mishandling it, or general wear and tear.
Tips, Warnings, and Best Practices
- Safety First: Always turn off and unplug the Roomba before disassembly.
- Avoid Force: Never force any parts during disassembly or reassembly.
- Check Compatibility: Ensure the replacement handle is compatible with your specific Roomba model.
- Read Reviews: If buying a third-party handle, read reviews to assess its quality and durability.
- Consider a Protective Case: To prevent future damage, consider using a Roomba carrying case.
Conclusion
Replacing your Roomba handle is a manageable task that can significantly extend the life and usability of your cleaning robot. Whether you choose an official replacement, a DIY solution, or a temporary fix, following these steps will help you get your Roomba back in action.
By investing a little time and effort, you can avoid the cost of a new Roomba and keep your home clean and tidy. So, grab your screwdriver, choose your replacement handle, and let’s get started!