
Is your Roomba acting a bit strange, stopping unexpectedly, or refusing to go near dark surfaces? It might be a problem with its cliff sensors. These sensors prevent your Roomba from tumbling down stairs or ledges, but they can sometimes malfunction or become overly sensitive. Replacing a faulty cliff sensor can restore your Roomba’s navigation and get it back to cleaning efficiently. This guide will walk you through the process.
Why Replacing the Cliff Sensor Matters
Roomba cliff sensors are crucial for safe and effective cleaning. If they’re not working correctly, your Roomba might:
- Avoid cleaning certain areas.
- Get stuck frequently.
- Be at risk of falling.
Replacing a malfunctioning sensor ensures your Roomba can navigate your home safely and clean all intended areas.
Identifying Cliff Sensor Issues
Before you jump into replacing the cliff sensor, make sure that’s really the problem. Here’s how to troubleshoot:
- Error Messages: Does your Roomba display an error message related to cliff sensors, such as “Please inspect and clean Roomba’s cliff sensors”?
- Erratic Behavior: Does your Roomba stop at edges when there’s no drop-off or back away from certain areas for no apparent reason?
- Dark Surface Problems: Does your Roomba refuse to travel over dark carpets or flooring? This is a common issue where the sensors mistake the dark surface for a cliff.
- Cleaning and Testing: Clean the sensors with a dry microfiber cloth. Then, place the Roomba near a simulated “cliff” (like a towel) to see if the sensors react appropriately.
If cleaning doesn’t solve the problem and you’re still experiencing these issues, replacing the sensor might be the best solution.
Preparation Steps

Before you begin, gather the necessary tools and take some precautions:
- Gather Your Tools:
- Small Phillips head screwdriver
- Replacement cliff sensor (ensure it’s compatible with your Roomba model)
- Clean, dry microfiber cloth
- Small brush or compressed air (optional, for cleaning)
- Power Down: Turn off your Roomba and disconnect it from the charging base.
- Work Area: Choose a well-lit, clean workspace to prevent losing small parts.
- Documentation: Take pictures as you disassemble the Roomba. This will help you remember how everything goes back together.
How to Replace the Roomba Cliff Sensor
Here are the general steps to replace a Roomba cliff sensor. Note that specific steps may vary slightly depending on your Roomba model, so always consult your Roomba’s service manual if available.
- Access the Sensors:
- Flip the Roomba over so the bottom is facing up.
- Remove the side brush and battery (if necessary for your model) to access the bottom cover screws.
- Unscrew and remove the bottom cover.
- Locate the Faulty Sensor:
- Identify the cliff sensors. They are usually located near the edge of the Roomba.
- Visually inspect the sensors for any damage or loose connections.
- Disconnect the Sensor:
- Carefully disconnect the faulty sensor from the main circuit board. This usually involves unplugging a small connector.
- Take note of the connector’s orientation before disconnecting it.
- Remove the Old Sensor:
- Depending on the model, the sensor might be held in place by screws or clips.
- Remove any screws or release the clips to free the sensor.
- Install the New Sensor:
- Place the new sensor into the designated slot.
- Secure it with screws or clips.
- Reconnect the Sensor:
- Plug the sensor connector back into the main circuit board, ensuring correct orientation.
- Reassemble the Roomba:
- Replace the bottom cover and screws.
- Reinstall the side brush and battery (if removed).
- Test the Roomba:
- Turn the Roomba on and place it on the floor.
- Observe its behavior near edges or dark surfaces to ensure the new sensor is working correctly.
Troubleshooting Guide
Even with careful installation, you might encounter some issues. Here are a few common problems and solutions:
- Roomba Still Not Detecting Cliffs:
- Double-check the sensor connection.
- Ensure the sensor is correctly seated in its housing.
- Try cleaning the sensor again with compressed air.
- Roomba is Now Overly Sensitive:
- The new sensor might be more sensitive than the old one.
- Check if there is updated firmware available for your Roomba model that might address sensor sensitivity.
- Roomba Giving a Different Error:
- Consult your Roomba’s manual to understand the new error code.
- Ensure all components were reconnected correctly during reassembly.
- Roomba Not Working at All:
- Double-check the battery connection and charge level.
- Review all steps to ensure nothing was missed during reassembly.
- Roomba Still Gets Stuck on Dark Surfaces:
- If the issue persists specifically on dark surfaces, consider using the tape method as a temporary workaround (see below).
Pro Tips
- Sensor Calibration: Some Roomba models may benefit from sensor calibration after replacement. Check your Roomba’s manual for instructions.
- Genuine Parts: Use genuine iRobot replacement parts whenever possible to ensure compatibility and performance.
- Cleanliness: Regularly clean your Roomba’s sensors to prevent future issues.
Alternatives/Variations
If replacing the sensor doesn’t fully resolve the issue, or if you want a temporary workaround, consider these alternatives:
- Virtual Walls: Use iRobot’s Virtual Wall barriers to block off problematic areas.
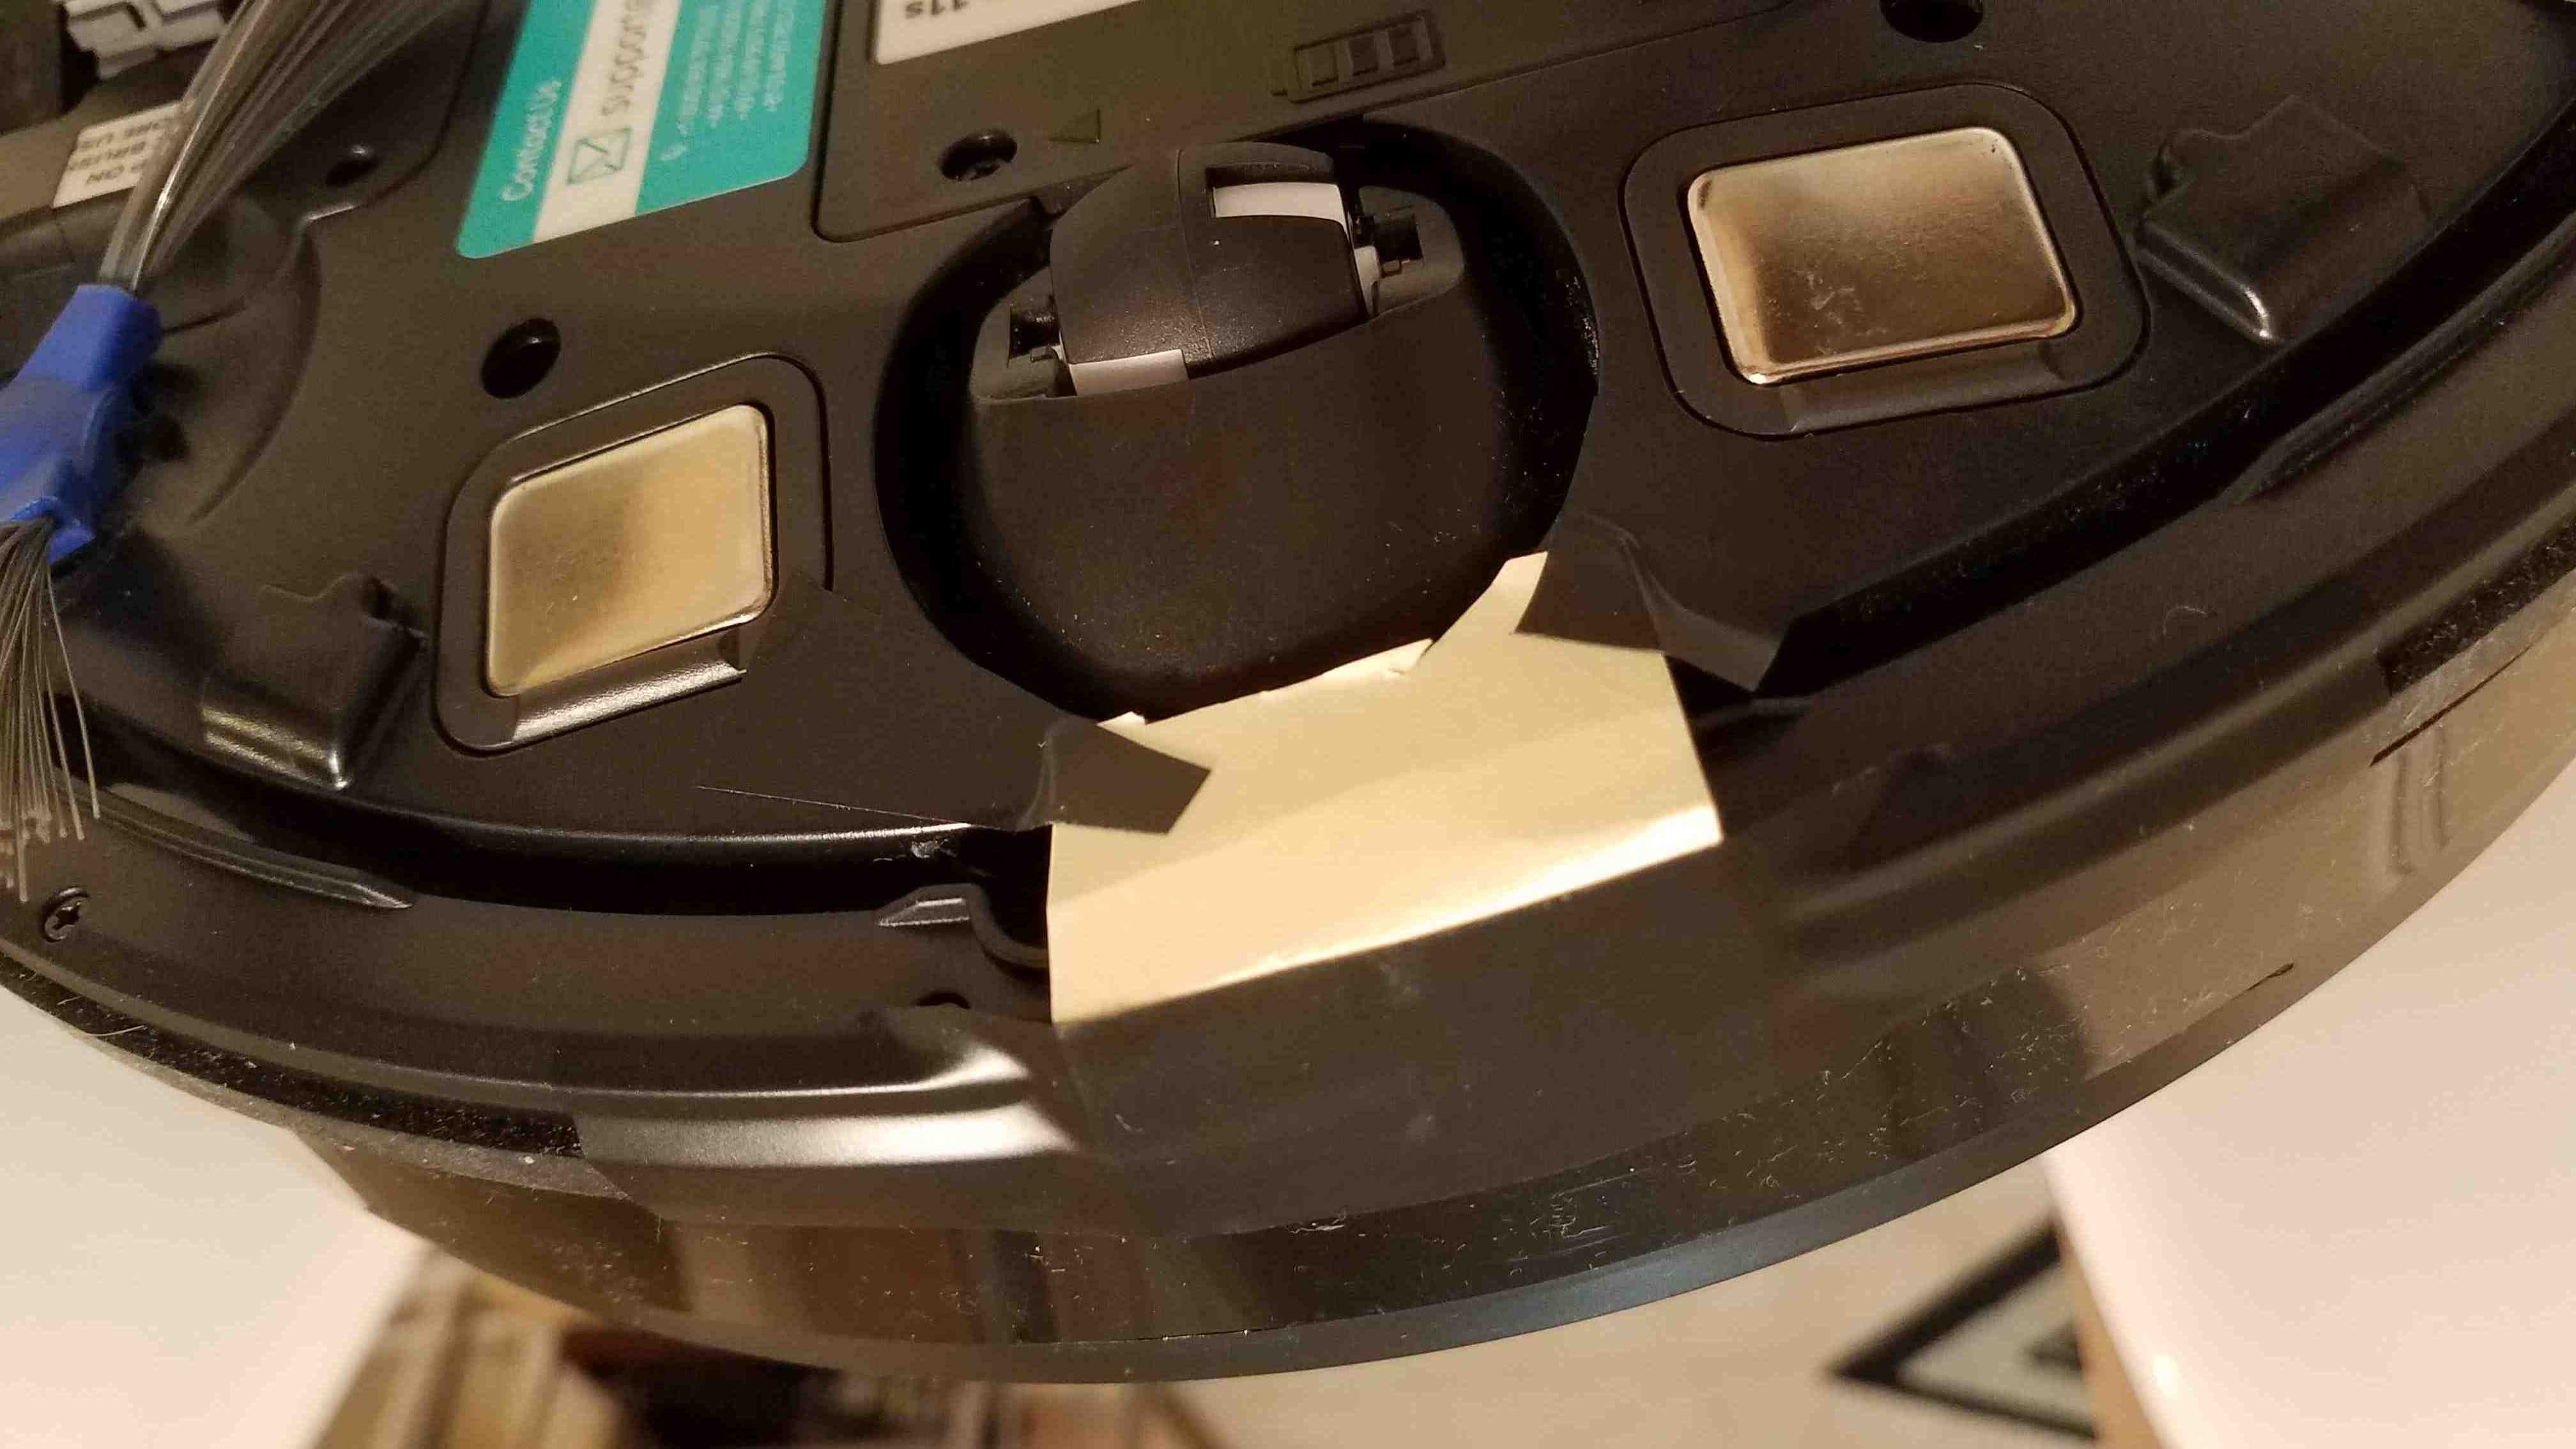
- Tape Method: As mentioned earlier, covering the cliff sensors with a few layers of white paper towel secured with Scotch tape can sometimes trick the Roomba into ignoring dark surfaces. Be cautious when using this method near actual cliffs or stairs.
FAQ
What are Roomba cliff sensors?
Roomba cliff sensors are infrared sensors located on the bottom of the device. They emit infrared light, which bounces back to the sensor when a surface is detected. If no surface is detected (like at the edge of a staircase), the Roomba recognizes a “cliff” and changes direction to avoid falling.
Why is my Roomba detecting cliffs on dark carpets?
Dark carpets absorb more infrared light than light-colored surfaces. This can trick the Roomba’s cliff sensors into thinking there’s a drop-off, even when there isn’t.
How often should I clean my Roomba’s cliff sensors?
It’s a good practice to clean the cliff sensors every few weeks, or more often if you notice your Roomba behaving erratically. Use a clean, dry microfiber cloth to gently wipe the sensor openings.
Can I disable the cliff sensors permanently?
While it’s possible to disable the cliff sensors using tape or other methods, it’s not recommended, especially if you have stairs or other drop-offs in your home. Disabling the sensors can put your Roomba at risk of falling and being damaged.
Where can I buy replacement cliff sensors for my Roomba?
You can purchase replacement cliff sensors from the iRobot website, authorized retailers, or online marketplaces like Amazon. Be sure to choose a sensor that is compatible with your specific Roomba model.
Is it difficult to replace the cliff sensors myself, or should I seek professional repair?
Replacing the cliff sensors is generally a straightforward process that most people can do themselves with basic tools. However, if you’re not comfortable disassembling your Roomba or are unsure about any of the steps, it’s always best to seek professional repair services.
Tips, Warnings, and Best Practices
- Always disconnect the Roomba from the charging base and turn it off before performing any maintenance or repairs.
- Be gentle when disconnecting and reconnecting the sensor connectors to avoid damaging the circuit board.
- If you’re unsure about any step, consult your Roomba’s service manual or seek professional help.
- Regularly clean your Roomba’s sensors and other components to ensure optimal performance and longevity.
Conclusion
Replacing your Roomba’s cliff sensor can be a straightforward solution to restore its navigation and cleaning efficiency. By following these steps and taking the necessary precautions, you can get your Roomba back to work, keeping your floors clean and your home safe. Remember to always prioritize safety and consult your Roomba’s manual for specific instructions related to your model.