
A Roomba 585 that refuses to charge can bring your automated cleaning routine to a frustrating halt. When your robotic vacuum can’t power up, it’s often a sign of a simple, fixable issue rather than a catastrophic failure. From dirty electrical contacts to a misaligned docking station, the reasons for charging failures are varied but typically straightforward to diagnose. This guide is designed to walk you through the most common causes and provide clear, actionable solutions.
By methodically working through these steps, you can identify the root of the problem and restore your Roomba to full working order. We will explore specific error codes that point to charging faults, detail a systematic troubleshooting process, and cover advanced diagnostic techniques. Furthermore, you will learn essential preventative maintenance tips to minimize the chances of these issues recurring, ensuring your Roomba 585 remains a reliable cleaning companion for years to come.
Decoding Roomba Charging Error Codes
Your Roomba communicates its status and problems through a series of audible beeps and error codes. When it comes to charging failures, two codes are particularly important to recognize. These codes provide a valuable starting point for your troubleshooting efforts by narrowing down the potential causes of the issue.
Error 6: A Charging System Fault
If your Roomba reports an Error 6, it is signaling a problem within the charging system itself. This is a general alert that can point to a few different components. Most frequently, the fault lies with the battery or the electrical contacts that connect the robot to its charging base. The battery may have reached the end of its life, or the contacts on either the robot or the dock may be too dirty or corroded to allow electricity to pass through effectively.
Symptoms accompanying Error 6 include the Roomba failing to even begin the charging process when placed on the dock, the charging indicator lights flickering erratically or not illuminating at all, or the device emitting beeps and verbal error messages.
Error 8: Dock Alignment Failure
An Error 8 indicates that your Roomba is having trouble physically connecting with its charging dock. The robot knows it needs to charge and attempts to return home, but it cannot achieve the precise alignment required for the charging contacts to meet. This can happen if the dock is placed on an uneven surface, if there are objects obstructing the path to the dock, or if the sensors involved in the docking process are dirty.
Common signs of an Error 8 problem include the Roomba bumping into the dock repeatedly without locking on, circling the dock without successfully mounting it, or simply stopping near the dock without initiating a charge. As with Error 6, you might also see flashing or absent indicator lights and receive an audible error message.
A Step-by-Step Guide to Fixing Charging Issues
When your Roomba 585 won’t charge, a methodical approach is the best way to find and fix the problem. Start with the simplest and most common solutions first before moving on to more complex diagnostics.
First Step: Clean the Charging Contacts
The most frequent cause of charging failure is obstructed charging contacts. Over time, these small metal plates on the underside of the Roomba and on the charging dock can accumulate dust, dirt, and even a layer of corrosion or oxidation. This buildup acts as a barrier, preventing a solid electrical connection and stopping the flow of power.
How to Properly Clean the Contacts
- Power Down: For safety, always turn your Roomba off completely before performing any maintenance.
- Locate Contacts: Turn the robot over to find the two metallic charging contacts on its underside. You will find the corresponding contacts on the face of the charging dock.
- Wipe Away Debris: Use a soft, clean, and dry cloth to gently wipe down all four contact points (two on the robot, two on the dock). This will remove any loose dust and grime.
- Address Corrosion: If you notice any green or black buildup, which indicates corrosion, you will need a slightly stronger cleaning agent. Lightly dampen a cotton swab with rubbing alcohol and scrub the contacts firmly.
- Ensure Dryness: After cleaning with alcohol, it is crucial to let the contacts air dry completely for several minutes before attempting to charge the Roomba again. Placing the robot on the dock while the contacts are still wet can cause damage.
Second Step: Inspect the Charging Dock
The Home Base, or charging dock, is just as important as the robot itself. If the dock is not functioning correctly, your Roomba will never receive a charge, regardless of the robot’s condition.
Clear Debris and Obstructions
Remove any dust or debris that has collected on or around the charging dock. Ensure there are no objects, like toys or shoes, that could physically block the Roomba from reaching its target.
Check for Physical Damage
Carefully inspect the dock for any signs of physical damage, such as cracks in the plastic or misaligned components. If the dock has been dropped or knocked over, it may be internally damaged.
If your Roomba’s charging dock is physically damaged or not providing power, replacing it can resolve charging issues and restore your Roomba’s ability to recharge properly.

Universal charging dock for iRobot Roomba 585 and compatible models.

Premium replacement dock with accessories for Roomba 585.

Durable and easy-to-install charging base for iRobot Roomba 585.
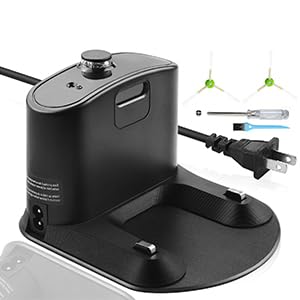
Budget-friendly dock with extra accessories for Roomba 585.
Ensure a Stable and Level Surface
The charging dock must be placed on a hard, flat surface. If it sits on a plush carpet or an uneven floor, it can tilt slightly when the Roomba attempts to dock, preventing a secure connection. This is a primary cause of the previously mentioned Error 8.
Test the Power Source
The problem might not be with your Roomba at all. Inspect the dock’s power cord for any frays, kinks, or visible damage. To rule out a faulty electrical outlet, unplug the charging dock and plug it into a different outlet in your home that you know is working.
If the power cord for your Roomba’s charging dock is frayed, damaged, or lost, replacing it ensures a consistent power supply to the dock, allowing your Roomba to charge reliably.
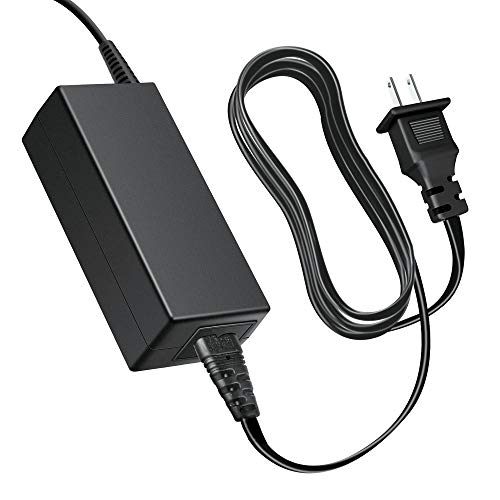
High-efficiency power adapter with safety protections.
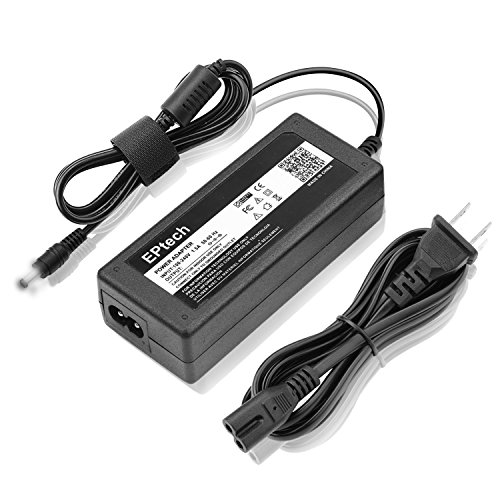
Widely compatible with 500/700/800 series models.

Safe with multiple protection features included.

Ideal replacement for integrated home base models.
Third Step: Evaluate the Battery’s Health
Like all rechargeable batteries, the one in your Roomba 585 has a finite lifespan. After hundreds of charging cycles, it will begin to lose its ability to hold a charge. If your cleaning and dock inspections haven’t solved the problem, a faulty battery is the next likely suspect.
Look for these telltale signs of a failing battery: * Reduced Runtime: The Roomba runs for a much shorter period than it used to before needing to recharge. * Failure to Hold a Charge: The battery seems to charge fully, but it depletes very quickly, sometimes in just a few minutes. * Inconsistent Behavior: The device shows frequent and unpredictable error messages related to power or charging, even after cleaning the contacts.
If you observe these symptoms, a battery replacement is the most probable solution.
If your Roomba 585 is experiencing reduced runtime, failing to hold a charge, or displaying inconsistent power-related errors, replacing the battery is often the most effective solution to restore its full cleaning capability.
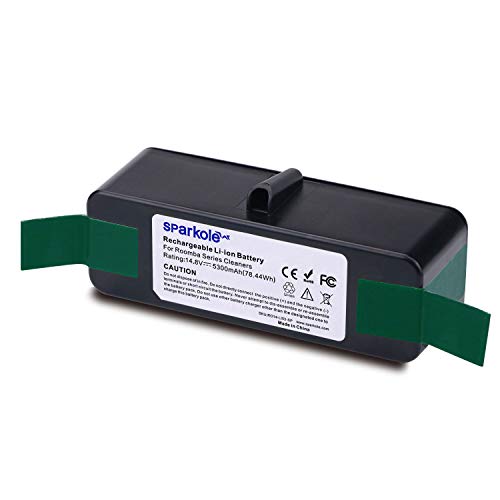
Longest runtime and extended battery life with high safety standards

High-capacity Ni-MH battery with extended warranty and compatibility

Upgraded 5.0Ah battery with full safety and protection features

High-capacity lithium battery with long-term durability and safety
Advanced Troubleshooting Tactics
If the basic steps have not resolved your charging issue, there are more advanced measures you can take before deciding on a replacement or professional repair.
Activating Diagnostic Mode
The Roomba 585 has a built-in diagnostic mode that can provide more specific information about internal faults. This mode runs a series of tests and displays codes that correspond to specific hardware problems.
- Begin with the Roomba off its dock. Press and hold the Clean button until the device beeps.
- Release the Clean button, then immediately press the Spot and Max buttons at the same time.
- The Roomba will enter its diagnostic mode and begin displaying a series of codes.
- To interpret these codes, you will need to refer to your Roomba 585 user manual or search for a diagnostic code list for your specific model on iRobot’s official support website.
When to Contact iRobot Support
If you have exhausted all troubleshooting steps, including running diagnostics, and the Roomba still won’t charge, it is time to contact customer support. The iRobot support team has access to more detailed technical information and can provide guidance for complex issues or arrange for a repair.
Before you call or email, be prepared with the following information: * Your Roomba’s model number (585) and serial number. * Any error codes the device has displayed. * A clear description of the problem and the troubleshooting steps you have already taken.
Proactive Maintenance for Your Roomba 585
Preventing problems is always easier than fixing them. A consistent maintenance schedule will not only help you avoid charging errors but will also extend the overall lifespan and improve the cleaning performance of your Roomba.
Establish a Regular Cleaning Routine
Make cleaning a part of your weekly chores. This includes wiping down the charging contacts on both the robot and the dock, clearing any debris from the dock area, and checking the brushes and wheels for tangled hair and fibers.
Correct Storage Practices
Proper storage is key to protecting your Roomba’s battery and internal components. When not in use, the robot should always be sitting on its charging dock. This keeps the battery topped off and ready for the next cleaning cycle. Avoid storing the unit in locations with extreme temperatures or high humidity, such as a garage or basement, as this can degrade the battery and electronics over time. Finally, keep the dock in an area where it is less likely to be bumped or disturbed by pets and children.
Keep the Firmware Updated
Firmware is the software that controls your Roomba’s operations. iRobot occasionally releases updates that can fix bugs and improve performance, including the algorithms that manage charging and docking. To update the firmware, connect your Roomba to your home’s Wi-Fi network using the iRobot Home app. The app will notify you when an update is available. Simply follow the on-screen instructions to install it, and remember to restart the Roomba afterward.
Frequently Asked Questions (FAQ)
What do Roomba Error 6 and Error 8 mean?
Error 6 indicates a general charging system problem, often related to a faulty battery or dirty charging contacts. Error 8 signifies an alignment failure, meaning the robot cannot properly connect with its charging dock due to obstructions, an uneven surface, or dirty sensors.
How often should I clean my Roomba’s charging contacts?
It is a best practice to wipe the charging contacts on both the robot and the dock at least once a week with a soft, dry cloth. If you notice corrosion, use a cotton swab with rubbing alcohol to clean them more thoroughly.
My Roomba bumps into the dock but won’t charge. What’s the problem?
This is a classic symptom of an alignment issue, often triggering Error 8. Check that the dock is on a hard, level surface. Clean any obstructions from around the dock and wipe down the robot’s sensors and charging contacts.
Can a bad power outlet stop my Roomba from charging?
Absolutely. The charging dock requires a steady supply of power. If the outlet it’s plugged into is faulty, the dock will not function. Always test the dock in a different wall outlet to eliminate this as a possible cause.
Conclusion
A Roomba 585 that fails to charge is usually suffering from a common and fixable issue. By following a structured troubleshooting process—starting with cleaning the charging contacts, inspecting the dock and its power supply, and then evaluating the battery’s health—you can resolve the majority of charging problems yourself. For more persistent issues, advanced tools like the diagnostic mode and iRobot customer support are valuable resources.
Ultimately, the key to a long and productive life for your robotic vacuum is consistent, proactive maintenance. Regular cleaning and proper care will prevent most charging failures from ever occurring, ensuring your Roomba 585 is always ready to keep your floors clean.