
The Roomba 4000 series robotic vacuum has long been a reliable assistant in maintaining clean homes. Its automated cleaning cycles depend entirely on its ability to return to its base and recharge successfully. When this crucial function fails, the convenience of this household helper comes to an abrupt halt, leaving you with a drained robot and a frustrating problem to solve. A Roomba that won’t charge can be caused by a variety of issues, ranging from simple maintenance oversights to more complex hardware or software failures.
This comprehensive guide will walk you through the essential troubleshooting steps to diagnose and resolve charging problems with your Roomba 4000. We will explore everything from the most common culprits, like dirty charging contacts and loose connections, to battery health diagnostics and software resets. By systematically working through these solutions, you can identify the root cause of the issue and get your robotic vacuum back to its efficient, self-sufficient operation.
Why Isn’t My Roomba 4000 Charging?
When your Roomba 4000 fails to charge, the problem typically falls into one of a few key categories. The most frequent cause is an issue with the physical connection between the robot and its charging station. This can be due to dirt, debris, or wear and tear. Another common area of concern is the battery itself, which can degrade over time or develop a fault. Less frequently, the problem might stem from a software glitch that can be resolved with a reset or a firmware update. Finally, environmental factors, such as the placement of the charging station or interference from other devices, can also play a role. By methodically investigating each of these potential causes, you can effectively pinpoint and fix the problem.
Inspecting the Charging Station and Connections
The charging station, or Home Base, is the lifeline for your Roomba. A flawless connection between the base and the robot is non-negotiable for charging to occur. Follow these steps to ensure the hardware is in perfect working order.
Clean the Charging Contacts
Over time, a thin layer of dust and grime can build up on the metal charging contacts on both the Roomba and the charging station. This accumulation acts as an insulator, preventing electricity from flowing to the battery.
- Action: Lightly dampen a clean melamine foam sponge (like a Magic Eraser) or a soft cloth with isopropyl alcohol. Gently wipe the silver charging contacts on the Home Base and the corresponding contacts on the underside of your Roomba. Ensure they are completely dry before attempting to charge the robot again. This simple cleaning step resolves a majority of charging issues.
Secure All Physical Connections
A loose wire can easily interrupt the power flow. It’s important to verify that every connection point is secure.
- Action: Start at the wall outlet. Unplug the charging station’s power cord and plug it back in firmly. Follow the cord to the charging station and ensure it is securely inserted into the port on the base. A slight wiggle can sometimes be enough to break the connection.
Examine Contacts for Wear and Tear
With repeated docking, the metal charging contacts can become scratched, corroded, or worn down. Damaged contacts cannot create the solid connection needed for reliable charging.
- Action: Closely inspect the contacts on both the robot and the base. Look for deep scratches, discoloration, or any signs of physical damage. If the contacts appear significantly worn, they may need to be replaced. For this, it is best to contact iRobot support or a certified repair center.
If the charging station’s power cord is damaged or lost, replacing it is necessary to ensure a consistent power supply to your Roomba.

Complete replacement charging base for Roomba 4000 and newer series.

Affordable replacement power cord for Roomba Home Base.
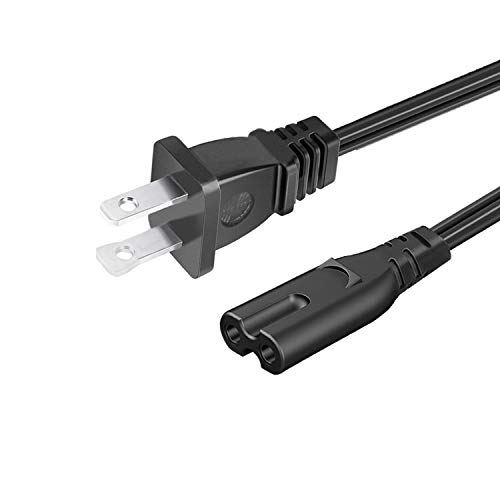
Extended power cable for flexible placement of Roomba charging dock.
Verify the Power Source
Before assuming the Roomba or its base is faulty, confirm that the power outlet itself is working correctly.
- Action: Unplug the Roomba’s charging station and plug another device, such as a lamp or a phone charger, into the same outlet. If that device doesn’t work, the problem is with the outlet or your home’s circuit breaker, not the Roomba. If the other device works, you can confidently rule out the outlet as the source of the issue.
Diagnosing Roomba Battery Problems
The rechargeable battery is the heart of your Roomba. Like all batteries, it has a limited lifespan and can be the source of charging failures.
The Issue of Battery Degradation
A Roomba 4000 battery is designed for hundreds of charge cycles, but its capacity will inevitably diminish over time. An old, degraded battery may appear to charge but will hold power for only a very short time, or it may fail to accept a charge at all.
- Action: If your Roomba is several years old and has been used frequently, the battery is the most likely suspect. The most effective solution for a worn-out battery is to purchase a replacement. Ensure you buy a battery that is compatible with the Roomba 4000 series.
If your Roomba’s battery is old or no longer holding a charge, replacing it is the most effective solution to restore full functionality.

High-capacity Ni-MH replacement for iRobot Roomba 400 series.

Extended runtime and 12-month warranty for Roomba 400 series.

High-capacity certified replacement for iRobot Roomba 400 series.
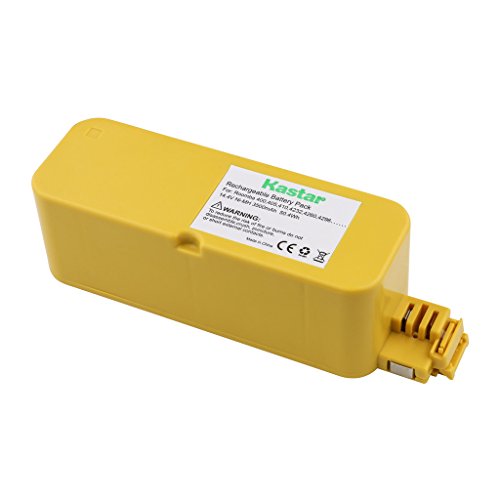
Durable Ni-MH battery with 3-year warranty for Roomba 4000.
How to Spot a Faulty Battery
Sometimes, a battery can fail prematurely due to a manufacturing defect. Signs of a faulty battery can include the Roomba not powering on at all, even when placed on the charger, or error codes related to the battery.
- Action: If you have access to a second, known-good battery, swapping it into your Roomba is a quick way to diagnose the problem. If the Roomba charges with the new battery, you have confirmed the original battery is faulty. If not, the problem likely lies elsewhere.
Performing a Battery Reset
Occasionally, a communication error between the Roomba and its battery can prevent charging. A simple reset can sometimes re-establish this connection.
- Action: To perform a basic reset, unplug the power cord from the wall outlet and from the charging station. Wait for at least 30 seconds. This allows any residual power in the circuits to dissipate. After the wait, plug everything back in and place the Roomba back on its base to see if charging resumes.
Resolving Software and Firmware Glitches
Your Roomba’s behavior, including its charging protocols, is governed by its internal software, or firmware. Glitches or outdated versions can lead to unexpected problems.
The Importance of Firmware Updates
Manufacturers periodically release firmware updates to fix bugs, improve performance, and enhance features. An outdated firmware version could contain a glitch that affects the charging process.
- Action: Check the iRobot HOME App or the official iRobot website for any available firmware updates for your Roomba 4000 model. Keeping the firmware current is a critical part of routine maintenance and can prevent a host of operational issues.
When to Perform a Factory Reset
If you suspect a persistent software issue that isn’t resolved by a simple power cycle, a factory reset may be necessary. This will revert the Roomba to its original settings, erasing any custom schedules or network information.
- Action: A factory reset should be considered a more advanced step. The procedure typically involves pressing and holding a combination of buttons on the robot for several seconds. It’s essential to consult your Roomba 4000’s user manual for the specific instructions for your model to avoid performing the reset incorrectly.
Correcting Physical and Environmental Roadblocks
The environment where your Roomba charges can directly impact its ability to dock and charge successfully.
Ensuring Proper Docking Alignment
For charging to begin, the Roomba must be perfectly aligned with the charging station so the metal contacts meet precisely.
- Action: If the Roomba fails to dock on its own, manually place it on the Home Base. Ensure it is centered and sits flush against the base. You should hear a tone or see an indicator light confirm that the connection has been made. If the robot seems to struggle to find the base, ensure there is ample clear space (at least 3-5 feet) around the front and sides of the station.
If your Roomba’s charging station is damaged, lost, or not functioning correctly, a replacement is essential for your Roomba to charge.

Official OEM replacement for Roomba 4000 series with enhanced charging contacts

Premium replacement dock with included power cord and global voltage support
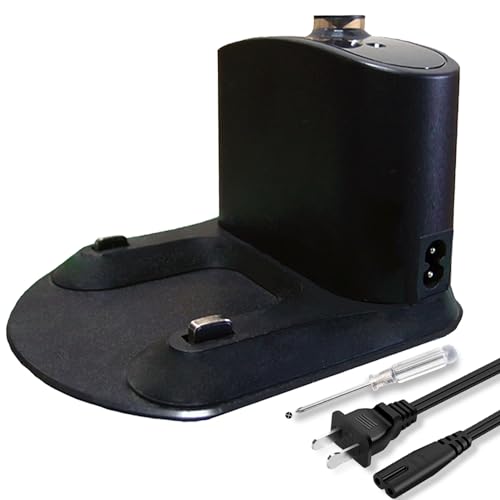
Value-packed replacement with accessories and comprehensive warranty

Official parts version with comprehensive accessory pack and support
Clearing Debris and Foreign Objects
Small objects like pet hair, carpet fibers, or other debris can get lodged around the charging contacts or the docking area, physically preventing a solid connection.
- Action: Perform a visual inspection of the underside of the Roomba and the surface of the Home Base. Remove any visible debris.
Choosing the Right Surface
The charging station needs a stable, level foundation to function correctly.
- Action: Always place the Home Base on a hard, flat floor. Avoid placing it on plush carpets or uneven surfaces, as this can cause the base to tilt, preventing the Roomba from docking properly.
Advanced Steps and Error Codes
If the basic troubleshooting steps don’t yield results, you may need to delve deeper or seek professional assistance.
Interpreting Charging Error Codes
Your Roomba is designed to communicate problems through a series of beeps or numbered error codes. Paying attention to these codes can help you narrow down the issue.
- Charging Errors (5-7): These codes typically point to a general problem with the charging system. This could involve the charger, the connection, or the robot’s internal charging circuits. Re-check all connections and clean the contacts.
- Battery Errors (11-13): These codes are more specific and suggest a problem with the battery itself. This could mean the battery is not installed correctly, is faulty, or is not compatible.
For any error code, your primary resource should be the Roomba 4000 user manual, which provides detailed troubleshooting steps for each specific code.
When to Seek Professional Help
There comes a point where DIY fixes are not enough. If you have exhausted all the steps in this guide and your Roomba still won’t charge, it’s time to call in the experts.
- iRobot Customer Support: The official support team can provide specialized guidance over the phone and help determine if your unit requires repair or replacement, especially if it is still under warranty.
- Authorized Service Centers: For out-of-warranty repairs, an authorized iRobot service center has the tools and expertise to diagnose and fix complex internal hardware issues safely.
Frequently Asked Questions (FAQ)
What is the most common reason a Roomba 4000 stops charging?
The most frequent cause is dirty or dusty charging contacts on either the Roomba itself or the Home Base. This creates a barrier that prevents a solid electrical connection. A thorough cleaning of these contacts with a dry or lightly dampened cloth often solves the problem immediately.
How can I perform a basic reset on my Roomba?
To perform a simple power cycle or reset, unplug the charging station’s power cord from both the wall outlet and the base itself. Wait for 30 seconds to allow the internal electronics to fully discharge, then plug everything back in. Place the Roomba back on the charger to see if the issue is resolved.
What do charging error codes 5, 6, or 7 mean?
These error codes indicate a general charging system failure. It means the robot is not receiving a charge from the base. This could be due to dirty contacts, a faulty power cord, a problem with the charging station, or an issue within the robot’s charging circuitry.
Does the surface where I place the charging station matter?
Yes, absolutely. The charging station should always be placed on a hard, level surface. Placing it on an uneven floor or a thick carpet can cause it to tilt, preventing the Roomba from aligning correctly with the charging contacts when it attempts to dock.
Conclusion
A Roomba 4000 that refuses to charge can be a significant inconvenience, but it is rarely an unsolvable problem. By working through the troubleshooting steps methodically—starting with the simplest solutions like cleaning contacts and checking connections, then moving on to battery diagnostics and software resets—you can often fix the issue yourself. Diligent maintenance is the key to preventing these problems from occurring in the first place.
Remember to keep the charging contacts clean, ensure the Home Base has a clear and level space, and check for firmware updates periodically. If after all your efforts the problem persists, do not hesitate to reach out to iRobot’s professional support network. With a little patience and methodical troubleshooting, you can restore your Roomba’s power and get it back to work keeping your floors clean.