
A Roomba that fails to clean effectively can be a significant source of frustration, especially when the core issue is a main brush that has stopped spinning. For owners of the iRobot Roomba 600 series, this is a common problem that dramatically reduces the vacuum’s ability to pick up debris. When the brushes are motionless, the robot can only manage light suction, leaving behind pet hair, crumbs, and other particles it was designed to eliminate. This malfunction turns your automated cleaning assistant into little more than a floor duster.
Fortunately, a non-spinning brush is often a repairable issue that you can tackle yourself with a bit of guidance. This comprehensive article will walk you through the entire process, from initial diagnosis to final testing. We will explore the primary causes behind the failure, provide a detailed step-by-step guide to cleaning and replacing the brush, and examine advanced troubleshooting techniques. Furthermore, we will delve into specific repair case studies for related Roomba models and outline essential maintenance tips to prevent the problem from happening again.
The Core Reasons Your Roomba’s Brush is Stuck

When your Roomba 600’s main brushes halt, it’s typically due to one of a few culprits. The most frequent cause by far is debris entanglement. Hair, string, carpet fibers, and other small objects inevitably get wrapped around the bristles and bearings of the brush. Over time, this buildup can become so dense that it physically prevents the brush from rotating, placing strain on the motor.
Beyond simple clogs, the components themselves can be the source of the problem. The brushes are consumable parts that experience wear and tear with every cleaning cycle. If the bristles are worn down or the end caps are damaged, the brush may no longer engage properly with the drive motor. In less common scenarios, the issue may lie with the brush motor itself. A motor can fail due to internal wear or electrical problems, which requires a more involved replacement. Pinpointing the correct cause is the first and most critical step toward a successful repair.
A Step-by-Step Guide to Repairing the Brush
Follow these detailed instructions to diagnose and fix the most common brush-related issues on your Roomba 600 series.
Preparing for the Repair
Before you begin, gather the necessary tools to make the process smooth and efficient. A clean, well-lit workspace will also help you keep track of small parts like screws.
Tools You Will Need
- Screwdriver: A small Phillips head screwdriver is typically required. A flat-head might be needed for some models or for prying.
- Scissors: A pair of scissors is invaluable for cutting through tightly wound hair and string.
- Replacement Parts: If you determine the brush or motor is damaged, have the official replacement parts ready. Ordering from iRobot or an authorized dealer is recommended.
Diagnosing the Problem
First, perform a quick inspection to narrow down the cause.
- Visually Inspect for Debris: Turn the Roomba over and look closely at the main brush. Check for any hair, fibers, or objects wrapped around it or lodged in the brush compartment.
- Attempt a Manual Spin: After clearing any obvious blockages, try to spin the brush by hand. If it moves freely, the issue may be related to the motor or a software glitch. If it feels stiff, jammed, or gritty, the problem is likely a deeper clog within the mechanism.
Removing the Main Brush Assembly
To properly clean or replace the brush, you must first remove it from the unit.
- Power Down the Roomba: Ensure the robot is completely turned off and disconnected from its charging base. This prevents any accidental startups and ensures your safety.
- Access the Underside: Flip the Roomba over to expose the brushes and wheels.
- Release the Brush Guard: Locate the two yellow tabs holding the brush guard in place. Push both tabs simultaneously to release the guard and lift it away.
- Lift the Brushes Out: Carefully lift the main bristle brush and the flexible beater brush out of the compartment. Take note of the yellow bearings on the ends of each brush.
Cleaning the Brush and Compartment
With the brushes removed, you can perform a thorough cleaning.
- Clean the Brushes: Use your fingers and scissors to meticulously remove all hair and debris wrapped around the brushes. Pay special attention to the ends where the yellow bearings are located, as hair often accumulates there.
- Clean the Bearings: Pop the yellow bearings off the ends of each brush and clean any hair or dust from inside them and from the metal axles.
- Clean the Brush Compartment: Use a dry cloth or a brush to wipe out any dust and debris from the compartment on the Roomba itself. Ensure the square and hexagonal sockets where the brushes connect are clear.
Reinstalling the Brush
Once everything is clean, it’s time to reassemble the unit.
- Reinsert the Brushes: Place the cleaned brushes back into the compartment, ensuring the square and hexagonal ends align correctly with their respective drive sockets.
- Secure the Brush Guard: Place the brush guard back over the brushes and press down firmly until both yellow tabs click securely into place.
- Test the Roomba: Turn the Roomba on and run a cleaning cycle. Listen and watch to confirm that the brushes are now spinning freely and effectively.
What to Do If Cleaning Isn’t Enough
If a thorough cleaning doesn’t solve the problem, the brush itself may be damaged or too worn to function. In this case, a replacement is necessary. Follow the same removal steps, discard the old brush, and install a brand-new one before reassembling and testing.
If your Roomba’s brushes are worn down, damaged, or simply not performing effectively even after cleaning, replacing them can restore your Roomba’s cleaning power.

Official parts for 600 Series Roomba maintenance

Affordable replacement for 600 series brushes
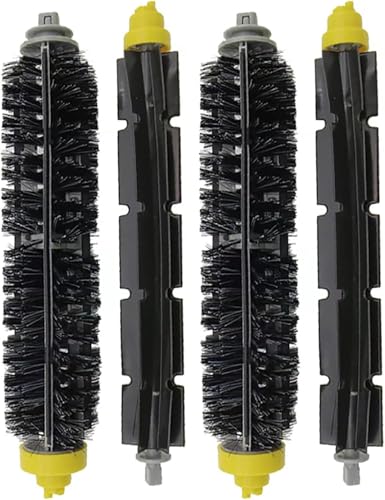
Durable brush set for 600 series vacuums

Value pack for 600/700 series maintenance
Advanced Troubleshooting for Persistent Issues
If the brush still refuses to spin after cleaning and replacement, the problem may be electronic or mechanical.
Inspecting the Brush Motor
A faulty motor can prevent the brush from receiving power. While a full motor replacement is more complex, you can look for obvious signs of trouble. Inspect the motor housing for any visible damage or signs of wear. Some Roomba models have diagnostic modes that can test individual components; consult your user manual for model-specific instructions.
If you’ve identified that the brush motor is faulty and preventing the brushes from spinning, replacing the motor assembly is the next step to get your Roomba fully functional again.

Official OEM replacement for Roomba 500-900 series with enhanced durability and performance.

High-quality third-party replacement with better brush and screw design.
Value pack with multiple brushes and tools for easy installation and replacement.
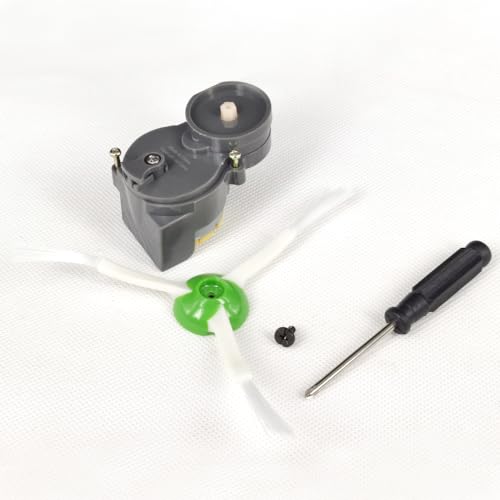
Budget-friendly replacement with essential tools for quick installation.
Resetting Your Roomba’s Software
Occasionally, a software glitch can cause hardware to behave erratically. Performing a factory reset can clear these issues and restore the Roomba to its default operational state. Check your user manual for the correct button combination to initiate a reset for your 600 series model. Additionally, ensuring your Roomba’s firmware is up-to-date can resolve known bugs that might affect motor operation.
Case Study: Repairing the Roomba 650 Side Brush Motor
Failures in the brush system are not limited to the main brushes. A common issue reported with the Roomba 650 involves the small, spinning side brush. In one documented case, the motor ran slowly and inconsistently, causing the brush to stop spinning and fail at sweeping debris toward the main cleaning head. An inspection revealed that the gear connected to the side brush motor was missing several teeth.
The root cause was traced to the use of an incompatible, third-party replacement brush. This non-official part created excessive resistance against the floor, which over time caused the motor to grind down and strip the gear teeth. The solution involved purchasing an official gear assembly replacement kit from iRobot. The repair was straightforward: after removing the side brush, the old, damaged gear module was unscrewed and replaced with the new one. After reassembly, the side brush function was fully restored, and the unit operated more quietly. This highlights the critical importance of using officially compatible parts to prevent mechanical damage.
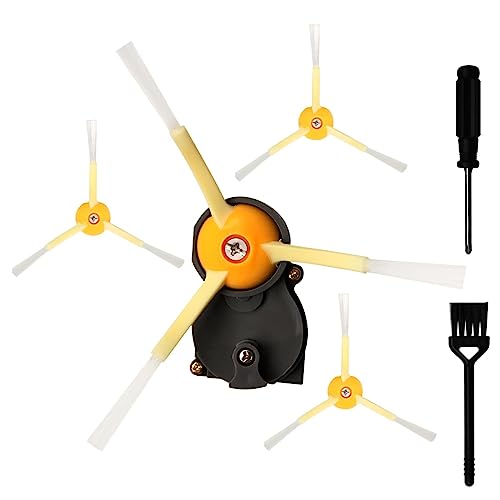
If your Roomba’s side brush is not spinning or is making unusual noises, the side brush motor or its gears might be damaged, requiring replacement to restore proper edge cleaning.
Official OEM replacement with improved design and durability.
Affordable replacement with improved performance and tools.
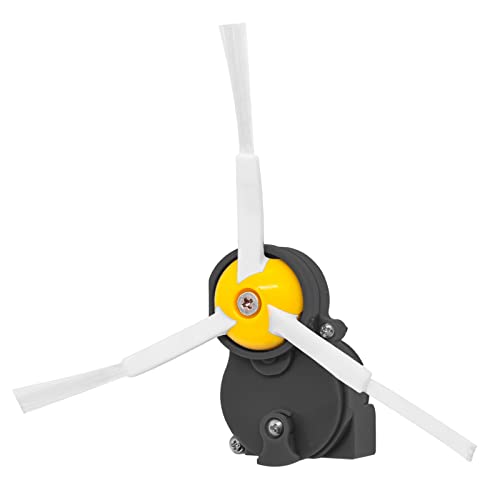
Reliable and cost-effective replacement for multiple Roomba models.
High-performance replacement with extra tools for easy installation.
Fixing Brush Motors in 500, 600, and 700 Series Roombas
A similar motor failure affects various models across the 500, 600, and 700 series. The primary symptom is a Roomba that runs its vacuum but fails to spin the main brushes. This results in the dustbin collecting only fine lint instead of larger debris. This problem points directly to a failed main brush motor.
The repair involves replacing the entire motor assembly. First, the battery must be removed. The motor is located under a sticker on the Roomba’s underside. By removing several screws, the motor housing can be disassembled, and the old motor can be lifted out. A new motor, often sold in a kit with updated seals, is then installed. During reassembly, it is crucial to route the motor’s power cables correctly so they do not get pinched or interfere with other components. Using a small piece of tape to hold parts in place can simplify the process. This repair restores the Roomba’s ability to sweep and collect all types of debris.
Preventive Maintenance for Optimal Performance
Regular maintenance is the best way to prevent brush malfunctions and extend the life of your Roomba.
Establish a Regular Cleaning Routine
A little upkeep goes a long way. Make it a habit to perform quick inspections and cleanings.
* Weekly Check: Once a week, flip the Roomba over and pull any visible hair or debris from the brushes.
* Monthly Deep Clean: Once a month, follow the disassembly steps to remove the brushes and bearings for a thorough cleaning.
Manage High-Debris Environments
If you have pets or areas that accumulate a lot of dust and hair, take extra precautions.
* Pre-Vacuum High-Traffic Areas: Running a traditional vacuum over extremely dirty spots first can reduce the load on your Roomba.
* Use Virtual Wall Barriers: Block off areas with lots of cables, rug tassels, or other potential entanglement hazards.
Proper Storage Practices
How you store your Roomba matters.
* Store It Clean: Always clean the brushes and empty the bin before storing the Roomba for an extended period to prevent debris from hardening or causing issues.
* Keep It Dry: Store the unit in a dry environment to protect its electronic components from moisture damage.
The Pros and Cons of a DIY Repair
Deciding whether to fix your Roomba yourself involves weighing a few factors.
Pros
- Cost-Effective: The most significant advantage is saving money. A DIY repair with a replacement part costs far less than professional repair services or buying a new machine.
- Educational: Repairing the Roomba yourself provides a deeper knowledge of how it works, making you better equipped to handle future issues.
Cons
- Risk of Further Damage: If done incorrectly, you could accidentally damage other components, leading to a more expensive problem.
- Voiding the Warranty: Performing your own repairs on a device that is still under warranty will almost certainly void it.
Frequently Asked Questions (FAQ)
What is the most common reason a Roomba brush stops spinning?
The most frequent cause is the buildup of debris, particularly hair and string, which gets tightly wrapped around the brush and its bearings, physically preventing it from rotating.
Can using non-official replacement parts damage my Roomba?
Yes, absolutely. As demonstrated in the Roomba 650 case, an incompatible third-party brush can create too much resistance, leading to severe damage to internal components like the motor’s gears. Always use officially compatible parts.
What tools do I need for a basic brush fix?
For most routine cleaning and brush replacement tasks, all you will need is a small Phillips head screwdriver to access certain components and a pair of scissors to easily cut through tangled hair.
What should I do if the brush still won’t spin after a thorough cleaning?
If a deep clean doesn’t resolve the issue, your next steps should be to inspect the brush for wear and consider replacing it. If a new brush also fails to work, you should investigate more advanced solutions like checking the motor for damage or performing a factory reset.
Conclusion
A Roomba 600 with a non-spinning brush can feel like a failed investment, but in most cases, it’s a problem with a clear and achievable solution. By methodically working through the diagnostic and cleaning steps, you can often resolve the issue in under an hour. From tangled hair to worn-out parts, the root cause is typically accessible and manageable for a DIY repair.
Remember that proper diagnosis is essential—distinguishing between a simple clog, a worn-out part, and a failed motor will guide you to the right fix. For more complex issues, using official replacement parts is non-negotiable to avoid causing further mechanical harm. With regular maintenance and the knowledge to tackle problems as they arise, you can ensure your Roomba continues to perform its cleaning duties effectively for years to come.