
The iRobot Roomba 4150 has long been a reliable ally in maintaining a clean home, automating a chore many would rather avoid. Its autonomous nature, however, depends entirely on a functional Home Base or docking station. When the dock fails to power on, the entire system grinds to a halt, leaving your robotic vacuum without a place to charge and prepare for its next cleaning cycle. This sudden power loss can be frustrating, but it’s often caused by a handful of common, fixable issues.
This comprehensive guide is designed to walk you through the entire troubleshooting process, from the simplest checks to more advanced solutions. We will explore the potential culprits behind a powerless dock, including issues with your home’s power supply, the docking station itself, and the Roomba’s own charging system. By following these steps, you will learn how to systematically diagnose the problem, implement effective solutions, and take preventive measures to ensure your Roomba 4150 and its dock remain in optimal working condition for years to come.
Diagnosing the Root Cause of Power Failure
Before you can fix the problem, you need to identify its source. A non-responsive docking station can be traced back to one of three primary areas: the external power source, the physical dock itself, or the connection between the dock and the Roomba.
Power Supply and Connection Problems
The most frequent and easily resolved issues are related to the power supply. The problem may not be with your Roomba’s equipment at all. A faulty wall outlet, a tripped circuit breaker, or a damaged power cord are common culprits. The connection point where the cord plugs into the dock or the wall can also become loose over time, interrupting the flow of electricity. These external factors should always be the first things you check.
Docking Station Malfunctions
If the external power supply is confirmed to be working, the issue may lie within the docking station. Physical damage, such as cracks from being bumped or dropped, can harm internal components. Over time, the internal wiring can become loose or damaged. More seriously, the internal power board—the electronic heart of the dock—may have malfunctioned, preventing it from receiving or distributing power. Additionally, an often-overlooked cause is the accumulation of dust and debris on the charging contacts, which can create a barrier that prevents a solid electrical connection.
Battery and Charging System Complications
In some cases, the dock may have power, but it appears inactive because of an issue with the Roomba itself. If the Roomba’s battery is completely and profoundly depleted, it may not have enough residual charge to initiate the “handshake” with the dock that begins the charging process. Furthermore, just as the dock’s contacts can get dirty, so can the corresponding contacts on the underside of the Roomba. If these are obscured by grime or dust, the vacuum cannot charge, making it seem as though the dock is dead.
A Comprehensive Guide to Troubleshooting
Follow this step-by-step method to systematically isolate and resolve the power issue with your Roomba 4150 dock. Perform these checks in order, as they move from the simplest to the more complex potential fixes.
Inspecting Your Power Source
Your first focus should be on the flow of electricity from your wall to the dock.
Examining the Power Cable
The power cable is a critical link that is susceptible to wear and tear.
1. Unplug the Cable: Disconnect the power cord from both the wall outlet and the docking station.
2. Visual Inspection: Carefully run your hands along the entire length of the cable. Look and feel for any signs of damage, such as cuts, deep scuffs, frays, or areas where the internal wires are exposed. Pay close attention to the points near the plugs, as this is where stress damage most often occurs.
3. Check the Plugs: Ensure the prongs on the wall plug are straight and not bent.
4. Secure Reconnection: Plug the cord back into the docking station first, ensuring it is seated firmly. Then, plug it securely into the wall outlet. A loose connection at either end is a common cause of power failure.
5. Test with a Different Cable: If you have another compatible power cable, try using it to see if the original cord was the problem.
If your power cable is damaged or you need a replacement to test if the original is faulty, you’ll need a new one.
Roomba 4150 Power Cord
iRobot Roomba 4150 Power Cord
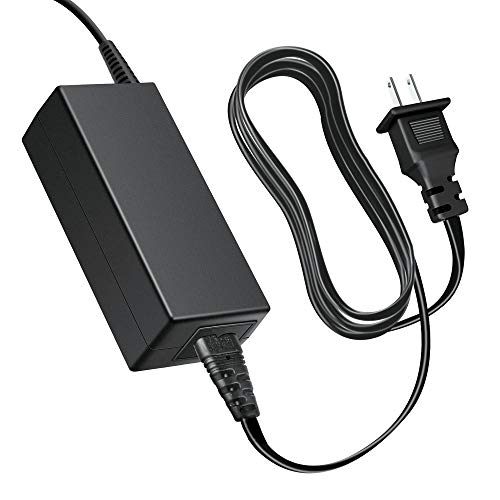
Dedicated power cord for Roomba 4150 with safety certifications and stable performance.
2 Prong Power Cord for Roomba 4150

Universal 2-prong cord compatible with Roomba 4150 and various other models.
Charger Cord for Roomba 4150

Durable replacement power cord for iRobot Roomba 4150 charging dock.
Roomba i4+ Power Cord

High-quality power cord for newer iRobot i4+ and compatible models.
Verifying the Wall Outlet
It’s crucial to confirm that the outlet itself is delivering electricity.
1. Test with Another Device: The easiest way to check the outlet is to unplug your Roomba dock and plug in a different, known-working device, such as a lamp or a phone charger. If that device doesn’t power on, the outlet is the problem.
2. Use a Multimeter: For a more technical confirmation, you can use a multimeter. Set it to the AC voltage setting and carefully insert the probes into the outlet’s slots. A standard US outlet should read approximately 110-120 volts. A reading of zero confirms the outlet is dead.
3. Try a Different Outlet: If the original outlet is not working, move the docking station to a different outlet in another room that you know is functional.
Checking the Circuit Breaker
A tripped circuit breaker will cut power to one or more outlets in your home.
1. Locate Your Breaker Panel: Find your home’s main electrical panel, which is usually located in a garage, basement, or utility closet.
2. Identify the Tripped Breaker: Open the panel door and look for a switch that is not aligned with the others. It will likely be in the “OFF” position or stuck in the middle.
3. Reset the Breaker: To reset it, push the switch firmly to the “OFF” position first, and then flip it back to the “ON” position.
4. Observe for a Repeat Trip: If the breaker trips again immediately after you plug the dock in, there may be a more significant electrical issue with the circuit or a short in the dock itself. In this case, you should consult a qualified electrician.
Evaluating the Docking Station Itself
If the power source is sound, your focus should shift to the dock and its connection points.
Performing a Physical Inspection
Look for any obvious signs of damage to the docking station’s housing. Check for cracks, chips, or parts that seem loose. Pay special attention to the port where the power cord plugs in, as it can be damaged if the cord is yanked out forcefully. Check the LED indicator light on the dock; if it remains dark even with confirmed power, it strongly suggests a fault with the dock’s internal power board.
If your Roomba Home Base is physically damaged or its internal power board has failed, you’ll need to replace the entire docking station.
Roomba 4150 Home Base
iRobot Roomba 4150 Home Base

Genuine iRobot home base for Roomba series 600-900 and e/i models
Roomba Charger Dock ADF-N1

Affordable replacement charging base for Roomba series 500-900 and e/i models
caSino187 OEM Charging Dock

Budget-friendly genuine OEM replacement for Roomba charging base
Roomba Docking Station SPRYAR

High-quality replacement dock for wide range of Roomba models
Cleaning the Charging Contacts
This is one of the most effective and commonly needed maintenance steps. Dust, pet hair, and grime can build up on the metal charging contacts, creating an insulating layer.
1. Power Down: Unplug the docking station from the wall.
2. Clean the Dock’s Contacts: Take a clean, soft, and completely dry cloth (a microfiber cloth is ideal) and firmly wipe the two metal charging contacts on the docking station.
3. Clean the Roomba’s Contacts: Turn your Roomba over and locate the two corresponding metal contacts on its underside. Clean these in the same manner.
4. Ensure a Clean Connection: Make sure no debris remains that could obstruct the physical connection when the Roomba docks.
Assessing the Roomba’s Battery
A completely dead battery can prevent the charging sequence from starting. Place the Roomba manually onto the dock and listen for the confirmation tone that indicates charging has begun. If you hear nothing and the lights on the Roomba do not illuminate, the battery may be too depleted to recover or may have reached the end of its life. In this scenario, you may need to order a replacement battery.
If your Roomba’s battery is no longer holding a charge or is completely dead, replacing it is essential for the robot to function.
Roomba 4150 Battery
LabTEC 4150 Battery

High-capacity Ni-MH battery with built-in protection and CE/RoHS certified
14.4V 4000mAh Roomba 4150 Battery

Longer runtime Ni-MH battery with extended warranty and safety features
TREE.NB 4150 Battery

Environmentally friendly battery with high capacity and global certifications
Kastar 4150 Battery
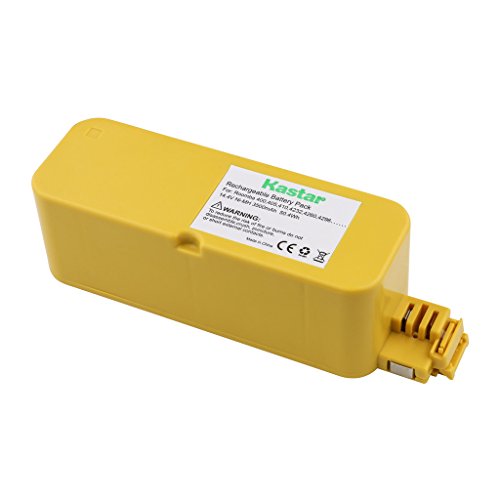
Premium Ni-MH battery with extended warranty and high-quality cells
Advanced Restoration Techniques
If the basic troubleshooting steps haven’t worked, these more advanced resets may resolve software or firmware glitches.
Performing a Roomba Soft Reset
Resetting the Roomba’s software can clear temporary errors that might interfere with charging.
1. Press and hold the “Clean” and “Spot” buttons on the Roomba simultaneously.
2. Keep them held down for approximately 10 to 15 seconds.
3. The Roomba will make a short tone or chime to signal the reset is complete.
4. Place the Roomba back on the docking station to see if it now begins to charge properly.
Attempting a Docking Station Power Cycle
This simple process can reset the internal electronics of the Home Base.
1. Unplug the docking station’s power cord from the wall outlet.
2. Wait for at least 30-60 seconds. This allows any residual power in the internal circuits to fully dissipate.
3. Plug the power cord back into the wall outlet.
4. Check if the dock’s power indicator light is now illuminated.
When to Contact Professional Support
If you have meticulously followed all the steps above and the docking station still shows no signs of power, the problem is likely a significant internal hardware failure, such as a faulty power board. At this point, it is best to contact iRobot customer support. Be prepared to provide them with your Roomba’s model and serial number, a clear description of the problem, and a list of the troubleshooting steps you have already performed.
Proactive Care for Your Charging Dock
Preventing problems is always better than fixing them. A few simple habits can greatly reduce the chances of your dock failing.
The Importance of Regular Maintenance
Make it a routine to clean the charging contacts on both the Roomba and the dock at least once a month using a dry cloth. This prevents the gradual buildup of grime that leads to poor connections. At the same time, give the power cord a quick visual inspection to catch any potential damage early.
Strategic Placement of the Dock
Place your Home Base in a low-traffic area where it is unlikely to be kicked, bumped, or tripped over. This protects both the dock and its power cord from accidental physical damage. Ensure there is adequate clearance around the dock as recommended in the user manual.
Keeping Your Firmware Current
For newer, Wi-Fi-connected models, firmware updates are pushed automatically. These updates can include bug fixes related to charging and power management. Ensure your Roomba is connected to your Wi-Fi network to receive these important updates, as they can sometimes resolve issues that appear to be hardware-related.
Frequently Asked Questions (FAQ)
Why is my Roomba 4150 dock light not on?
If the power indicator light on your dock is off, it typically points to one of three issues. First, there could be no power coming from the wall outlet or the power cord itself could be damaged. Second, the dock’s internal power board may have failed. Third, the power cord may not be securely plugged into the back of the dock or the wall.
How do I clean the charging contacts on my Roomba and dock?
To clean the contacts, first unplug the docking station from the wall. Use a soft, completely dry cloth, like microfiber, to gently but firmly wipe the metal contacts on both the dock and the underside of the Roomba. Do not use water, cleaning solutions, or abrasive materials, as they can damage the contacts.
What should I do if the circuit breaker for the outlet keeps tripping?
If a circuit breaker trips repeatedly after you reset it, this is a serious warning sign. It indicates an overload or a short circuit. Immediately unplug the Roomba dock and all other devices from that circuit. Do not use the outlet again until it has been inspected by a qualified electrician to prevent a fire hazard.
Can a dead Roomba battery make it seem like the dock has no power?
Yes, this is possible. A battery that is completely drained may not have enough power to communicate with the dock and initiate the charging cycle. In this state, the Roomba may not show any lights or make any sounds when placed on the dock, which can be mistaken for a powerless dock.
Conclusion
A Roomba 4150 dock that refuses to power on can be a significant disruption to your cleaning routine, but it is rarely an unsolvable problem. By methodically working through the troubleshooting steps—starting with the external power supply, moving to the physical connections and cleanliness of the hardware, and finally attempting software resets—you can identify and fix the vast majority of issues yourself.
Remember that consistent, proactive maintenance is the key to longevity. Regularly cleaning the charging contacts and ensuring the dock is safely placed can prevent most power-related problems from ever occurring. If you exhaust all options without success, know that a hardware failure is the likely cause, and reaching out to iRobot’s customer support is the correct final step.