
The iRobot Roomba 600 series is a trusted workhorse in the world of robotic vacuums, known for its ability to keep homes clean with minimal effort. These devices are designed for convenience, and a key feature for many users is the ability to schedule cleanings using the built-in clock. However, like any piece of technology, the Roomba can sometimes encounter glitches, with clock-related issues being a frequent point of frustration for owners.
This article serves as a comprehensive guide to resolving these time-telling troubles. We will explore the most common clock problems you might face with your Roomba 600 series, from a blank display to a clock that constantly resets. You will learn a step-by-step process for troubleshooting, starting with simple fixes and progressing to more advanced solutions. We will also cover preventive measures to keep your Roomba running smoothly and offer practical workarounds for scheduling cleanings if the clock issue persists.
Identifying Common Roomba 600 Clock Problems
Before you can fix the problem, you need to know exactly what you’re dealing with. Clock malfunctions on the Roomba 600 series typically fall into one of three categories. Pinpointing which issue your device is experiencing is the first step toward a solution.
- The Clock Is Not Displaying: One of the most straightforward issues is when the clock display is completely blank. You might see no time at all on the Roomba’s interface, making it impossible to set schedules or even check the current time on the device itself.
- The Clock Resets Frequently: A more common and frustrating problem is a clock that refuses to hold the correct time. It might repeatedly reset to its default setting, often 12:00 AM. This typically happens after the Roomba has been off its charging dock for a period or if your home experiences a brief power outage.
- The Time Is Inaccurate: Your Roomba’s clock may be running, but it’s not keeping time correctly. It could be running significantly faster or slower than the actual time, throwing off your scheduled cleaning sessions. This desynchronization can also occur if the device isn’t properly connected to Wi-Fi to sync with your local time zone via the app.
A Comprehensive Guide to Troubleshooting Clock Issues
When your Roomba’s clock starts acting up, there’s no need to panic. Most issues can be resolved with a series of logical troubleshooting steps. Work your way through the following solutions, starting with the simplest fixes first.
Step 1: Verify the Battery Level
A low or depleted battery is a primary culprit behind many electronic glitches, including clock malfunctions. If the Roomba doesn’t have enough power, its internal memory and clock can fail.
Before attempting any other fixes, place your Roomba on its Home Base charging dock and allow it to charge completely. An adequately charged battery provides the stable power needed for all functions to operate correctly. Once fully charged, see if the clock issue resolves itself.
If your Roomba’s battery is old, doesn’t hold a charge well, or is causing frequent clock resets even after a full charge, it might be time for a replacement. A new battery can restore consistent power and resolve many clock-related issues.
Roomba 600 Series Battery
iRobot Roomba XLife Battery

Official high-quality battery for Roomba 400/600/700/800 series
FirstPower 5.0Ah Roomba Battery

High-capacity battery for extended cleaning sessions
SPARKOLE 5300mAh Lithium Battery
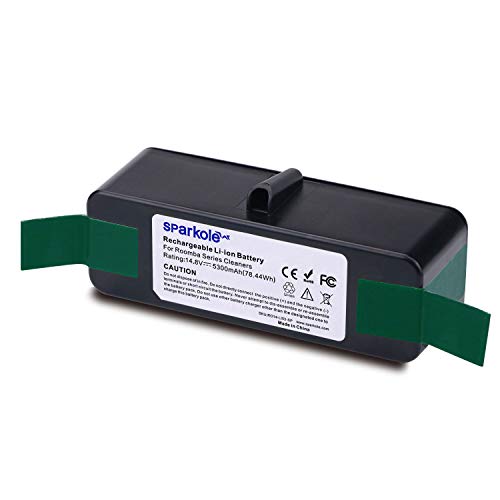
Long-lasting lithium battery with advanced safety protection
Upgraded 6500mAh Roomba Battery
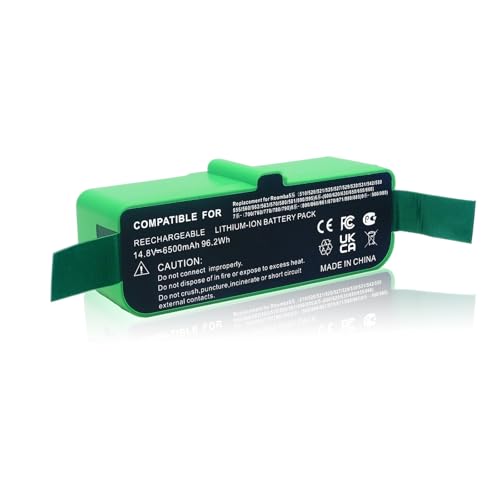
Highest capacity battery for maximum runtime and durability
Step 2: Perform a Simple Reset
A soft reset can often clear up minor software bugs without erasing your settings. It’s like rebooting your computer—a quick and effective way to solve temporary problems.
To reset your Roomba 600 series, press and hold both the “Clean” and “Spot” buttons simultaneously. Keep them held down for about 10 seconds, until you hear the Roomba make a beeping sound. After the device restarts, you will need to set the clock again. This simple action frequently resolves issues of the clock resetting or freezing.
Step 3: Update the Firmware
iRobot regularly releases firmware updates to fix bugs, improve performance, and add new features. An outdated firmware version could be the source of your clock problem.
To check for and install updates, ensure your Roomba is connected to your home’s Wi-Fi network. Open the iRobot Home app on your smartphone and connect to your device. The app will notify you if a new firmware version is available. Follow the on-screen instructions to download and install the update, which can often contain patches for known clock-related bugs.
Step 4: Manually Set the Time
If an automatic sync isn’t working or your Roomba model relies on manual settings, you’ll need to input the time directly on the device.
- Press and hold the “Clock” button on the Roomba’s control panel.
- Wait until the hour digits begin to flash.
- Use the “Hour” and “Minute” buttons to adjust the time to the correct values.
- Once the correct time is set, press the “Dock” button to save your settings.
Step 5: Sync Time with the iRobot App
For Wi-Fi-enabled models, the iRobot Home app is the easiest way to manage the clock. The app can automatically sync the time from your phone to the Roomba.
First, make sure your phone’s time and time zone are set correctly. Then, open the iRobot Home app and ensure your Roomba is connected. The app should automatically synchronize the time. If it doesn’t, check that the time zone setting within the app itself is accurate for your location. A strong Wi-Fi connection is essential for this feature to work reliably.
Step 6: Check for Signal Interference
While less common, electromagnetic interference from other household electronics can disrupt your Roomba’s internal components, including the clock.
If your Roomba’s charging dock is located near a microwave, cordless phone base, or a dense cluster of other electronic devices, try moving it to a different location. After relocating it away from potential sources of interference, attempt to set the clock again to see if the problem persists.
Step 7: Execute a Factory Reset (Last Resort)
If all other troubleshooting steps have failed, a factory reset is your final option. This action will restore your Roomba to its original, out-of-the-box settings, erasing all your custom schedules, network information, and other preferences.
To perform a factory reset, press and hold the “Clean” button and the “Home” button at the same time. Continue holding them for approximately 10 seconds, until the Roomba beeps and its lights turn off. After the reset is complete, you will need to go through the initial setup process again, including connecting to Wi-Fi and setting the clock.
Proactive Tips for Preventing Clock Malfunctions
The best way to deal with problems is to prevent them from happening in the first place. Adopting a few good habits can help ensure your Roomba’s clock and other functions operate reliably for years to come.
Maintain a Regular Cleaning Routine
A clean machine is a happy machine. Debris, dust, and hair can build up around sensors, wheels, and internal components, potentially causing a variety of performance issues. Regularly clean your Roomba’s brushes, filter, and sensors as recommended in the user manual to keep it in optimal condition.
To keep your Roomba running efficiently and prevent issues caused by debris buildup, regularly replacing worn-out brushes and dirty filters is essential. These components are critical for effective cleaning and can impact the overall performance of your Roomba.
Roomba 600 Series Replacement Parts Kit
iRobot Authentic Replenishment Kit

Official iRobot parts ensuring optimal performance and compatibility.
LOVECO Replacement Accessories Kit

Comprehensive kit for Roomba 600 and 500 series with extra brushes.
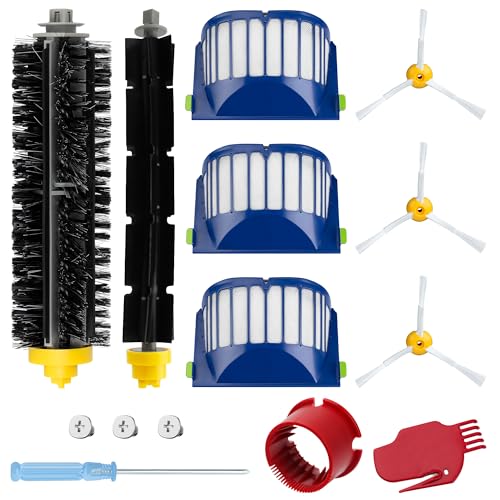
Replacement Parts Kit – 14-in-1 Accessory

High-quality 14-in-1 kit with durable industrial-grade materials.
Funmit Parts Replacement Kit
Affordable all-in-one replacement kit with easy installation.
Ensure a Stable Power Connection
Inconsistent power can lead to clock resets and other electronic faults. Always keep your Roomba on its Home Base when not in use. Place the charging dock in an area with a stable electrical supply, avoiding outlets that are prone to power surges or frequent outages.
If your Roomba isn’t charging properly or its Home Base is damaged, it can lead to inconsistent power and clock issues. Replacing a faulty Home Base or its power adapter can ensure your Roomba always has a stable connection and is fully charged when needed.
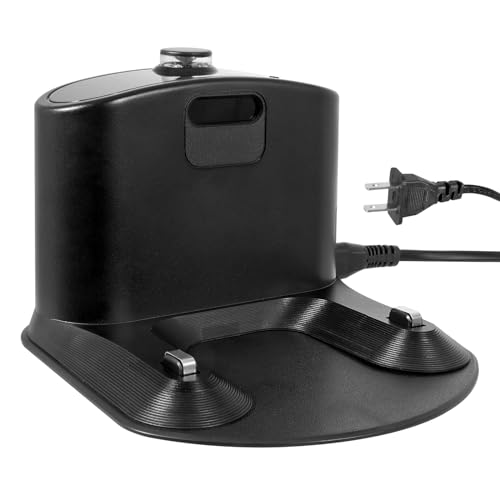
Roomba 600 Series Charging Dock
iRobot Roomba 600 Series Charging Dock

Official replacement charging dock for iRobot Roomba 600 series vacuums.
Roomba 600 Series Compatible Charging Dock

Affordable alternative with extra accessories for various Roomba models.
Budget-Friendly Roomba 600 Dock
Cost-effective replacement dock compatible with 600 series and more.
caSino187 OEM Charging Dock

Official OEM charging base with improved contact design for 600 series.
Keep Firmware Up to Date
Make a habit of periodically checking for firmware updates through the iRobot Home app. Enabling automatic updates, if available, ensures your device always has the latest bug fixes and performance enhancements from iRobot.
Maintain a Solid Wi-Fi Connection
For models that rely on the app for time syncing and scheduling, a stable Wi-Fi connection is crucial. Ensure your charging dock is placed in an area with a strong signal from your router. A weak or intermittent connection can prevent the Roomba from syncing its clock correctly.
Alternative Scheduling When the Clock Fails
If you’ve tried everything and the clock on your Roomba 600 series remains unreliable, don’t worry—your robotic vacuum is still perfectly usable. You just need to adjust how you schedule its cleaning sessions.
Use the iRobot Home App for Scheduling
The most effective workaround is to rely entirely on the iRobot Home app. Instead of using the Roomba’s internal clock, you can create and manage detailed cleaning schedules directly from your smartphone. This method bypasses the faulty hardware clock and uses the app’s reliable scheduling system, as long as your Roomba is connected to Wi-Fi.
Create Manual Cleaning Routines
If your model isn’t Wi-Fi enabled or you prefer a lower-tech approach, you can simply start cleanings manually. Get into the habit of pressing the “Clean” button at specific times each day or week. This approach requires a bit more hands-on effort but ensures your floors get cleaned on a regular basis without depending on a functioning clock.
When to Contact iRobot Support
If your clock issue persists despite all troubleshooting and it’s essential for your use of the device, it’s time to call in the experts. Contact iRobot customer support and provide them with a detailed account of the problem and the steps you’ve already taken. They may be able to offer additional solutions or determine if a hardware repair is necessary.
Navigating Your Roomba’s Clock Settings

Knowing how to directly manipulate your Roomba’s clock settings is a valuable skill. Here’s a quick guide to accessing and adjusting the time.
Accessing and Adjusting the Clock
To begin, power on the device and press the “Clock” button. To set the day of the week, hold the “Clock” button and use the “Day” button to cycle through the options. The “Day” button is also used to navigate between adjusting the hours and minutes.
Switching Between 12-Hour and 24-Hour Formats
Your Roomba’s clock can display time in either a standard 12-hour format (AM/PM) or a 24-hour military time format. To switch between them, simply press and hold both the “Minute” and “Day” buttons at the same time. The display will change formats. To switch back, just repeat the same button combination.
Frequently Asked Questions (FAQ)
What should I do first if my Roomba’s clock isn’t working?
The best first steps are to ensure the Roomba is fully charged on its Home Base and then perform a simple reset. You can reset the device by pressing and holding the “Clean” and “Spot” buttons together for 10 seconds. These two actions resolve a majority of minor clock-related glitches.
Why does my Roomba’s clock keep resetting to 12:00 AM?
A clock that frequently resets is often a symptom of an unstable power supply. This can happen if the battery is low, if the Roomba is disconnected from its charging dock for too long, or if there’s a power interruption. It can also be caused by a software bug that may be fixed with a firmware update.
Can I schedule cleanings without a working clock on my Roomba?
Absolutely. The most convenient method is to use the iRobot Home app, which allows you to set schedules without relying on the Roomba’s internal clock. Alternatively, you can start cleaning cycles manually by pressing the “Clean” button at your desired times.
How do I perform a factory reset on my Roomba 600?
A factory reset should only be used as a last resort, as it erases all your settings. To perform one, press and hold the “Clean” and “Home” buttons simultaneously for about 10 seconds, until the Roomba beeps and the lights go out. You will then need to set up the device from scratch.
Conclusion
A malfunctioning clock on your iRobot Roomba 600 series can certainly be an annoyance, but it’s rarely a sign of a critical failure. By following a structured troubleshooting process—starting with battery checks and resets before moving to firmware updates and factory resets—you can often resolve the issue yourself. Implementing preventive maintenance habits, such as keeping the device clean and ensuring a stable power supply, will help minimize future problems.
Even in a worst-case scenario where the internal clock cannot be fixed, your Roomba remains a powerful cleaning tool. By leveraging the iRobot Home app for scheduling or initiating manual cleans, you can continue to enjoy spotless floors. A faulty clock doesn’t have to sideline your robotic helper; it just requires a slight adjustment in how you manage its cleaning duties.