
Is your Roomba refusing to charge, leaving you with a dirty floor and a headache? A Roomba that won’t charge is a common problem, but luckily, it’s often fixable. This article will guide you through the most common reasons your Roomba might not be charging and provide step-by-step solutions to get it back up and running. We’ll cover everything from simple fixes like cleaning the charging contacts to more complex troubleshooting steps.
A non-charging Roomba can be frustrating, especially when you rely on it to keep your home clean. Don’t worry; we’ll explore the potential causes and provide practical steps to diagnose and resolve the issue. Whether it’s a dirty charging contact, a faulty battery, or a problem with the base station, we’ll equip you with the knowledge to tackle it head-on and get your Roomba back to work.
Check the Charging Base and Power Supply

The first step in troubleshooting a Roomba that won’t charge is to examine the charging base and power supply. There might be an issue with the power source or the base itself, preventing your Roomba from receiving power.
Ensure the Base Station Has Power
- Verify the power outlet: Plug another device into the outlet to ensure it’s working. If not, try a different outlet or reset the circuit breaker.
- Inspect the power cord: Look for any visible damage to the power cord, such as cuts, fraying, or exposed wires. If you find any damage, replace the cord immediately.
- Check the connection: Make sure the power cord is securely plugged into both the base station and the power outlet. A loose connection can prevent the base from supplying power.
Clean the Charging Contacts on the Base
- Turn off the base station: Unplug the base station from the power outlet before cleaning.
- Inspect the charging contacts: Look for any dirt, dust, or debris on the metal charging contacts on the base station.
- Clean the contacts: Use a clean, dry cloth or a slightly damp melamine foam (such as a Magic Eraser) to gently wipe the charging contacts. Make sure they are completely dry before plugging the base station back in.
Examine and Clean the Roomba’s Charging Contacts
Just as the base station’s contacts can get dirty, so can the Roomba’s. Cleaning these is a crucial step in diagnosing a charging issue.
Locate the Charging Contacts on the Roomba
- Identify the contacts: The charging contacts are typically located on the bottom of the Roomba, near the front. They are small metal plates that connect with the charging base.
Clean the Roomba’s Charging Contacts
- Turn off the Roomba: Make sure the Roomba is powered off before cleaning.
- Inspect the contacts: Check for any visible dirt, dust, or debris on the charging contacts.
- Clean the contacts: Use a clean, dry cloth or a slightly damp melamine foam to gently wipe the charging contacts. Ensure they are completely dry before placing the Roomba back on the base station.
Reset the Roomba
Sometimes, a simple reset can resolve charging issues caused by software glitches or internal errors.
Perform a Soft Reset
- Locate the “Clean” button: This is the main button you press to start a cleaning cycle.
- Press and hold the button: Press and hold the “Clean” button for about 15-20 seconds.
- Wait for the Roomba to restart: The Roomba will play a tone or chime to indicate that it has restarted.
Perform a Hard Reset (if necessary)
- Remove the battery: Refer to your Roomba’s manual for instructions on how to safely remove the battery.
- Wait a few minutes: Leave the battery out for about 5-10 minutes.
- Reinsert the battery: Put the battery back in and make sure it’s securely connected.
- Place the Roomba on the base: Allow the Roomba to charge for several hours to see if the reset has resolved the issue.
Check the Roomba’s Battery
A degraded or faulty battery is a common reason for charging problems. Over time, batteries lose their ability to hold a charge and may need to be replaced.
Evaluate Battery Health
- Check battery age: If your Roomba battery is more than 1-2 years old, it may be nearing the end of its lifespan.
- Observe charging behavior: Does the Roomba charge very quickly and then discharge rapidly? This can indicate a failing battery.
- Look for swelling or damage: Inspect the battery for any signs of swelling, leakage, or physical damage. If you notice any of these issues, replace the battery immediately.
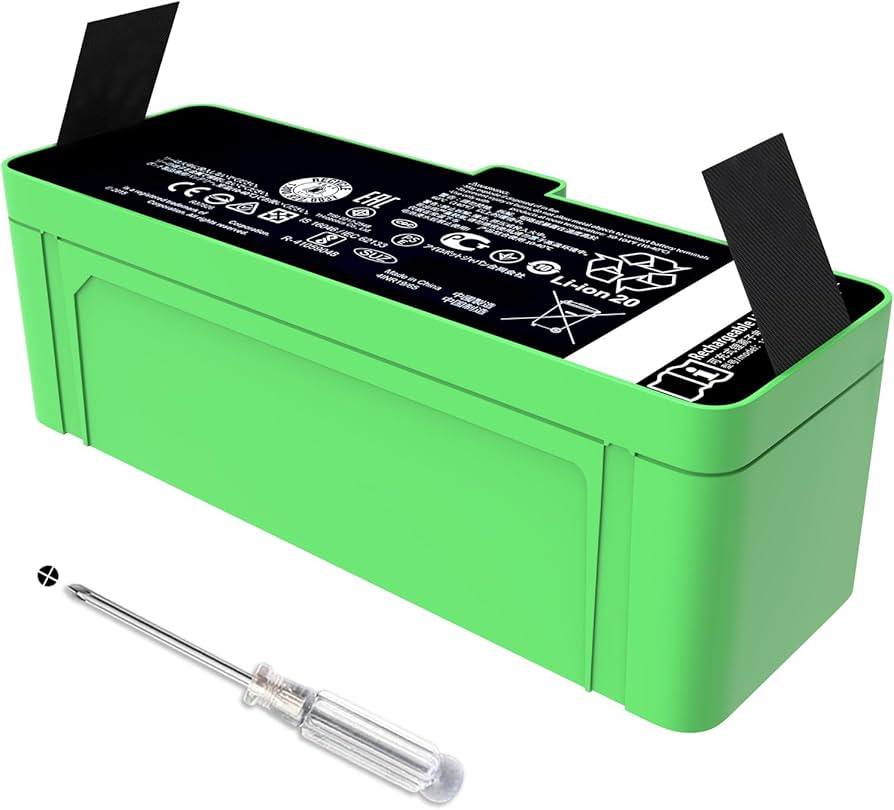
Replace the Battery
- Purchase a compatible battery: Buy a new battery that is specifically designed for your Roomba model. You can find replacement batteries online or at electronics stores.
- Install the new battery: Follow the instructions in your Roomba’s manual to safely remove the old battery and install the new one.
- Charge the Roomba: Place the Roomba on the charging base and allow it to charge fully before using it.
Troubleshoot Common Charging Problems

Even after trying the above solutions, you might still encounter charging issues. Here are some common problems and their solutions:
Roomba Starts Charging Then Stops
- Problem: The Roomba begins charging when placed on the base but stops after a short period.
- Possible causes: Dirty charging contacts, a faulty battery, or a software glitch.
- Solutions: Clean the charging contacts, try resetting the Roomba, or replace the battery if necessary.
Roomba Shows a Charging Error Message
- Problem: The Roomba displays an error message related to charging.
- Possible causes: Overheating, a faulty battery, or a problem with the charging base.
- Solutions: Allow the Roomba to cool down if it’s hot, try a different charging base, or replace the battery.
Roomba Won’t Dock Properly
- Problem: The Roomba has difficulty docking with the charging base.
- Possible causes: Obstructions near the base, incorrect placement of the base, or a faulty docking sensor.
- Solutions: Clear any obstacles around the base, ensure the base is on a flat surface against a wall, and clean the Roomba’s sensors.
FAQ
Why is my Roomba not charging even after cleaning the contacts?
Even after cleaning, a thin layer of residue might remain. Try using a melamine foam pad (Magic Eraser) very lightly dampened with distilled water to gently scrub the contacts. Ensure they are completely dry before charging. Also, the battery might be too old to hold a charge or the charging base could be defective.
How often should I replace my Roomba battery?
Typically, a Roomba battery lasts between 12 to 18 months. However, this can vary based on usage frequency and charging habits. If you notice a significant decrease in runtime, it’s likely time for a replacement.
Can I use a third-party charger for my Roomba?
While third-party chargers might seem like a cheaper option, they aren’t always reliable and could potentially damage your Roomba. It’s best to stick with the official iRobot charger or a certified replacement to ensure compatibility and safety.
What does it mean when my Roomba is blinking while charging?
A blinking light on your Roomba usually indicates it is charging. However, different colors and patterns can signify different charging states or errors. Consult your Roomba’s manual to interpret the specific blinking pattern.
How do I know if my Roomba battery is completely dead?
If your Roomba won’t turn on, won’t charge, and shows no signs of life even after a reset, the battery might be completely dead. Try replacing the battery to confirm if that’s the issue.
Is it okay to leave my Roomba on the charging base all the time?
It’s generally fine to leave your Roomba on the charging base when not in use. Roomba’s charging system is designed to prevent overcharging. However, if you plan to store your Roomba for an extended period, it’s best to remove the battery and store it in a cool, dry place.
Tips, Warnings, and Best Practices for Roomba Charging
- Regular Cleaning: Clean the charging contacts on both the Roomba and the base station regularly (at least once a month) to prevent buildup and ensure a good connection.
- Proper Placement: Place the charging base on a hard, level surface against a wall, with ample clear space around it. This helps the Roomba dock properly.
- Avoid Extreme Temperatures: Do not expose your Roomba or its battery to extreme temperatures, as this can damage the battery and affect charging performance.
- Use Genuine Accessories: Always use genuine iRobot batteries and chargers to ensure compatibility and avoid potential damage to your Roomba.
- Storage: If you plan to store your Roomba for an extended period, remove the battery and store it in a cool, dry place. Charge the battery periodically to prevent it from completely discharging.
Conclusion
A Roomba that refuses to charge can be a major inconvenience, but with a systematic approach, you can often diagnose and fix the problem yourself. By checking the charging base, cleaning the contacts, resetting the Roomba, and evaluating the battery, you can get your robotic vacuum back to work in no time.
If these steps don’t resolve the issue, consider contacting iRobot support or a qualified repair technician. Remember, consistent maintenance and care are essential to keep your Roomba running smoothly for years to come, ensuring your home stays clean with minimal effort.