
Putting the rollers back into your Roomba is essential for maintaining its cleaning performance. If your Roomba’s rollers have popped out, whether during cleaning or maintenance, knowing how to properly reinstall them will keep your robotic vacuum running smoothly. This guide provides a detailed, step-by-step process to get your Roomba back in action, ensuring efficient cleaning and extending the life of your device.
This article will cover the necessary steps to put the rollers back in your Roomba correctly. We will address common issues, offer troubleshooting tips, and provide best practices to help you maintain your Roomba’s rollers for optimal performance. Follow these instructions to ensure your Roomba is always ready to tackle dirt and debris.
1. Preparation: What You Need Before You Start

Before you begin, gather the necessary tools and prepare your workspace to ensure a smooth reinstallation process.
- Clean Workspace: Choose a well-lit, flat surface to work on. This will help you see all the components clearly and prevent any parts from getting lost.
- Cleaning Tools: Have a small brush or cloth handy to clean any debris from the rollers and the Roomba’s roller bay.
- Your Roomba: Ensure your Roomba is turned off and unplugged to prevent accidental activation during the process.
- Replacement Parts (if needed): If any parts are damaged or missing, have replacements ready. These can typically be purchased from the Roomba website or authorized retailers.
2. Accessing the Roller Bay
The first step is to access the roller bay where the rollers are housed. Follow these steps to open it safely:
- Turn Off the Roomba: Make sure your Roomba is powered off to avoid any accidental operation.
- Flip the Roomba: Gently turn the Roomba upside down so the bottom is facing up.
- Locate the Roller Cage: Find the roller cage, which is a rectangular frame covering the rollers. It usually has two tabs or clips securing it in place.
- Release the Tabs: Press or lift the tabs to release the roller cage. The mechanism may vary slightly depending on your Roomba model, so consult your user manual if needed.
- Remove the Roller Cage: Once the tabs are released, remove the roller cage to expose the rollers and the roller bay.
3. Inspecting the Rollers and Roller Bay

Before reinserting the rollers, take a moment to inspect them and the roller bay for any debris or damage.
- Check the Rollers: Examine the rollers for tangled hair, threads, or other debris. Clean them thoroughly using a brush or cloth. Remove any obstructions that could impede their movement.
- Inspect the Roller Bay: Look inside the roller bay for any accumulated dirt or debris. Use a small brush or vacuum nozzle to clean the area.
- Check for Damage: Inspect the rollers for any signs of wear and tear, such as cracks or deformation. Also, check the roller cage and the tabs for any damage that might prevent them from securing properly. Replace any damaged parts to ensure optimal performance.
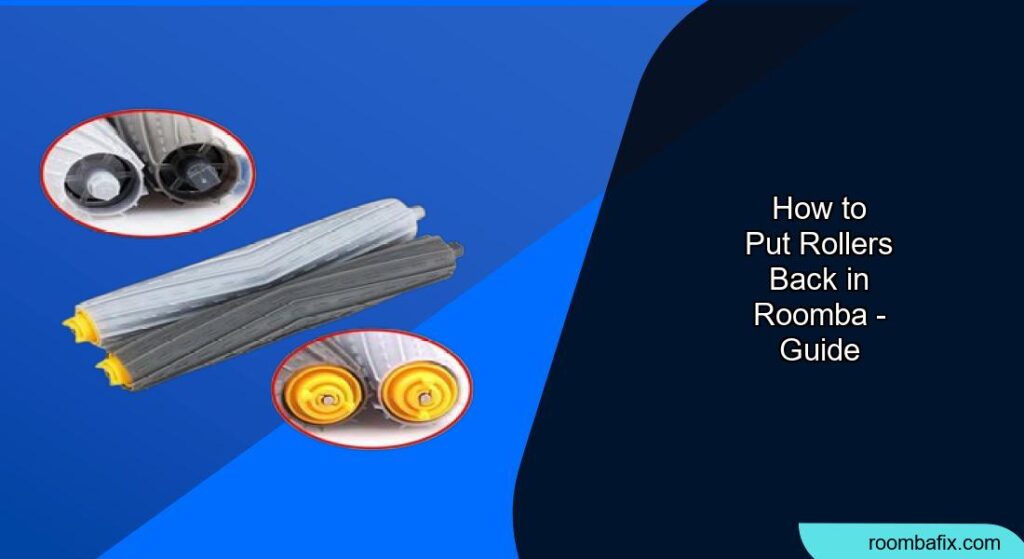
4. Putting the Rollers Back In
Now, follow these steps to correctly reinstall the rollers:
- Identify Roller Placement: Note the specific placement of each roller. Typically, Roomba models have two different types of rollers: one with bristles and one made of rubber. Ensure you know which roller goes where.
- Insert the First Roller: Align the first roller with its corresponding slot in the roller bay. Make sure the roller is oriented correctly, with the appropriate end fitting into the designated slot.
- Secure the First Roller: Gently push the roller into the slot until it clicks or sits firmly in place.
- Insert the Second Roller: Repeat the process with the second roller, ensuring it is properly aligned and securely inserted.
- Test Roller Movement: Once both rollers are in place, manually spin them to ensure they rotate freely without any obstructions.
5. Reattaching the Roller Cage
After the rollers are correctly installed, reattach the roller cage to secure them in place:
- Position the Roller Cage: Align the roller cage with the roller bay, ensuring the tabs line up with their corresponding slots.
- Secure the Tabs: Press down on the roller cage until the tabs click into place. Make sure the cage is firmly attached and does not wobble.
- Verify Secure Attachment: Double-check that the roller cage is securely fastened. If it feels loose, remove it and reattach it to ensure a proper fit.
6. Testing Your Roomba
Once everything is reassembled, test your Roomba to ensure the rollers are functioning correctly:
- Place Roomba on the Floor: Put the Roomba back on the floor.
- Start a Cleaning Cycle: Turn on the Roomba and start a cleaning cycle.
- Observe Roller Function: Watch the rollers to ensure they are spinning correctly and picking up debris.
- Listen for Unusual Noises: Pay attention to any unusual noises coming from the roller bay, which could indicate a problem with the installation.
- Check Cleaning Performance: Monitor the Roomba’s cleaning performance to ensure it is effectively picking up dirt and debris.
7. Troubleshooting Common Issues
Even with careful installation, you might encounter some common issues. Here’s how to troubleshoot them:
- Rollers Not Spinning:
- Problem: Rollers are not spinning freely after reinstallation.
- Solution: Turn off the Roomba, remove the roller cage, and check for any obstructions preventing the rollers from spinning. Clean the rollers and the roller bay thoroughly.
- Roller Cage Not Securing:
- Problem: The roller cage does not stay securely attached.
- Solution: Inspect the tabs on the roller cage and the slots on the Roomba for any damage. Replace the roller cage if the tabs are broken or worn.
- Roomba Making Loud Noises:
- Problem: The Roomba is making loud noises during operation.
- Solution: Turn off the Roomba and check for any debris caught in the rollers or roller bay. Clean the area and ensure the rollers are properly aligned.
- Uneven Cleaning:
- Problem: The Roomba is not cleaning evenly.
- Solution: Check the rollers for wear and tear. Replace them if they are damaged or worn. Also, ensure the roller cage is securely attached and the rollers are properly aligned.
- Roomba Stops Frequently:
- Problem: The Roomba stops frequently during cleaning cycles.
- Solution: This could be due to a variety of issues, including a full bin, a dirty filter, or tangled rollers. Check and clean these components to ensure smooth operation.
FAQ
What do I do if the Roomba rollers keep falling out?
Ensure the roller cage is securely attached and not damaged. Check the roller cage tabs and replace the cage if necessary. Also, make sure the rollers are correctly aligned and fully inserted into their slots.
How often should I clean my Roomba rollers?
It is recommended to clean your Roomba rollers at least once a week, or more frequently if you have pets or heavy shedding. Regular cleaning prevents debris buildup and ensures optimal performance.
Can I use water to clean the Roomba rollers?
Yes, you can use a damp cloth to clean the Roomba rollers. However, make sure to dry them thoroughly before reinstalling them to prevent mold or mildew growth.
What type of replacement rollers should I buy for my Roomba?
Purchase replacement rollers specifically designed for your Roomba model. Check the Roomba website or authorized retailers for compatible parts. Using the correct rollers ensures proper fit and performance.
How do I know if my Roomba rollers need to be replaced?
If your Roomba rollers are cracked, deformed, or no longer effectively picking up debris, it’s time to replace them. Also, if you notice a significant decrease in cleaning performance, inspect the rollers for wear and tear.
Why is my Roomba leaving streaks on the floor?
Streaks can be caused by dirty or worn rollers. Clean the rollers thoroughly and replace them if necessary. Also, check the roller cage for proper attachment and ensure the rollers are correctly aligned.
Tips, Warnings, and Best Practices
- Regular Maintenance: Regularly inspect and clean your Roomba rollers to prevent debris buildup and ensure optimal performance.
- Use Genuine Parts: When replacing rollers or other components, use genuine Roomba parts to ensure compatibility and reliability.
- Avoid Water Damage: Never submerge the Roomba or its components in water. Use a damp cloth to clean them and dry them thoroughly before reassembling.
- Check for Obstructions: Before starting a cleaning cycle, remove any small objects, cords, or rugs that could obstruct the Roomba’s movement or damage the rollers.
- Proper Storage: When not in use, store your Roomba in a cool, dry place to prevent damage to the rollers and other components.
- Read the Manual: Always refer to your Roomba’s user manual for specific instructions and maintenance guidelines.
Conclusion
Knowing how to put the rollers back in your Roomba is crucial for maintaining its cleaning efficiency and extending its lifespan. By following the steps outlined in this guide, you can easily reinstall the rollers, troubleshoot common issues, and keep your Roomba running smoothly. Regular maintenance and proper care will ensure your robotic vacuum continues to deliver a clean and healthy home environment.
Take action today by implementing these tips and steps to keep your Roomba in top condition. Proper roller maintenance translates to a cleaner home and a longer-lasting cleaning companion.