
Creating a new map for your Roomba can significantly improve its cleaning efficiency and ensure it covers every nook and cranny of your home. Whether you’ve rearranged your furniture, moved to a new house, or are experiencing mapping issues, setting up a fresh map is a straightforward process. This guide will walk you through each step, offering tips and best practices to get the most out of your Roomba’s mapping capabilities.
Many users find that their Roomba’s performance declines over time due to outdated or inaccurate maps. By creating a new map, you’re essentially giving your robot vacuum a fresh start, allowing it to learn the layout of your home again and optimize its cleaning routes. Let’s dive into the process of creating a new map and making sure your Roomba is performing at its best.
Preparing Your Home for Mapping
Before you start the mapping process, it’s essential to prepare your home to ensure the Roomba can navigate freely and create an accurate map. This preparation can save you time and frustration in the long run.
Clear Obstacles and Clutter
Remove any obstacles that might prevent the Roomba from accessing certain areas or disrupt its path. This includes:
- Loose cables and wires
- Small rugs or mats that the Roomba might get stuck on
- Toys, shoes, and other items scattered on the floor
- Pet bowls or stands that could be easily knocked over
Open All Doors
Make sure all doors to rooms you want the Roomba to map are fully open. This allows the Roomba to seamlessly move from room to room and create a comprehensive map of your entire home.
Ensure Adequate Lighting
While newer Roomba models are equipped with advanced sensors that allow them to navigate in low-light conditions, ensuring adequate lighting can still improve mapping accuracy. Turn on lights in all rooms you want the Roomba to map.
Initiating a Mapping Run on Your Roomba
Once your home is prepared, you can initiate a mapping run on your Roomba. The exact steps may vary slightly depending on your Roomba model, so consult your user manual for specific instructions.
Starting a Mapping Run from the App
- Open the iRobot Home App: Launch the iRobot Home App on your smartphone or tablet.
- Select Your Roomba: Ensure your Roomba is connected to the app and select it from the list of available devices.
- Start a Mapping Run: Look for an option like “Mapping Run,” “Training Run,” or “Smart Map Training.” This option is typically found in the settings menu or under the “Clean” tab.
- Monitor the Run: Allow the Roomba to explore your home without interruption. It will systematically navigate each room, creating a digital map as it goes.
What to Expect During the Mapping Run
- No Cleaning: During a mapping run, the Roomba will not vacuum or clean. It will focus solely on mapping the environment.
- Longer Run Time: Mapping runs usually take longer than regular cleaning cycles, as the Roomba needs to explore every area of your home.
- Quiet Operation: The Roomba will operate in a quiet mode during mapping, minimizing noise and disturbance.
- Return to Base: Once the mapping run is complete, the Roomba will automatically return to its base to recharge.
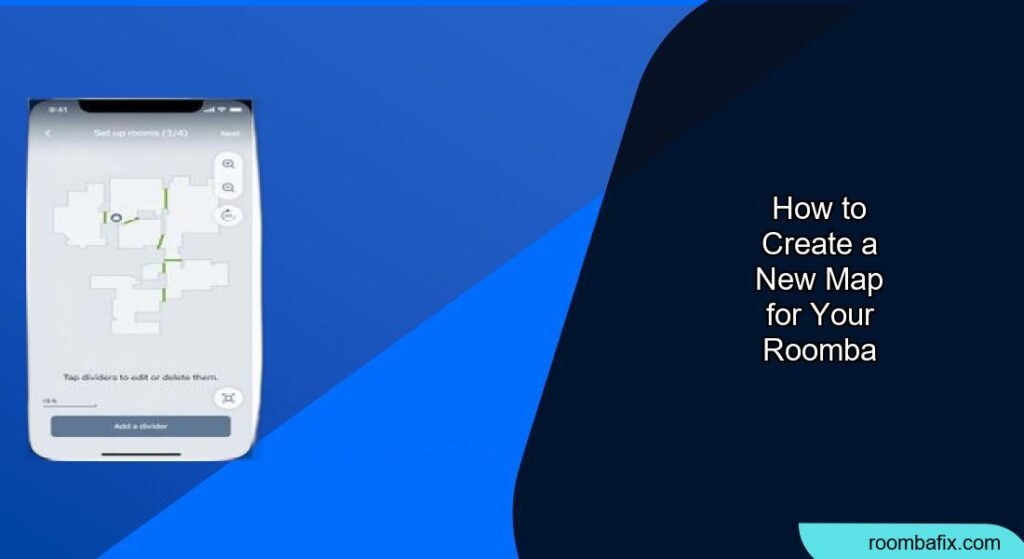
Customizing Your Smart Map

After the mapping run, the Roomba will generate a Smart Map of your home. You can then customize this map to further optimize your cleaning experience.
Naming Rooms and Zones
Assign names to each room or zone on the map. This allows you to instruct the Roomba to clean specific areas using voice commands or scheduled cleaning routines. For example, you can name areas “Living Room,” “Kitchen,” or “Master Bedroom.”
Creating Keep Out Zones
Define “Keep Out Zones” to prevent the Roomba from entering certain areas. This is useful for protecting delicate items, avoiding cluttered spaces, or keeping the Roomba away from pet feeding stations.
Setting Up Clean Zones
Designate “Clean Zones” for targeted cleaning. These are specific areas that you want the Roomba to focus on during regular cleaning cycles. For example, you might set up a Clean Zone around your dining table or in a high-traffic entryway.
Troubleshooting Mapping Issues

If you encounter issues during the mapping process, here are some common troubleshooting tips.
Roomba Gets Stuck or Lost
- Solution: Ensure the floor is clear of obstacles and that the Roomba has enough space to maneuver. You may need to guide the Roomba back to an open area if it gets stuck.
Inaccurate Map Creation
- Solution: Make sure the Roomba has sufficient lighting and a clear view of its surroundings. Restart the mapping run and monitor the Roomba’s progress.
Mapping Run Fails to Complete
- Solution: Check the Roomba’s battery level and ensure it is fully charged before starting a mapping run. Also, verify that the Roomba is not encountering any persistent obstacles or errors.
Pro Tips for Successful Mapping
Here are some pro tips to help you create the most accurate and effective map possible.
Run Multiple Mapping Runs
Consider running multiple mapping runs to refine the map and capture any areas that were missed during the initial run.
Monitor the Roomba’s Progress
Keep an eye on the Roomba during the mapping run to identify and address any potential issues early on.
Update the Map Regularly
As you rearrange furniture or make changes to your home’s layout, update the map to ensure the Roomba continues to clean efficiently.
Alternatives to Roomba Mapping
While Roomba’s Smart Mapping technology is highly effective, there are alternative methods and products you might consider.
Other Robot Vacuum Brands
Explore other robot vacuum brands that offer advanced mapping features, such as those from Shark, Ecovacs, or Roborock.
Manual Mapping
Some robot vacuums allow you to manually create a map by guiding the robot through your home using a remote control or app.
Laser-Based Mapping
Consider robot vacuums that use LiDAR (Light Detection and Ranging) technology for more precise and detailed mapping.
FAQ
How long does it take for Roomba to create a map?
The time it takes for a Roomba to create a map depends on the size and complexity of your home. On average, it can take anywhere from 30 minutes to several hours.
Can Roomba map multiple floors?
Yes, some Roomba models can store multiple maps, allowing you to use them on different floors of your home. You will need to manually carry the Roomba to the desired floor and select the appropriate map in the app.
What happens if the Roomba loses its map?
If the Roomba loses its map, it will need to create a new one. This can happen if the Roomba is moved to a different location or if there are significant changes to the environment.
How do I delete an existing Roomba map?
You can delete an existing Roomba map through the iRobot Home App. Go to the “Smart Maps” section, select the map you want to delete, and choose the “Delete” option.
Can I use Roomba without a map?
Yes, you can use Roomba without a map in a basic cleaning mode. However, without a map, the Roomba will not be able to clean efficiently or follow specific cleaning routines.
How often should I update my Roomba map?
You should update your Roomba map whenever you make significant changes to your home’s layout, such as rearranging furniture or adding new obstacles.
Tips, Warnings, and Best Practices
- Tip: Run mapping runs during off-peak hours when there is less activity in your home.
- Warning: Avoid interrupting the Roomba during a mapping run, as this can disrupt the mapping process.
- Best Practice: Regularly clean the Roomba’s sensors to ensure accurate mapping and navigation.
Conclusion
Creating a new map for your Roomba is a simple yet effective way to improve its cleaning performance and ensure it covers every area of your home. By following the steps outlined in this guide, you can create an accurate and customized map that meets your specific needs.
Give your Roomba a fresh start with a new map and enjoy a cleaner, more efficient home. Now that you have a new map created, you can set up specific cleaning zones or no-go zones, tailoring your Roomba’s cleaning to your exact preferences and needs.