
Is your Roomba feeling a bit… disconnected? Bringing your robotic vacuum cleaner online unlocks a world of convenience, from scheduling cleanings to controlling it remotely. If you’re wondering how to connect your Roomba to WiFi, you’ve come to the right place. This guide provides simple, step-by-step instructions to get your Roomba connected and cleaning smarter.
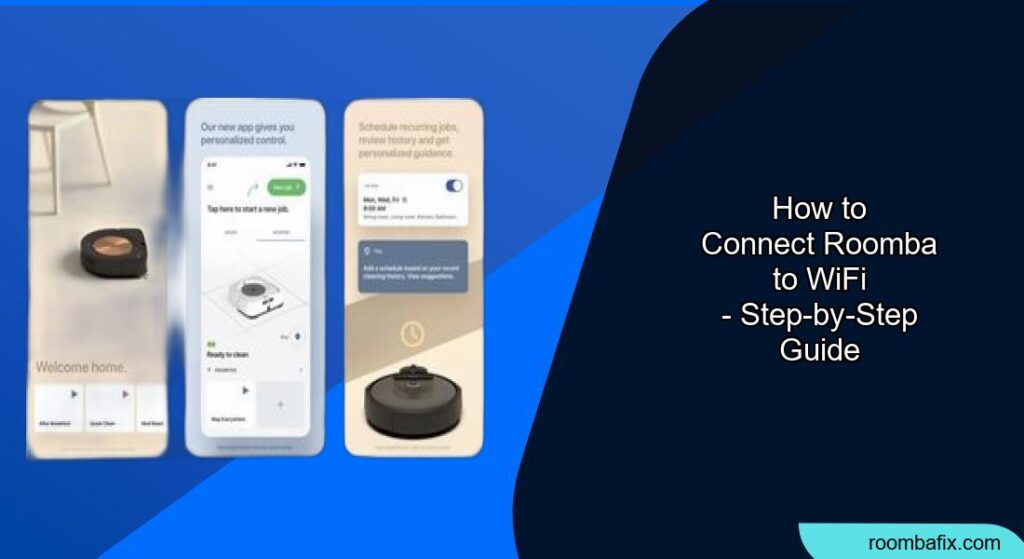
Connecting your Roomba to your home’s WiFi network allows you to control it via the iRobot app. This means starting, stopping, and scheduling cleanings from anywhere. It also enables your Roomba to receive software updates that improve its performance and add new features. Let’s dive into the process of connecting your Roomba to WiFi so you can take full advantage of its smart capabilities.
Preparation Steps Before Connecting Your Roomba to WiFi

Before you begin, make sure you have the following:
- A compatible Roomba: This guide applies to most WiFi-enabled Roomba models (i Series, s Series, 900 Series, 690/691/692/694/695/696, e Series, j Series).
- A stable WiFi network: Ensure your home WiFi network is working correctly and that you have the password handy. Roomba’s generally only support 2.4GHz networks.
- The iRobot Home app: Download and install the iRobot Home app on your smartphone or tablet from the App Store (iOS) or Google Play Store (Android).
- A fully charged Roomba: Ensure your Roomba is sufficiently charged or docked on its Home Base.
Step-by-Step Guide: Connecting Roomba to WiFi
Here’s how to connect your Roomba to WiFi:
- Open the iRobot Home App: Launch the iRobot Home app on your smartphone or tablet.
- Create an Account or Log In: If you’re a new user, create an iRobot account. Otherwise, log in with your existing credentials.
- Add Your Roomba: On the app’s main screen, tap the “Add a Robot” button or the “+” icon. The exact wording may vary slightly depending on your app version.
- Select Your Roomba Model: Choose your specific Roomba model from the list provided. The app will guide you through the rest of the setup process based on your model.
- Enable Location Services: The app may ask you to enable location services. This is required for the Roomba to properly connect to your WiFi network.
- Connect to Roomba’s Temporary Network: The app will instruct you to go to your phone’s WiFi settings and connect to a temporary WiFi network broadcast by your Roomba. The name of this network will typically start with “Roomba-” followed by a series of characters.
- Return to the iRobot Home App: Once connected to the Roomba’s temporary network, return to the iRobot Home app.
- Enter Your WiFi Credentials: The app will now prompt you to enter your home WiFi network name (SSID) and password. Ensure you enter the information correctly.
- Wait for Connection: The Roomba will attempt to connect to your WiFi network. This process may take a few minutes. Make sure your Roomba stays close to your router during this process for better connectivity.
- Roomba is Connected: Once the Roomba successfully connects to your WiFi, the app will display a confirmation message. You can now control your Roomba through the app.
Troubleshooting Guide: Resolving Common WiFi Connection Problems

Encountering problems while connecting your Roomba to WiFi? Here are some common issues and solutions:
- Incorrect WiFi Password: Double-check that you’ve entered your WiFi password correctly. Even a small typo can prevent the Roomba from connecting.
- Incompatible WiFi Network: Roomba’s typically only support 2.4GHz WiFi networks. Ensure your router is broadcasting a 2.4GHz network and that your Roomba is connecting to it.
- Weak WiFi Signal: If your WiFi signal is weak in the area where your Roomba is located, it may have trouble connecting. Try moving your router closer to the Roomba or using a WiFi extender.
- Firewall or Security Settings: Your router’s firewall or security settings may be blocking the Roomba’s connection. Check your router settings and ensure that the Roomba is not being blocked.
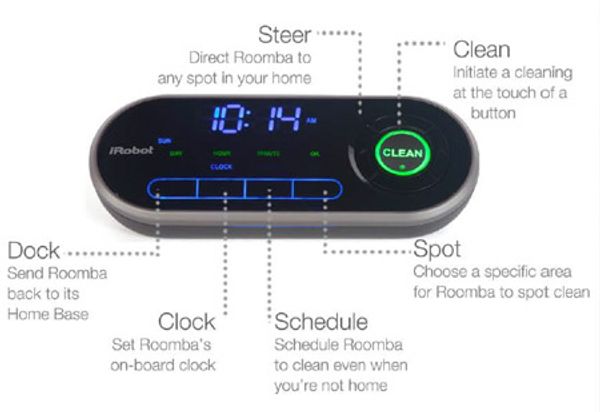
- Roomba Not in Setup Mode: If your Roomba isn’t broadcasting its temporary WiFi network, it may not be in setup mode. Refer to your Roomba’s manual for instructions on how to put it in setup mode.
Pro Tips for a Seamless Connection
Here are some pro tips to ensure a smooth Roomba to WiFi connection:
- Restart Your Router: Before starting the connection process, restart your WiFi router. This can resolve temporary network issues.
- Keep Roomba Close to Router: During the connection process, keep your Roomba close to your WiFi router to ensure a strong signal.
- Update Roomba Firmware: Ensure your Roomba has the latest firmware installed. This can resolve compatibility issues and improve performance.
- Check iRobot Support: If you’re still having trouble, visit the iRobot support website for troubleshooting guides and FAQs specific to your Roomba model.
Alternatives: Connecting Without WiFi
While connecting your Roomba to WiFi provides the most features, there are alternative ways to use your Roomba if you can’t connect to WiFi:
- Manual Operation: You can always start, stop, and dock your Roomba manually by pressing the buttons on the robot itself.
- Scheduling (if supported): Some Roomba models allow you to set a cleaning schedule directly on the robot, without using the app.
FAQ
Why is my Roomba not connecting to WiFi after a password change?
After changing your WiFi password, you need to update the password in the iRobot Home app. Go to Settings > WiFi Settings, and enter the new password for your Roomba to reconnect.
How do I reconnect my Roomba to a new WiFi network?
To connect to a new WiFi network, follow the same steps as the initial setup. Open the iRobot Home app, go to Settings > WiFi Settings, and select “Change WiFi Network.” The app will guide you through the process.
What does it mean if my Roomba’s WiFi light is blinking?
A blinking WiFi light on your Roomba usually indicates that it is trying to connect to a WiFi network. If it continues to blink for an extended period, there may be a problem with the connection, such as an incorrect password or a weak signal.
Can I connect my Roomba to multiple WiFi networks?
No, a Roomba can only be connected to one WiFi network at a time. If you want to use your Roomba in a different location with a different network, you’ll need to change the WiFi settings in the iRobot Home app.
What security protocols are supported when connecting Roomba to WiFi?
Roomba supports WPA and WPA2 security protocols for WiFi connections. Ensure your router is using one of these protocols for optimal security and compatibility.
Is it possible to connect my Roomba to WiFi without using the app?
No, connecting your Roomba to WiFi requires the iRobot Home app. The app is essential for configuring the WiFi settings and linking your Roomba to your network.
Tips, Warnings, and Best Practices for Roomba WiFi Connectivity
- Security: Always use a strong, unique password for your WiFi network to protect your Roomba and other connected devices from unauthorized access.
- Firmware Updates: Regularly update your Roomba’s firmware through the iRobot Home app to ensure optimal performance and security.
- Placement: Place your Roomba’s Home Base in an area with a strong WiFi signal for reliable connectivity and scheduling.
- Avoid Interference: Keep your Roomba away from sources of interference, such as microwave ovens and other electronic devices, to maintain a stable WiFi connection.
Conclusion
Connecting your Roomba to WiFi unlocks a range of convenient features that enhance its functionality and make cleaning your home easier. By following the steps outlined in this guide, you can quickly and easily connect your Roomba to your home network and start enjoying the benefits of smart cleaning.
Remember to keep your Roomba’s firmware updated and maintain a strong WiFi signal for optimal performance. Now that you know how to connect your Roomba to WiFi, you’re ready to take full control of your cleaning schedule!